This is only a guide and each email type has unique merge tags.
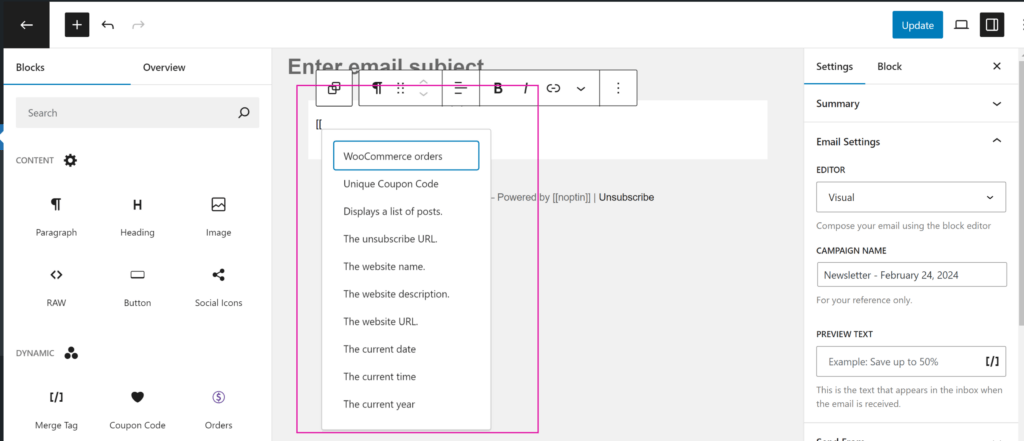
You can find a list of available merge tags in the email campaign editor.
You can use email tags (also known as merge tags) to display dynamic and personalized content in your emails and success messages.
This guide shows you how to personalize your emails and success messages using merge tags.
What is a Merge Tag?
A merge tag is a placeholder that allows you to personalize email campaigns and confirmation messages. Merge tags are also known as personalization fields or personalization tags.
Noptin merge tags are usually enclosed between two opening square brackets ([[) and two closing square brackets (]]).
For example,
Each subscriber has a unique email address. When you include the [[email]] merge tag in your email campaigns, each subscriber receives an email with the merge tag replaced by the subscriber’s actual email.
Where Can You Use Merge Tags?
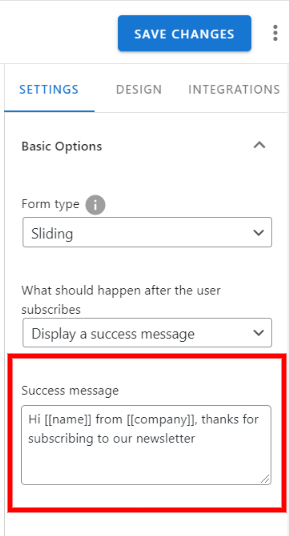
You can use merge tags in the success messages shown to users after they subscribe to your newsletter,
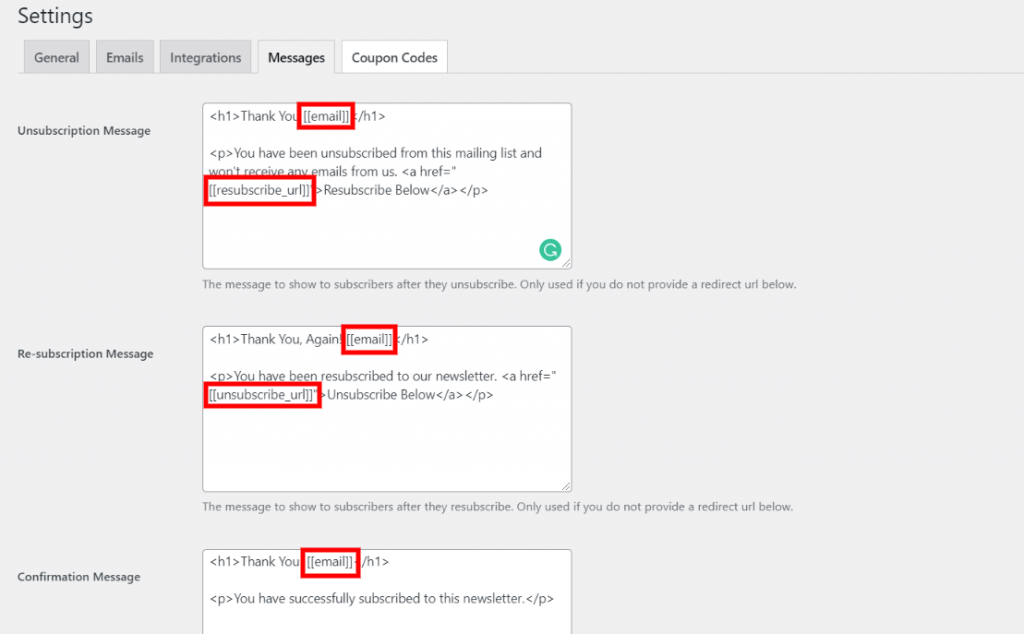
… the confirmation messages shown to subscribers who confirm their email addresses, unsubscribe from your newsletter, or re-subscribe to your newsletter,
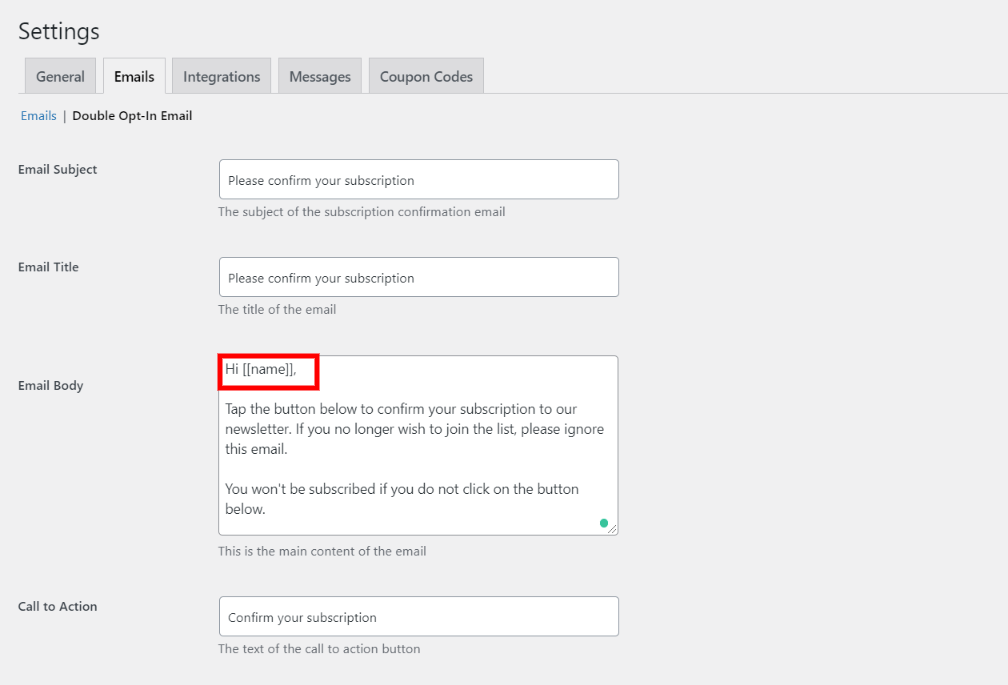
… the double opt-in confirmation email,
or normal email campaigns including the new post notifications and welcome emails.
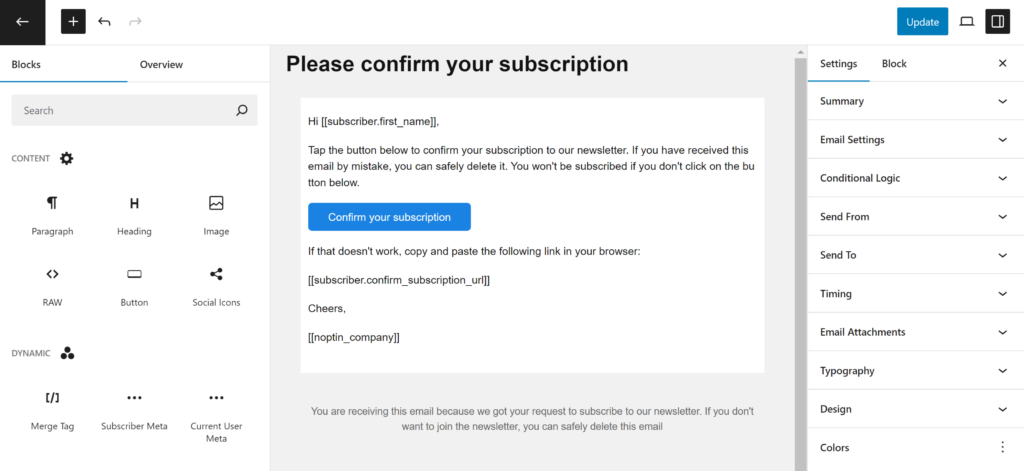
Available Merge Tags
Below is a partial list of the available merge tags.
Warning:- Some of the merge tags below are outdated. Some are missing.
You can find the list of available merge tags in the Noptin email campaign editor.
Blog Tags
[[blog_name]]Displays the blog name.
[[blog_description]]Displays the blog description.
[[home_url]]Displays the blog’s URL.
[[noptin_company]]Displays the company name that you set in Noptin > Settings > Emails.
[[noptin]]Displays a personalized link to our website.
Dynamic dates
[[date]]Displays today’s date in the Y-m-d format. For example, 2025-06-20.
[[date localized=1]]Displays today’s date, localized and in the format set in your WordPress settings. For example, June 5, 2025.
You can also pass a custom format to both the localized and non-localized versions of the merge tag as shown in the example below:-
[[date format="c"]]This displays the current date formatted as an ISO 8601 date. For example, 2025-06-12T15:19:21+00:00.
[[date format="Y"]]Displays the current year.
Similarly, both the localized and non-localized versions of the merge tag support relative dates as shown in the example below:-
[[date relative="tomorrow"]]This displays tomorrow’s date.
[[date localized=1 format="F j, Y" relative="+14 days"]]This displays the correct date 14 days from now, in a custom format and localized to your site’s language.
Subscriber Tags
[[unsubscribe_url]]Inserts a URL to unsubscribe from the newsletter.
[[resubscribe_url]]Inserts a URL to re-subscribe to the newsletter. Useful in cases where a subscriber unsubscribes from your newsletter and decides to resubscribe again.
[[manage_preferences_url]]Inserts a link to a page where the subscriber can edit their subscription details and email preferences. Requires the Ultimate Addons Pack.
[[first_name]]Displays the subscriber’s first name.
[[last_name]]Displays the subscriber’s last name.
[[email]]Displays the subscriber’s email address.
[[avatar_url]]Displays the subscriber’s avatar URL.
[[date_created]]Displays the date on which a subscriber subscribed to your blog.
[[confirm_key]]Displays the subscriber’s secret confirmation key.
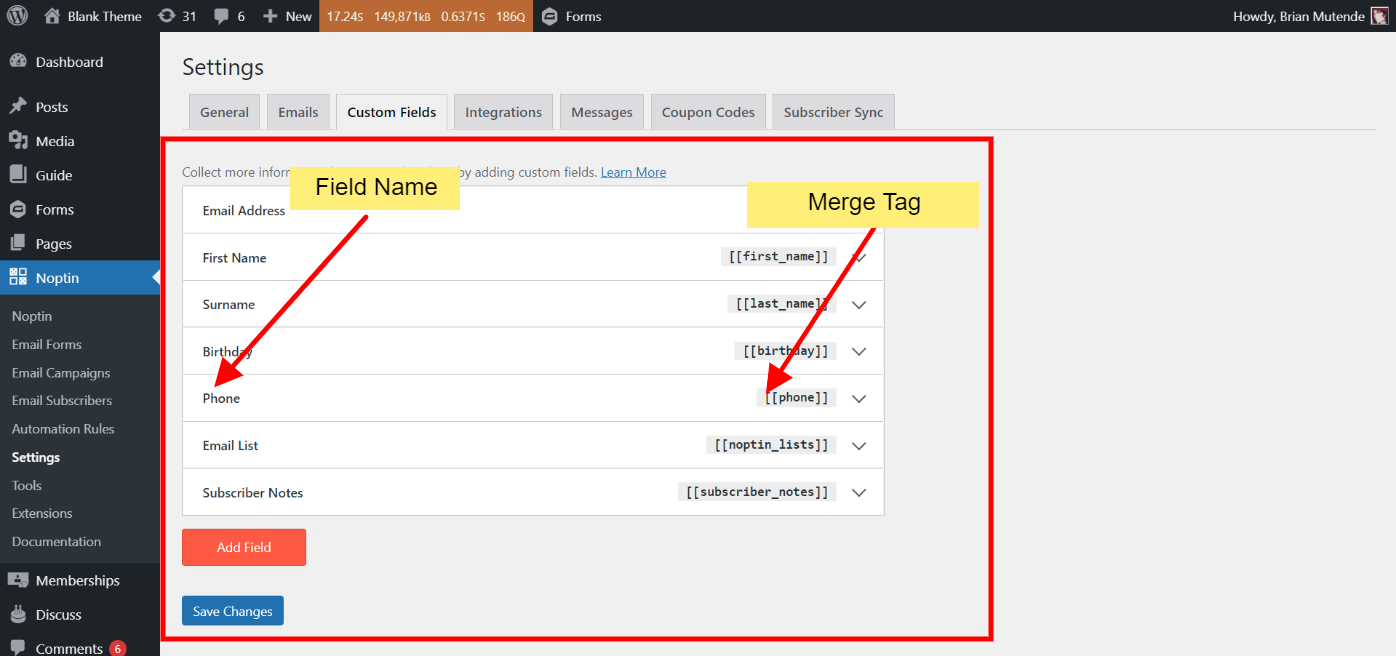
[[$subscriber_field]]Replace $subscriber_field with any custom field that you’ve added to your website to display the value of that field. For example, phone in the image below.
Post Notifications Tags
These merge tags are only available when setting up a new-post notification campaign.
[[post_excerpt]]Displays the post’s summary.
[[post_content]]Displays the post’s entire content.
[[post_title]]Displays the post’s title.
[[featured_image]]Displays the featured image. Please note that this displays the entire featured image and not just the URL.
[[post_author]]Displays the author’s name.
[[post_author_email]]Displays the author’s email address.
[[post_author_login]]Displays the author’s login name.
[[post_author_id]]Displays the author’s id.
[[post_date]]Displays the date a post was published.
[[post_url]]Displays the post’s URL.
[[post_id]]Displays the post’s ID.
[[button url="[[post_url]]" text="Continue Reading" background='brand' color='white' rounding='4px']]Displays a button linking to the post.
[[post_meta.$key]]Replace $key with the actual meta key. Displays a post’s custom metadata.
Customer Tags
These merge tags are available when sending single or bulk emails to your WooCommerce customers.
[[customer.id]]The customer’s ID.
[[customer.details]]Displays a summary of the customer’s details.
[[customer.avatar_url]]Displays the customer’s avatar URL. You can use it as an image source to display dynamic avatars.
[[customer.order_count]]The number of orders the customer has.
[[customer.first_order_date format="date"]]The date of the customer’s first order.
[[customer.total_spent format="price"]]Displays the customer’s lifetime value.
[[customer.username]]The customer’s username
[[customer.email]]The customer’s email.
[[customer.first_name]]The customer’s first name.
[[customer.last_name]]The customer’s display name.
[[customer.display_name]]Shows the customer display name as set in his/her profile.
[[customer.locale]]The customer’s preferred locale.
[[customer.newsletter]]The customer’s newsletter subscription status. Either yes or no.
User Tags
These merge tags are available when sending an email to your WordPress users.
[[display_name]]Shows the user’s display name as set in their profile information.
[[user_registered]]This displays the date a user joined your site.
[[nickname]]Displays the user’s nickname.
[[description]]This merge tag displays the user’s description.
[[$user_meta_key]]Replace “$user_meta_key” with an actual meta key as saved in the wp_usermeta table to display the meta value associated with the user.
Misc Tags
[[rule height="3px" color="black" width="100%" margin="50px"]]Displays a horizontal rule in emails.
[[spacer height="50px"]]Adds a vertical blank space.
[[button text="Click Here" url="https://noptin.com" background='#008000' color="#ffffff" rounding="4px"]]Displays a button with a call to action.
[[noptin_coupon_code]]To enable the user to view the current email in the browser
[[view_in_browser_url]]Requires the Ultimate Addons Pack. Displays an automatically-generated unique coupon code.
Leave a Reply