Displaying past newsletters on your website is a great way to engage your audience and showcase the valuable content you’ve shared over time.
Noptin makes it easy to display past newsletter issues using a simple shortcode.
Follow this guide to learn how to set it up.
Step 1: Understanding the Shortcode
Noptin (since version 3.4.3) provides a shortcode [past_noptin_newsletters] that you can use to display a list of past newsletters on any page or post.
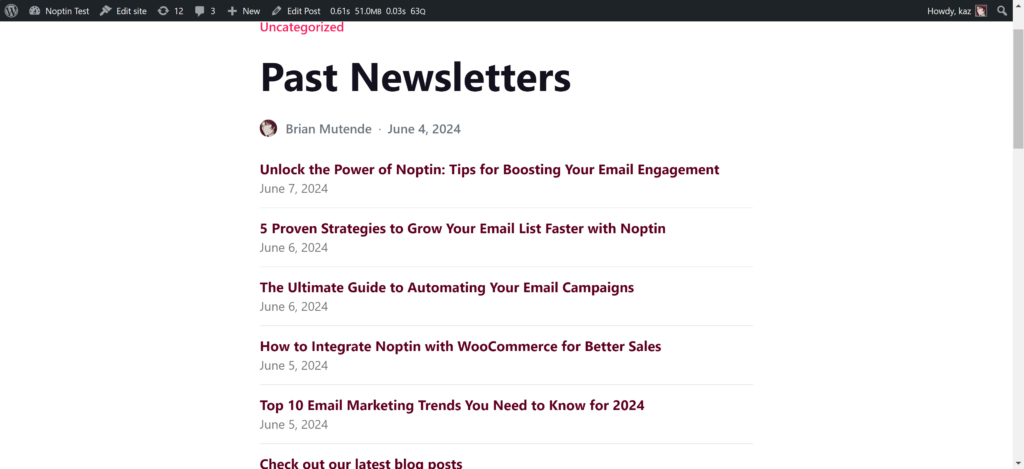
This shortcode will render a list of past newsletter issues, making it easy for your site visitors to read previous editions.
Step 2: Adding the Shortcode to Your Site
- Navigate to the Page or Post: Go to the WordPress admin dashboard and navigate to the page or post where you want to display the past newsletters.
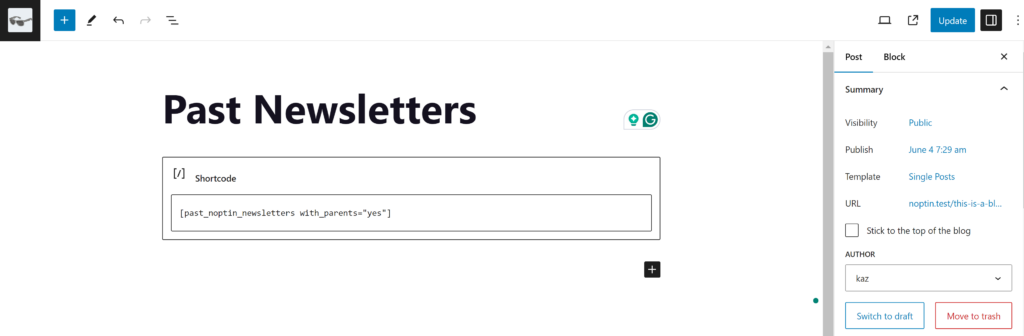
- Add the Shortcode: In the content editor, add the
[past_noptin_newsletters]shortcode where you want the list to appear. You can type or paste it directly into the editor. - Publish or Update: Click the “Publish” or “Update” button to save your changes.
Step 3: Customizing the Shortcode
The [past_noptin_newsletters] shortcode comes with several optional attributes that allow you to customize the display of your past newsletters. Here are the available attributes and how you can use them:
limit: Set the maximum number of newsletters to display. The default is20.with_parents: Decide whether to include child newsletters. The default is'no'.show: Choose whether to show the ‘subject’ or ‘title’ of the newsletters. The default is'subject'.
Example Usage
Here are some examples of how you can use the shortcode with different attributes.
Default Usage:-
[past_noptin_newsletters]
Limit to 5 Newsletters:-
[past_noptin_newsletters limit="5"]
Show Campaign Names Instead of Subjects:-
[past_noptin_newsletters show="title"]
Include child newsletters such as those created from New Post Notifications:-
[past_noptin_newsletters with_parents="yes"]
Styling the list
The list of past newsletters generated by the shortcode will be styled with basic inline CSS for a clean and organized appearance.
You can, however, use custom CSS to style the list.
For example,
The CSS below styles the title and date to appear side by side…
.noptin-past-newsletters ul li {
    display: flex;
    align-items: center;
    justify-content: flex-start;
}

/* Style the link */
.noptin-past-newsletters li a {
    text-decoration: none;
    color: currentColor; /* You can change this color */
}

/* Style the date */
.noptin-past-newsletters li div {
    color: currentColor !important; /* You can change this color */
    font-size: 1em;
}

/* Style the separator */
.noptin-past-newsletters li a::after {
    content: "|";
    margin: 0 10px;
    color: currentColor;
}
… whereas this custom CSS removes the bottom border after each list item.
.noptin-past-newsletters ul li {
    padding-bottom: 0 !important;
	border-bottom: none !important;
}
This final example ensures that the emails are listed in a grid with 3 rows hence saving space.
.noptin-past-newsletters ul {
    display: grid;
    grid-template-columns: 1fr 1fr 1fr; /* Three columns */
    gap: 20px; /* Space between columns */
}
Conclusion
It is not possible to automatically publish your newsletters as blog articles on your WordPress website. You can, however, use the above shortcode to display a list of all your past newsletter issues.
Each newsletter item will display the title or subject and the publication date.
Happy emailing! 🚀
Leave a Reply