Noptin allows you to send an email to all your WordPress users.
To do this:-
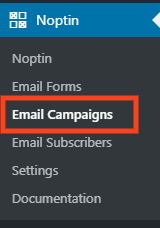
First, click on Noptin > Email Campaigns to open the email campaigns management page.
Next, click on the “New Campaign” button to open the email campaign creation page.

If this is your first time sending an email, Noptin will open the campaign creation page without first opening the campaign overview page.
Finally, click on the “WordPress Users” button to create a new campaign.

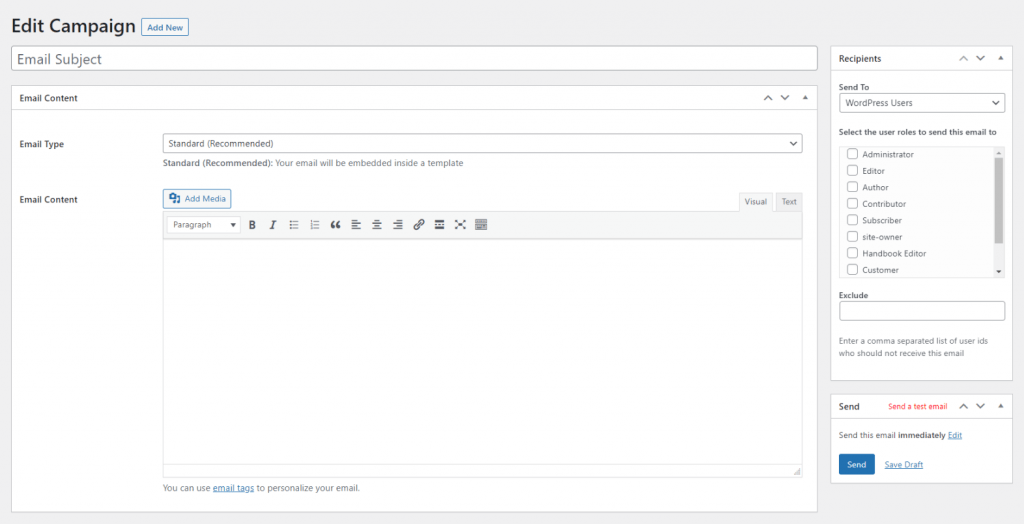
Noptin will open a new screen allowing you to edit and send your campaign.
Editing your campaign
Noptin does not come with a drag-and-drop email builder. Instead, it allows you to write your email as you would normally write a normal blog post and then style the email using a template.
This guide shows you how to use a drag-and-drop email builder.
Setting email recipients
After editing your newsletter campaign, navigate to the “Recipients” meta box and select the WordPress user roles that should receive the email.
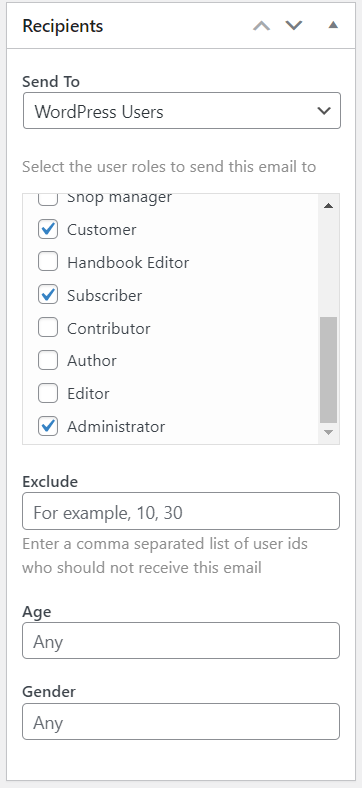
You can also exclude specific users from receiving the email by specifying their user ids in the “Exclude” input box.
Noptin also allows you to filter recipients by custom fields. Your custom fields will appear in the recipients’ meta box if you’re using a supported plugin.
We currently only support JetEngine by Crocoblock and ACF but have plans to integrate with other popular plugins.
The screenshot below shows how to send emails to WordPress users associated with certain custom fields.
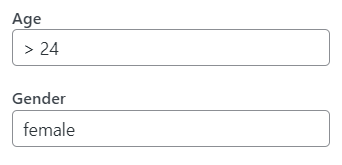
You can add an operator before the custom field value to instruct Noptin on how to test the value.
For example,
Setting > 24 as the value for the Age custom field will only send the newsletter to users who are 24 years or older.
Here is the list of accepted operators:-
| Operator | Description |
|---|---|
| = | Equal to |
| != | Not equal to |
| > | Greater than |
| >= | Greater than or equal to |
| < | Less than |
| =< | Less than or equal to |
| LIKE | Contains the value |
| NOT LIKE | Does not contain the value |
| IN | Matches any of a comma-separated list of values |
| NOT IN | Does not match any of a comma-separated list of values |
| BETWEEN | Matches a range of values |
| NOT BETWEEN | Does not match a range of values |
| REGEXP | Matches a pattern using regular expressions |
| NOT REGEXP | Does not match a pattern using regular expressions |
| RLIKE | Starts with the value |
| EXISTS | The user has the custom field |
| NOT EXISTS | The user does not have the custom field |
You should use a comma to separate values when using an operator that expects multiple values as shown in the screenshot below:-

After deciding on the recipients of the email, it is now time to send the email.
Sending the email
You can find the email-sending options in the “Send” meta box.
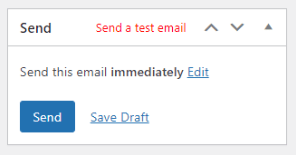
This meta box also allows you to send yourself a test email.
Leave a Reply