You can use tags to group newsletter subscribers the same way you use them to group normal blog posts and WooCommerce products.
This helps you organize your contacts based on data that you already know about them.
For example,
You can create a newsletter subscription form asking your website visitors to enter their e-mail and get notified every time you publish a new blog post. You can then instruct Noptin to tag everyone who subscribes via the form with the tag “new post notifications”.
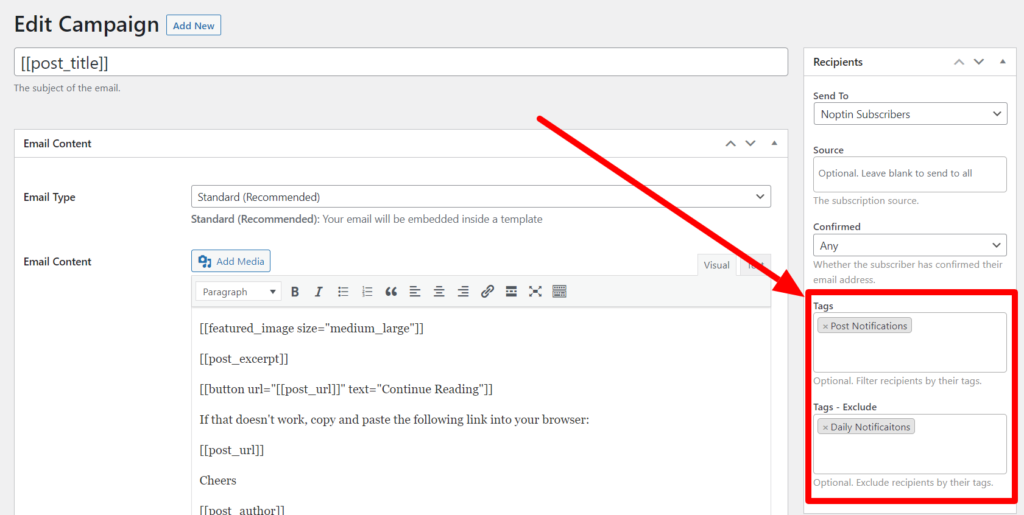
Finally, you create a “new posts notification” email and set it to only send to subscribers who are tagged with “new post notifications”.
This way, only people who are interested in receiving new post notifications get notified whenever you publish a new post.
Noptin allows you to create and assign your subscribers as many tags as you want. There are no limits! The following sections show you how to manage them.
Unlike lists, subscribers cannot self-select their own tags.
You can, however, automatically add or remove tags from subscribers based on what actions they take on your site.
Manually tag or untag existing subscribers
First, open the subscribers’ overview page…
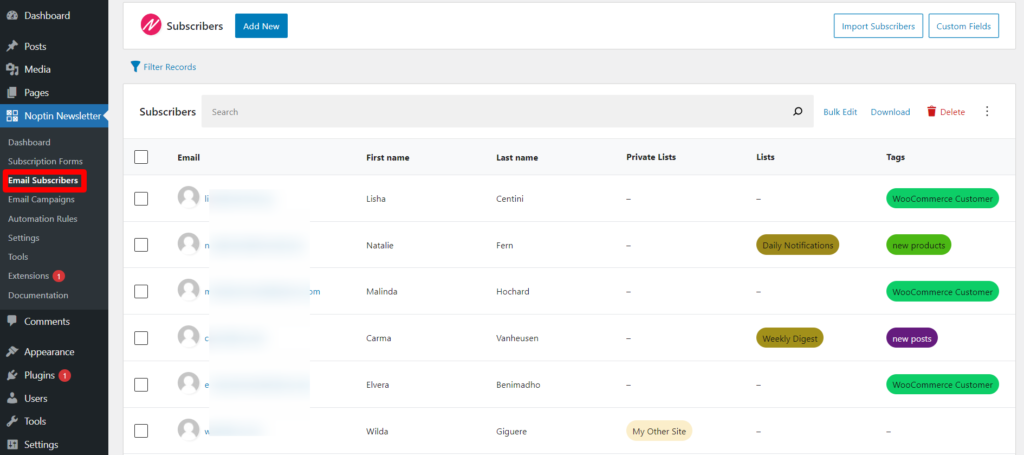
… and then click on the email address of the subscriber whose tags you want to edit.
Next, scroll down to the tags input box then add or remove tags as needed. Remember to click on the Save Changes button after you’re done.
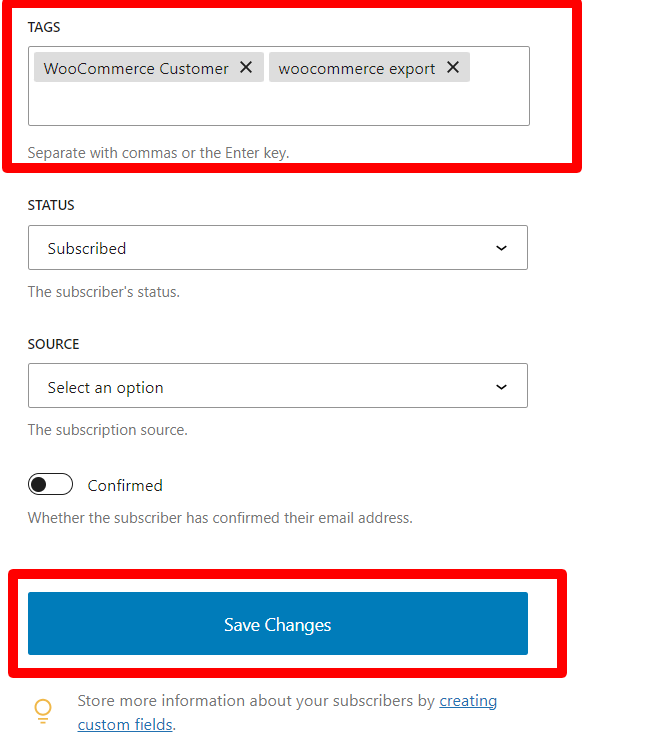
You need to press either the enter key or the comma key every time you enter a new tag.
This is required even if you’re only entering a single tag.
Bulk tag or untag existing subscribers
First, open the subscribers’ overview page…

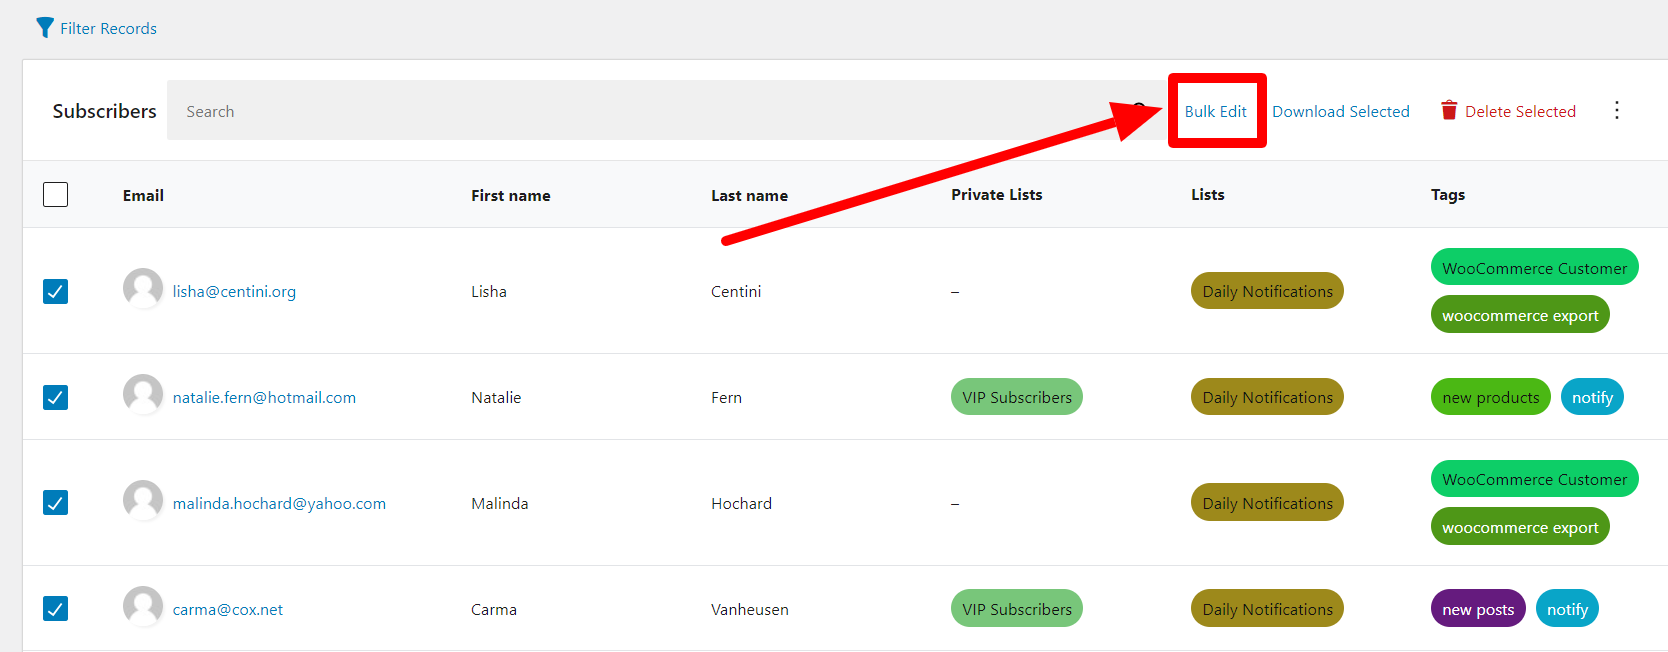
… and then select the subscribers you want to tag.
Do not select any subscribers if you want to tag all subscribers that match your current filters.
Next, click on the Bulk Edit button to open the bulk edit modal…
… then scroll down to the tags input box then add or remove tags as needed. Remember to click on the Save Changes button after you’re done.
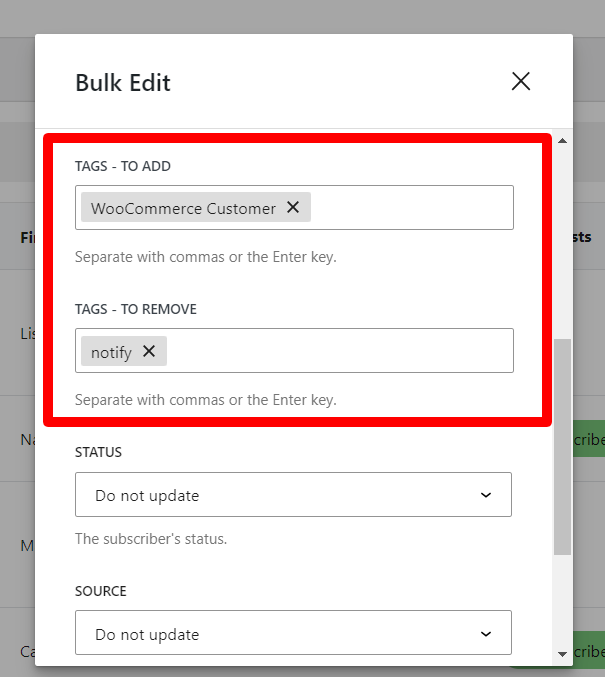
You need to press either the enter key or the comma key every time you enter a new tag.
This is required even if you’re only entering a single tag.
Automatically tag people who subscribe via specific forms.
To do this,
First, click on the name of a subscription form to open it in the subscription forms editor…
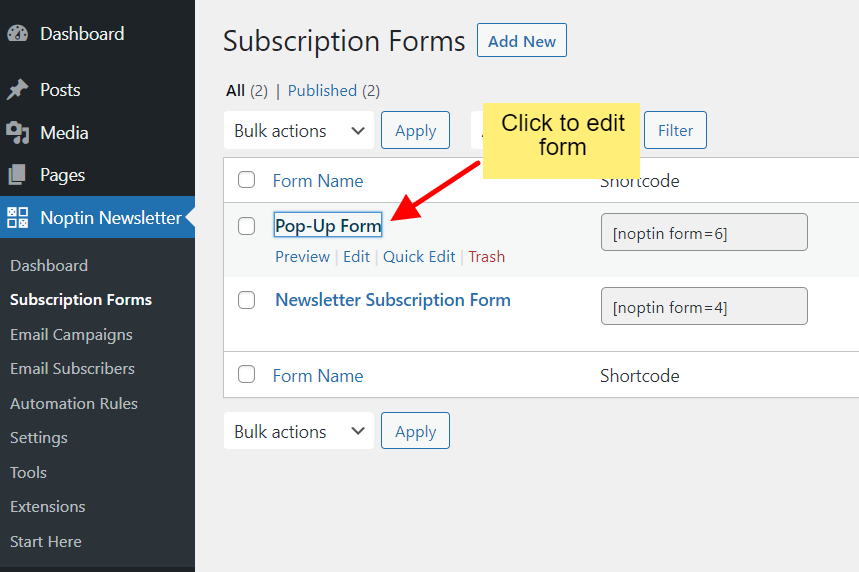
… then scroll down to the tags panel and set the relevant tags.
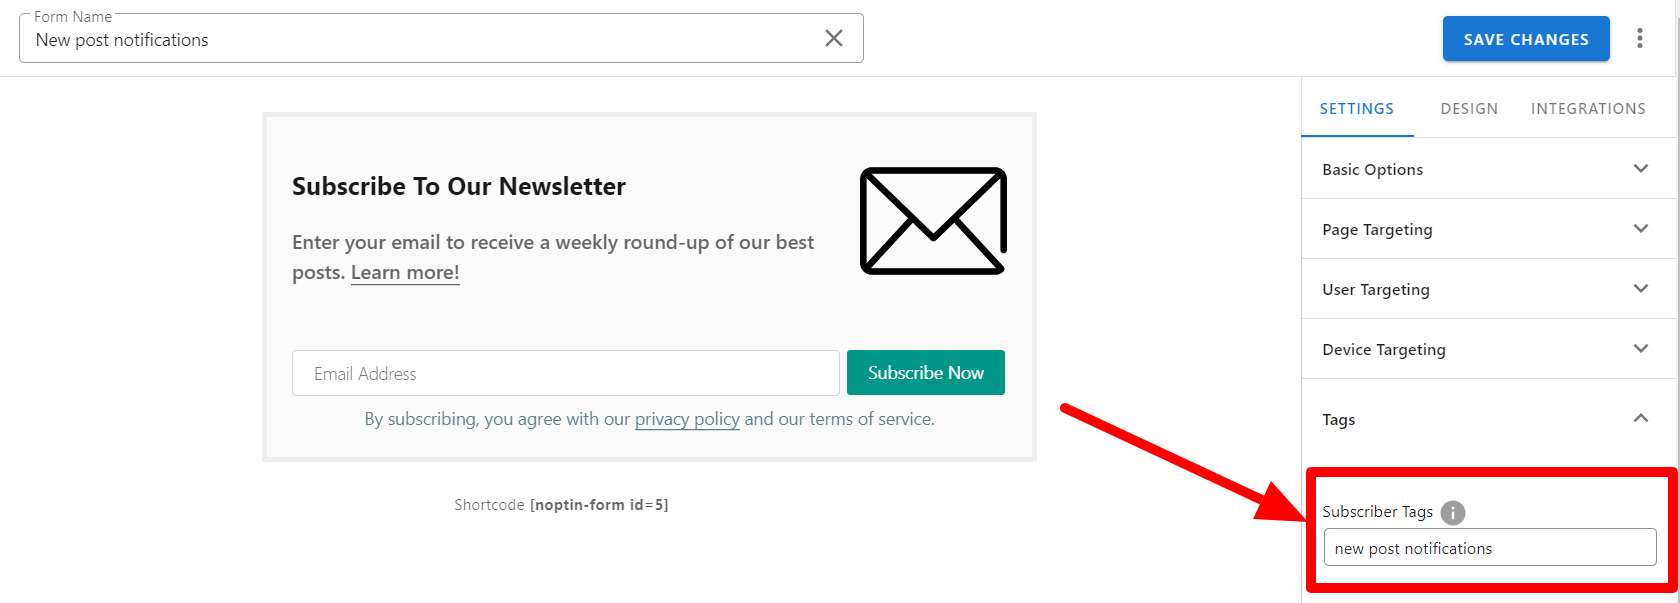
From now on, Noptin will automatically apply the specified tags to anyone who signs up via the form.
Apply tags to imported subscribers
When importing subscribers, Noptin allows you to specify the tags to apply to the imported subscribers.
You can either add a tags column to your CSV file and then map it when importing subscribers…
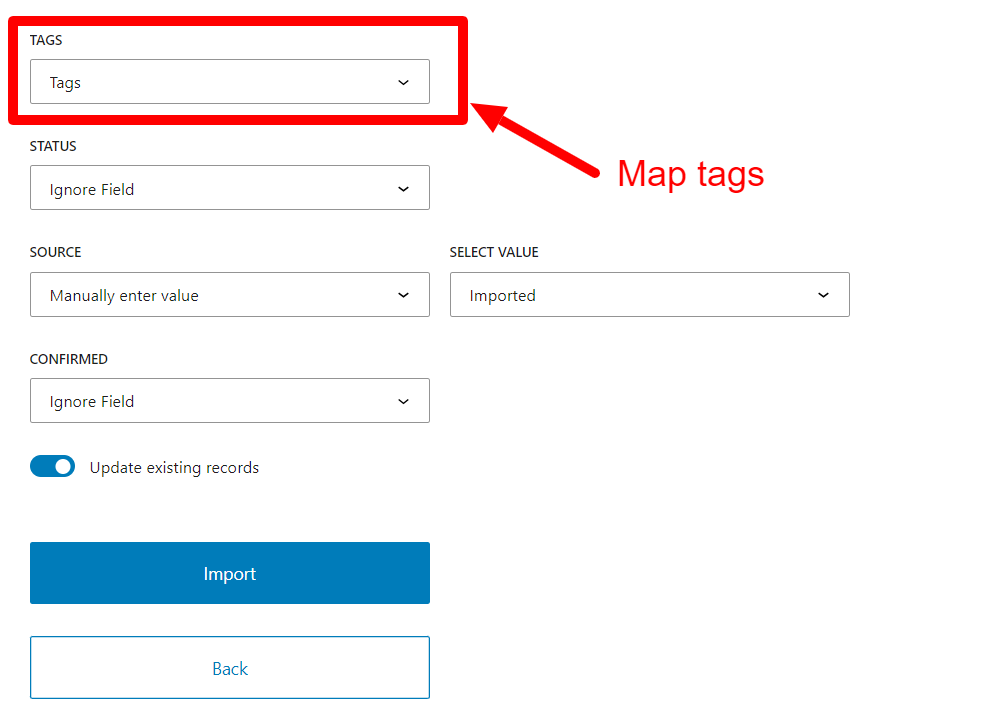
… or manually specify a list of tags to apply to all subscribers.

Either way, ensure that your tags are separated using a comma.
Tag automation
This is a premium feature.
That means that you have to purchase a plan before you can use it.
Noptin allows you to automatically tag or untag subscribers based on which actions they take on your site.
For example, you can automatically tag or untag someone when they:-
- Sign-up for your newsletter.
- Open a given email campaign.
- Click on a specific link in an email.
- Buy a given WooCommerce product.
- Make a new WooCommerce order.
- Create an account on your site.
- Use a certain coupon code.
- Submit a contact form.
- e.t.c
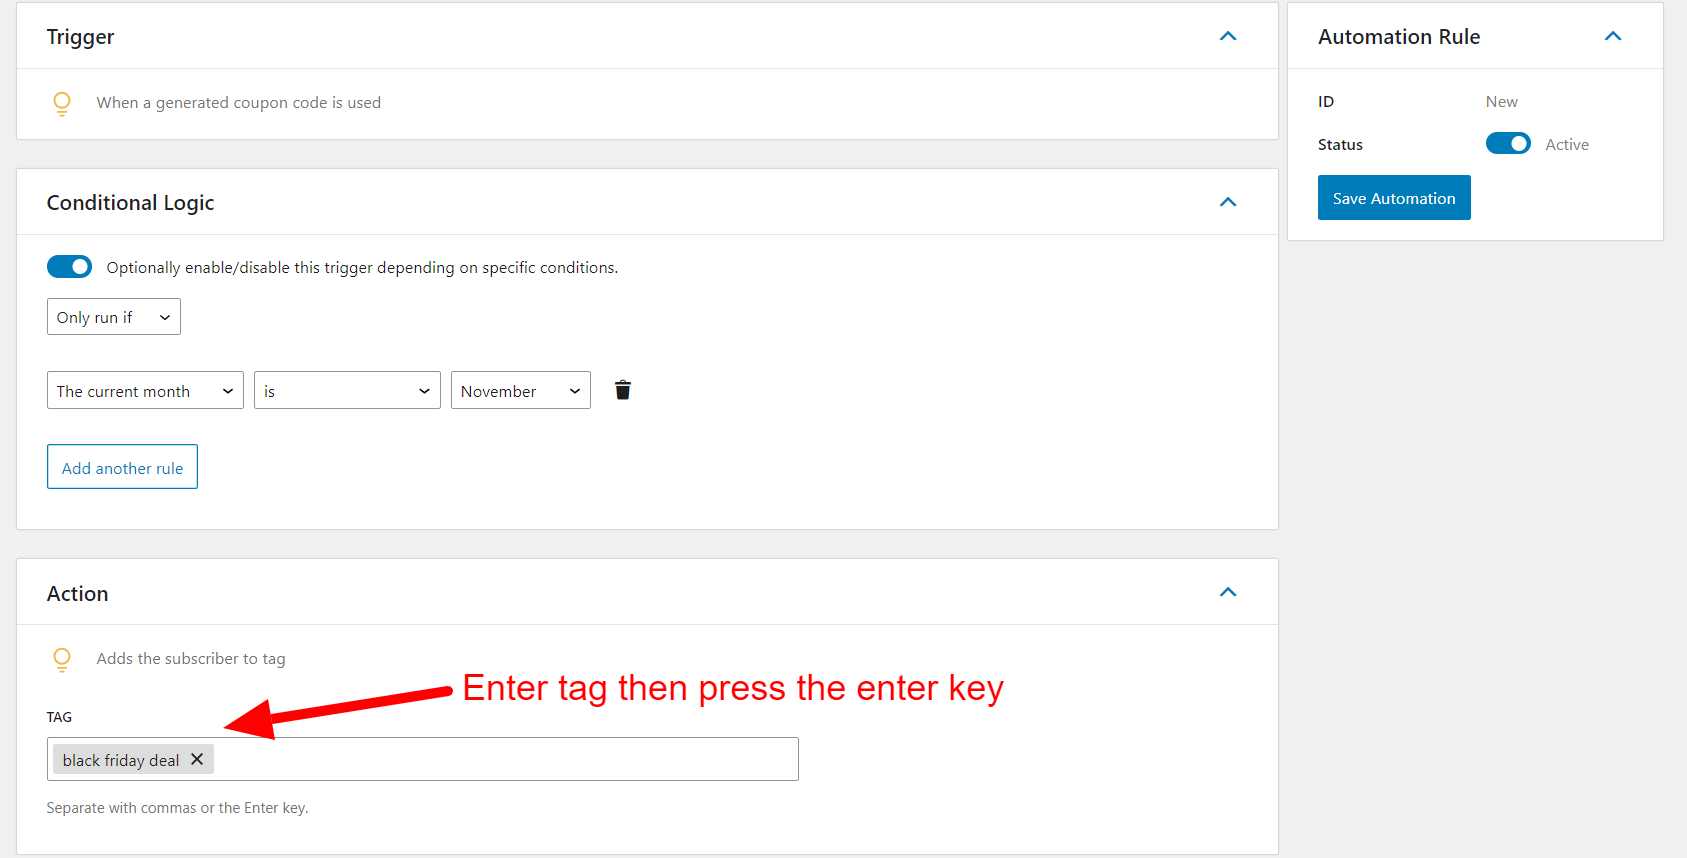
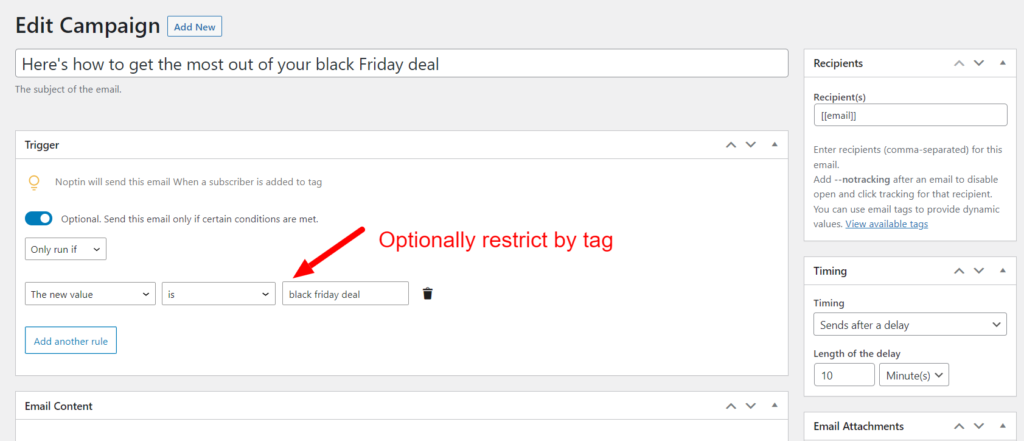
Similarly, you can trigger specific actions whenever a subscriber is tagged or untagged.
- Sending them an email.
- Sending a webhook to a 3rd party service.
- Creating or updating the contact in your external CRM.
- Creating a new user account.
- Adding or updating their user role.
- Deleting a user account.
- e.t.c


Leave a Reply