By default, Noptin comes with double opt-in disabled. This means that new subscribers will be automatically marked as active as soon as they subscribe to your email newsletter.
Your email subscribers are not required to confirm their email addresses before they can receive any marketing emails.
Sometimes, however, you might want your subscribers to confirm their email addresses before they can receive any emails that you send. In that case, you will want to enable double opt-in.
How double opt-in works
- Initial Subscription: A user signs up for your newsletter, usually by entering their email address into a subscription form on your website or by checking a newsletter checkbox on your contact or checkout form.
- Confirmation Request: After the initial sign-up, the Noptin automatically sends an email to the provided address, asking the user to confirm their subscription. This confirmation email typically contains a link or a button that the user must click to verify their email address and their intent to subscribe.
- Final Subscription: Only after the user clicks the confirmation link are they officially added to the email list, completing the double opt-in process.
If you enable double opt-in, subscribers will only receive Noptin emails after they confirm their email address.
How to enable double opt-in
First, open the Noptin settings page then navigate to “Emails > Double Opt-In” to open the double opt-in settings page.
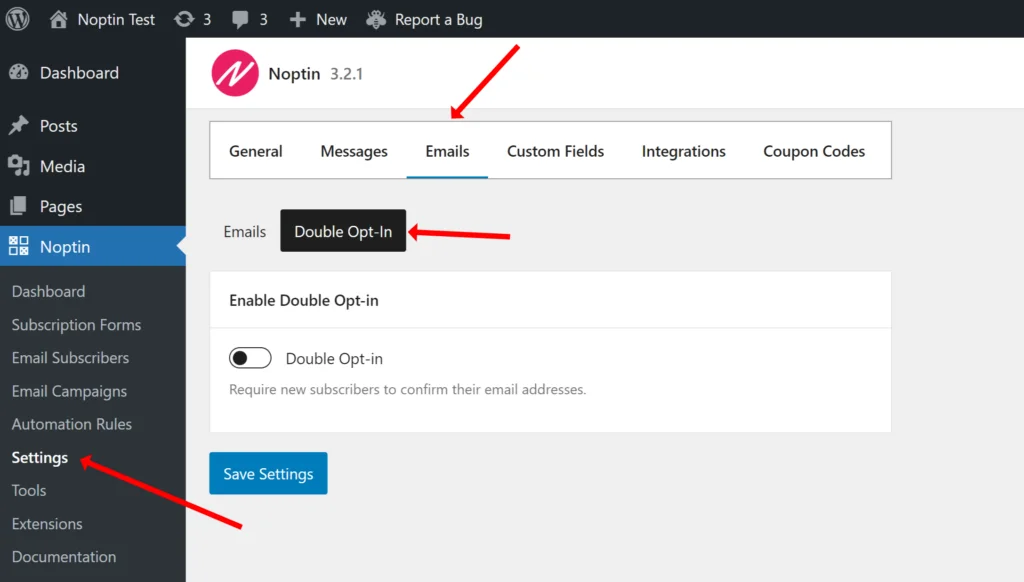
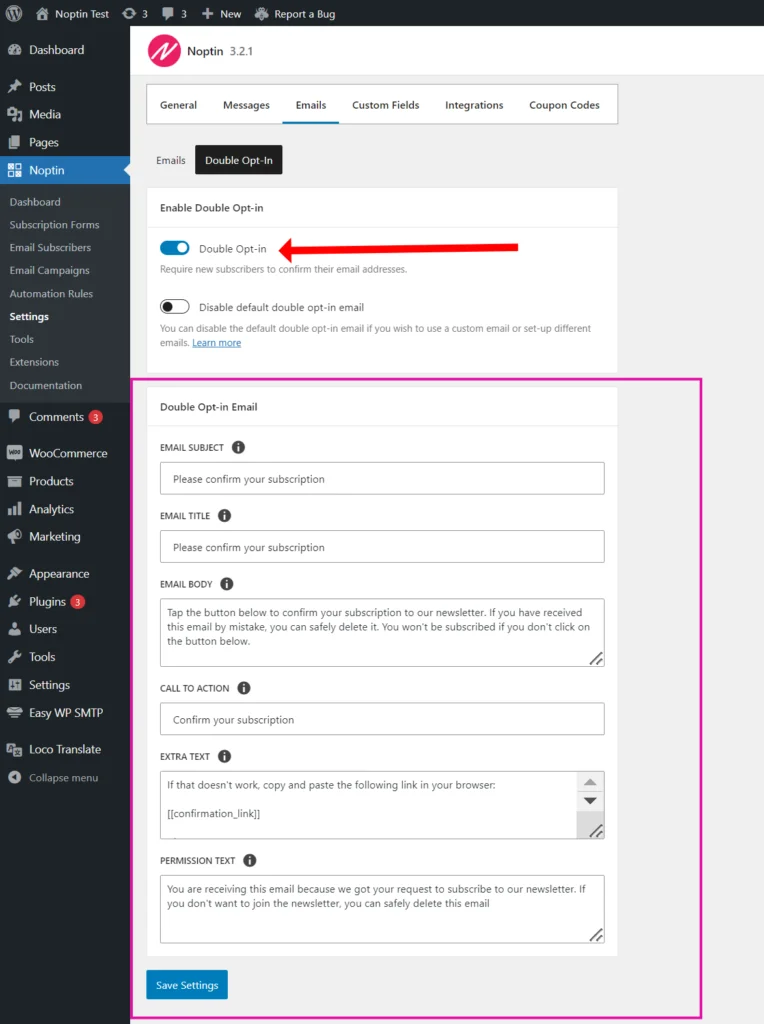
Next, toggle the “Double Opt-in” switch to enable or disable double opt-in. Noptin will reveal extra settings that you can use to change the subject and content of the confirmation email.
How to customize the email or set up multiple double opt-in emails
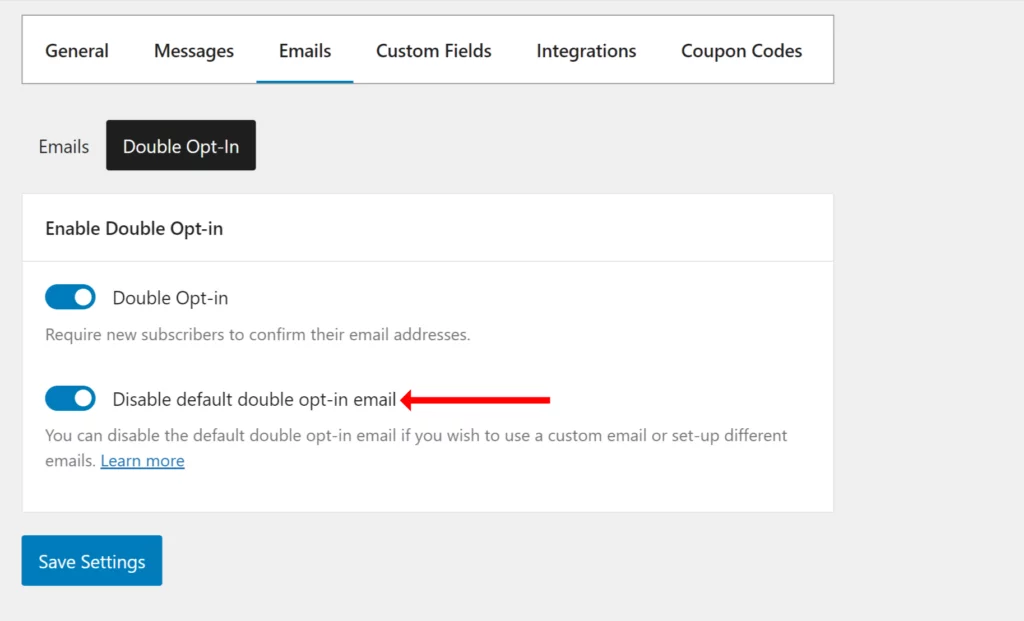
This section shows you how to override the default double opt-in emails. This allows you to set up your own custom content, change templates, etc.
You can also set up multiple double opt-in emails and then send them to your subscribers depending on how they sign up on your site or which values they select for their custom fields.
To do this,
You first need to disable the default double opt-in emails as shown below.
Next, click on Noptin > Email Campaigns > Automated Emails > New Automated Email then create a “Confirm New Subscriber” automated email as shown in the video below.
Noptin will open a new page allowing you to set your email subject and content.
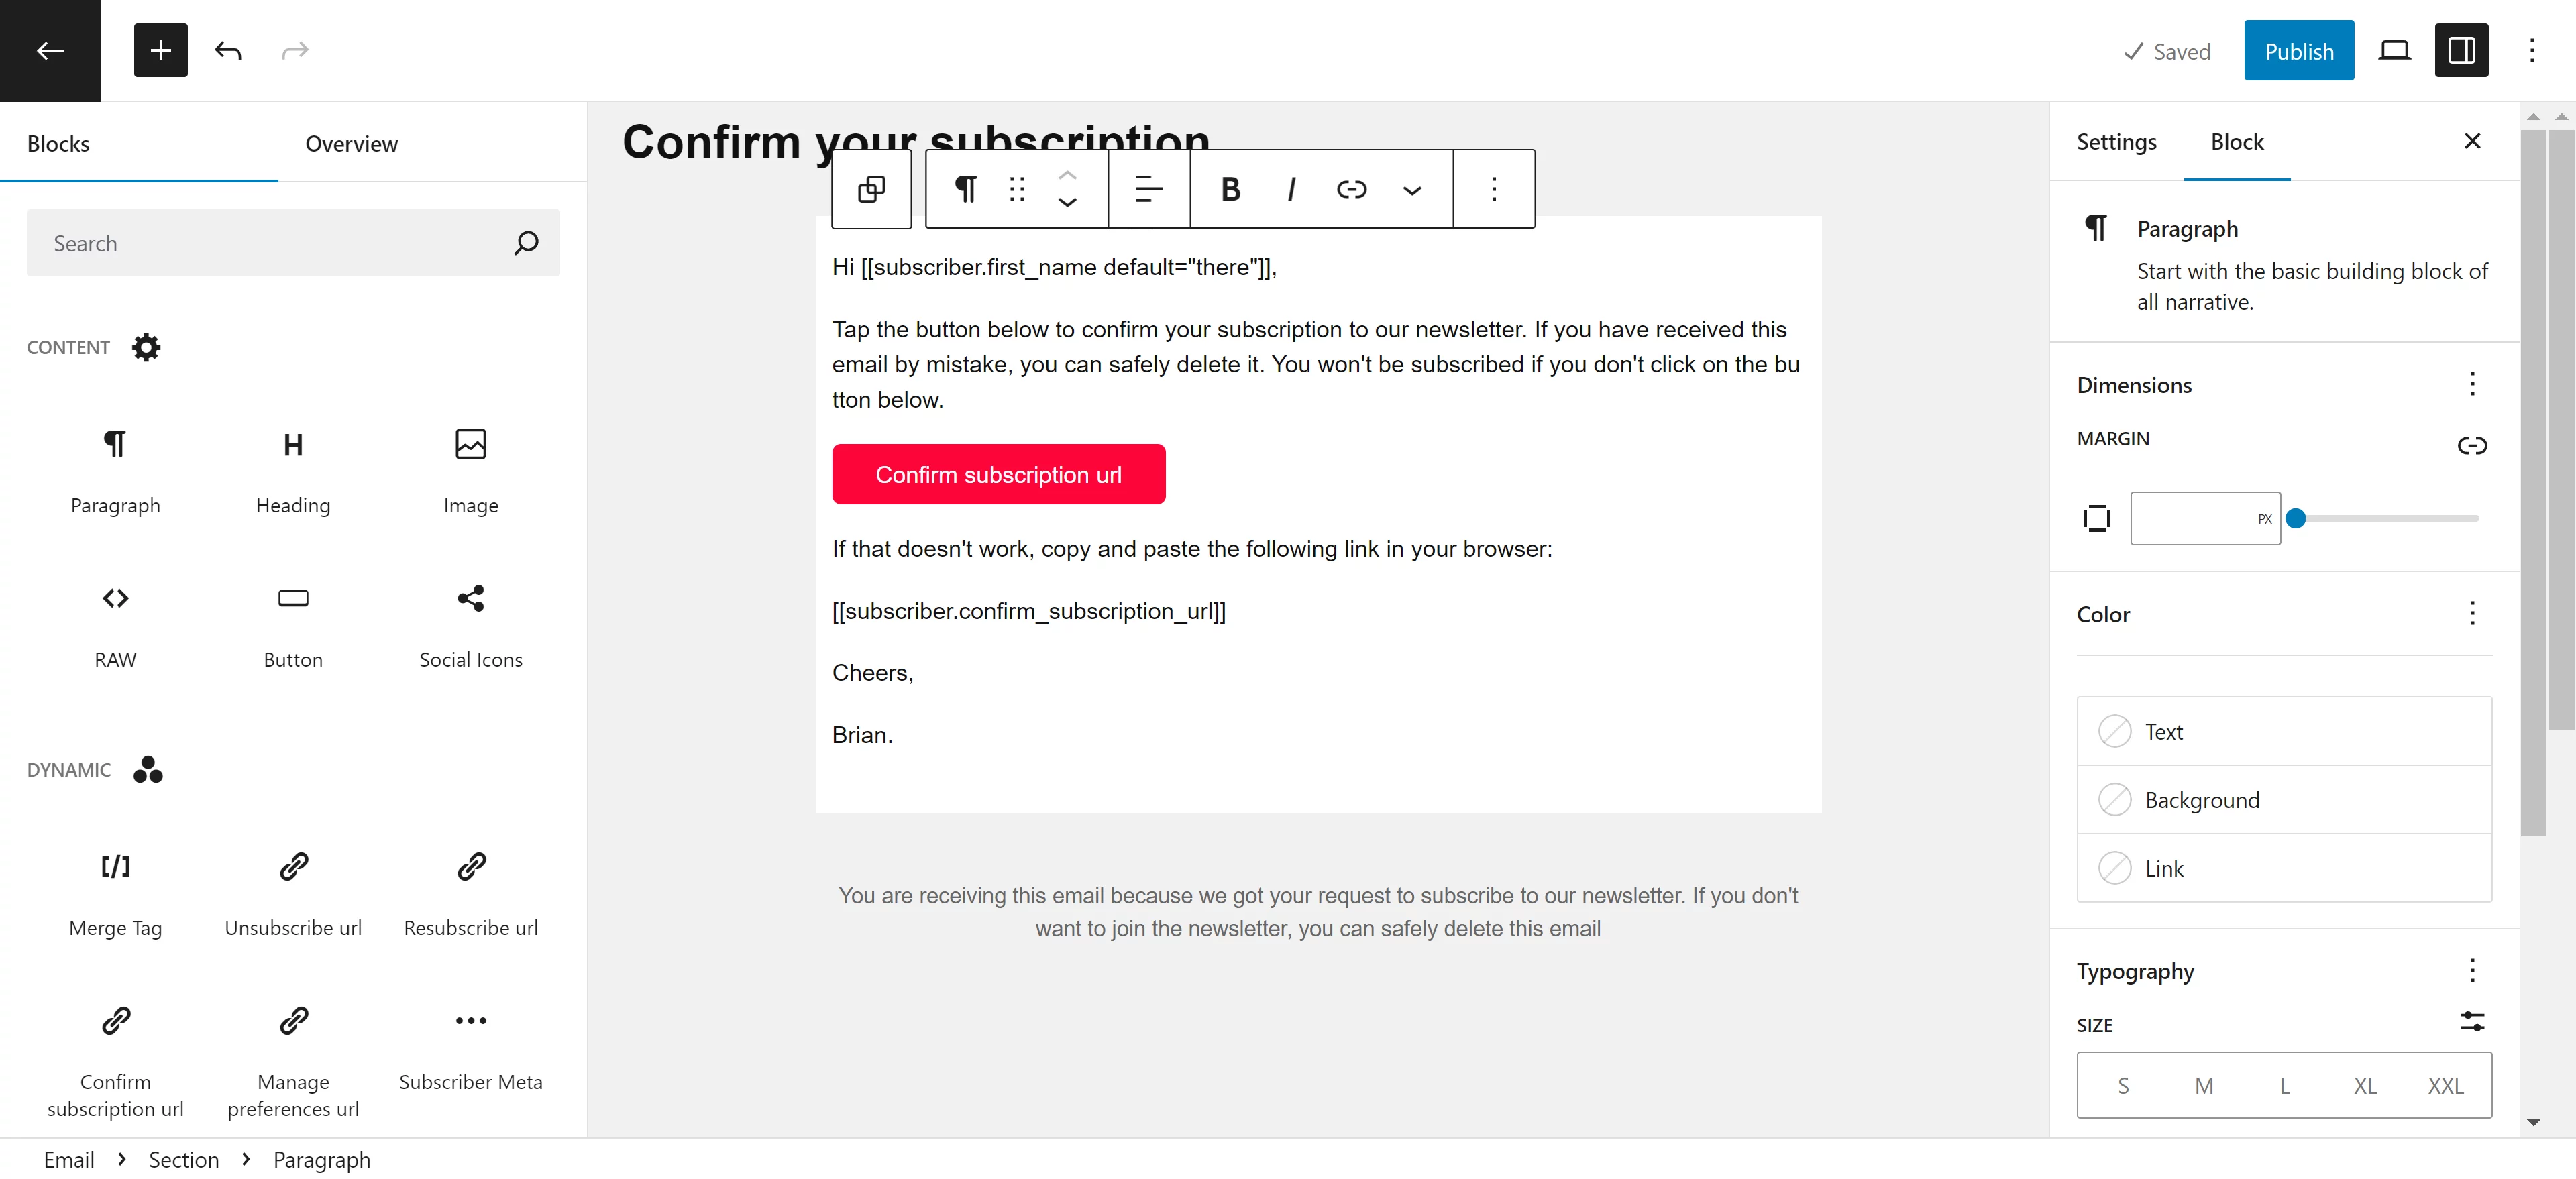
If you’re using the visual editor, you can add the Confirm subscription URL block to your email to display a button that allows the user to confirm their subscription.
Those using other editors can use the following merge tag to display the subscription confirmation URL.
[[subscriber.confirm_subscription_url]]
Conditional Logic
Conditional logic allows you to send the double opt-in email only if certain conditions are met. This is useful when you:-
- Need to set up different double opt-in emails depending on the subscription method, page, or custom fields.
- Only want to send the double opt-in email in certain situations.
Below is an example.
How to bulk-send double opt-in confirmation emails
In your WordPress admin dashboard, click on Noptin > Tools to open the Noptin tools page.

After Noptin loads the tools page, click the Send button next to the Send Confirmation Emails tool.
Noptin will create a background task to send confirmation emails to all subscribers who have not yet confirmed their email address. Depending on the number of subscribers you have, it might take a few minutes to finish sending the emails.
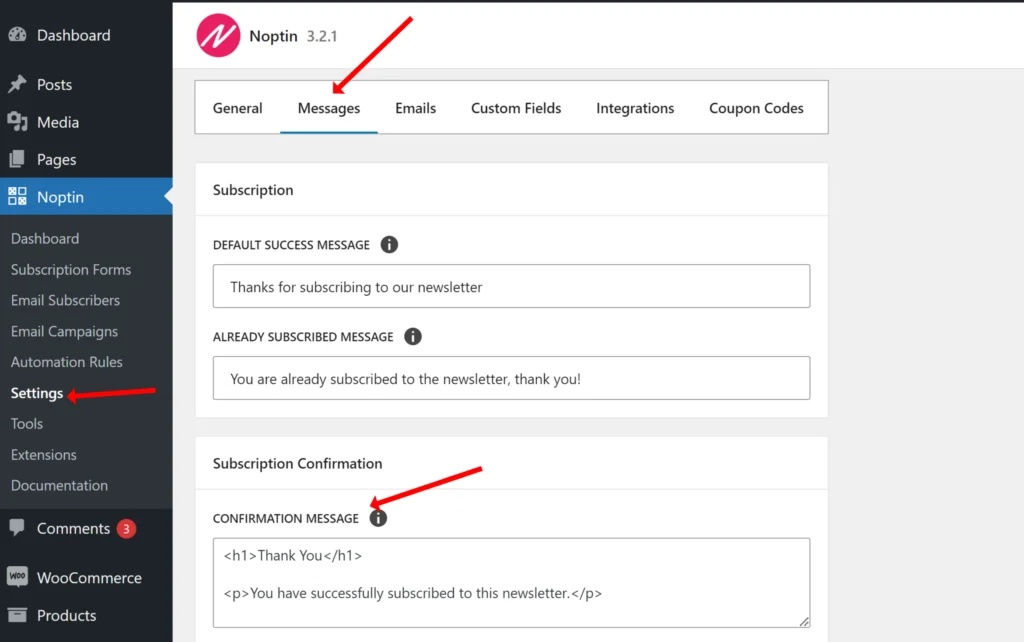
How to change the double opt-in confirmation message
First, open the Noptin > Settings page and then click on the Messages tab to display message settings.
Next, scroll to the Subscription Confirmation panel and change the confirmation message.
How to redirect subscribers after they confirm their email address
You can redirect subscribers by pasting the URL to redirect subscribers into the Confirmation Redirect textbox. This textbox is located just below the Confirmation Message text area.
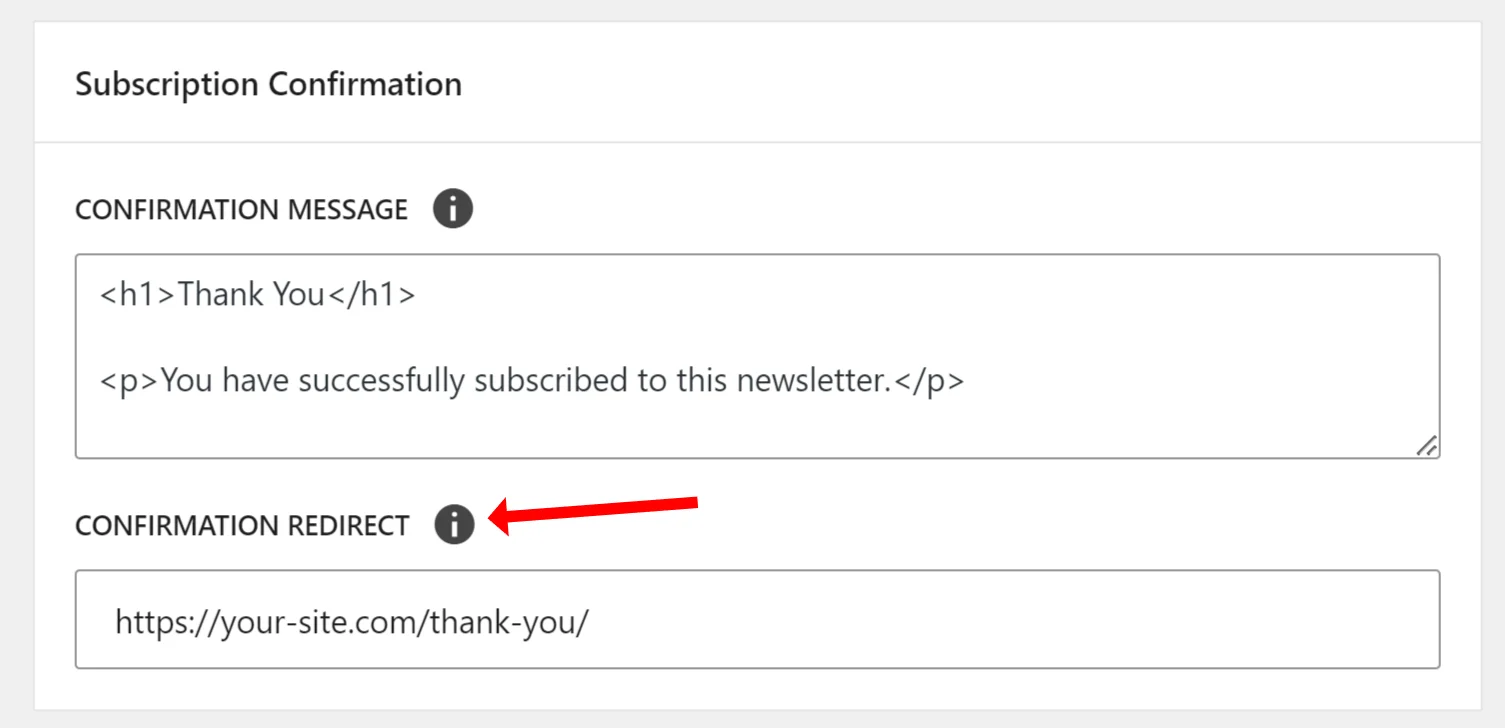
Leave the field blank if you do not want to redirect subscribers after they confirm their email addresses.
It is, however, recommended that you redirect your subscribers to a custom welcome page.
That gives you limitless flexibility about what to show the subscriber after they confirm their email address.
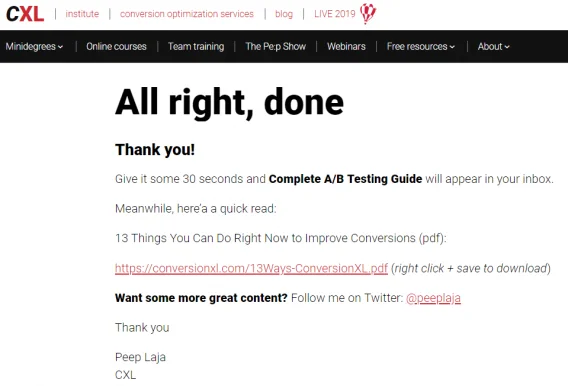
For example,
You can redirect them to a page with a custom form like we do at Noptin…

… or surprise them with some goodies like the guys at Conversion XL.
Leave a Reply