
Subscriber lists allow you to categorize your subscribers, similarly to how you use normal categories in WordPress.
For example, you can use lists to organize your audience into groups such as Customers, Weekly Newsletter, Product Updates, or Course Subscribers.
A subscriber can belong to one list or several lists, depending on how you configure the Lists field.
You can use lists to:
- Organize subscribers into mailing groups.
- Let subscribers choose which newsletters they want to receive.
- Automatically categorize subscribers based on where they signed up.
- Add subscribers to lists after purchases or other actions.
- Target or exclude specific lists when sending emails.
- Trigger automations when someone joins or leaves a list.
There are no limits to how many lists you can create, and each list can have as many subscribers as you want.
Lists vs Tags
Lists and tags both help you organize subscribers, but they are intended for slightly different purposes.
Lists are best for broader mailing groups or preferences that subscribers may select themselves either on the manage subscription form or on the newsletter sign-up forms.
For example:
- Weekly Newsletter
- Product Updates
- Special Offers
- Email Course
Tags are better for labels that you apply based on subscriber behavior or internal information.
For example:
- Purchased Product A
- Clicked Pricing Link
- WooCommerce Customer
- Webinar Attendee
A subscriber can use both lists and tags at the same time.
For more flexible categories such as Language, Region, or Interests, you can also create a custom subscriber segment.
Create and manage lists
Lists are stored as a custom subscriber segment in Noptin.
If you already see Lists under Noptin → Subscribers, open it and click Add New.
If the Lists segment does not yet exist:
- Open Noptin → Subscribers and click Add Segment to create a new segment.
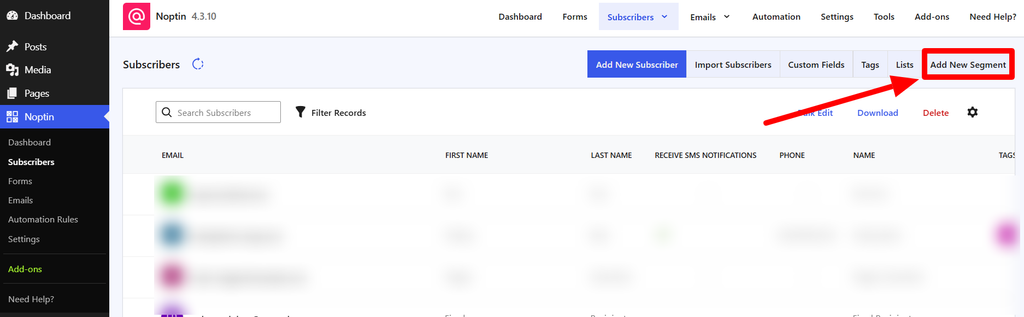
- Enter Lists as the segment name.
- Enable A subscriber can appear in more than one segment if subscribers should be allowed to belong to several lists.
- Click Create.

You can now add individual lists.
Click Add New, enter the list name, and optionally enter a different display label.

For example:
- Weekly Newsletter
- Product Updates
- Offers
The Name identifies the list internally, while the Label controls the wording displayed to subscribers.
For more information about segment settings, see Creating a Custom Subscriber Segment.
Add or Remove a Subscriber From a List
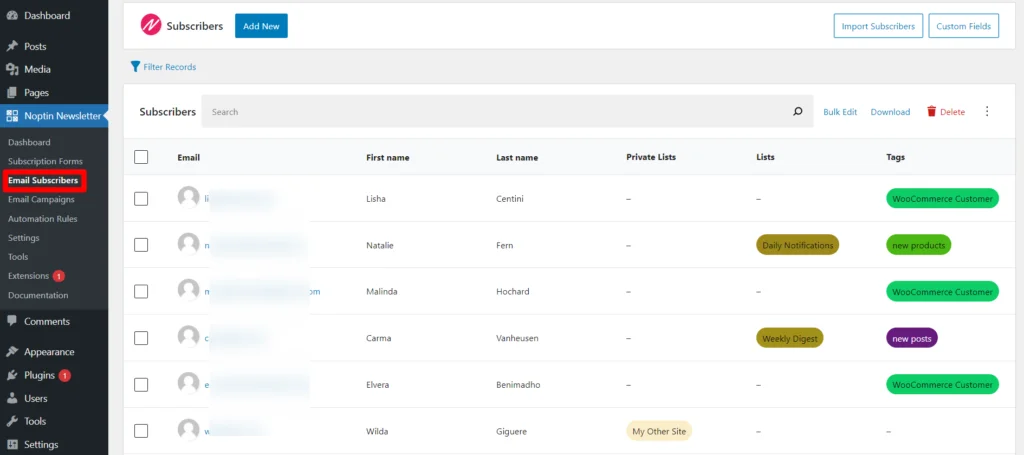
Go to Noptin → Subscribers and click the subscriber’s email address to open their overview page.
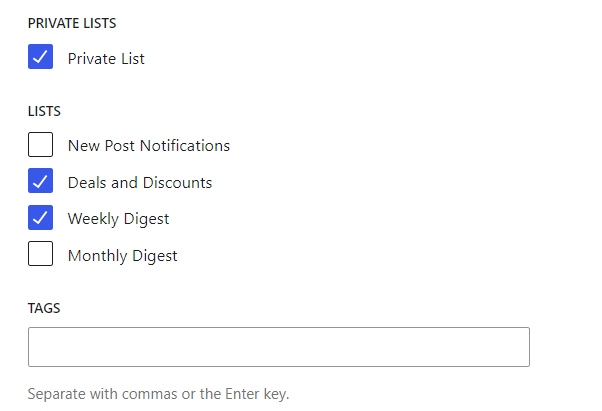
Next, locate the Lists field, then select or remove the appropriate lists. Remember to click on the Save Changes button after you’re done.
Note:
If you have automation rules that trigger when a subscriber joins or leaves a list, those automations will run after the change.
Bulk list or unlist existing subscribers
First, open the subscribers’ overview page…
… and then select the subscribers you want to edit.
Note:
If you want to update all subscribers matching your current filters, leave the individual checkboxes unselected before opening Bulk Edit.
Next, click on the Bulk Edit button to open the bulk edit modal…
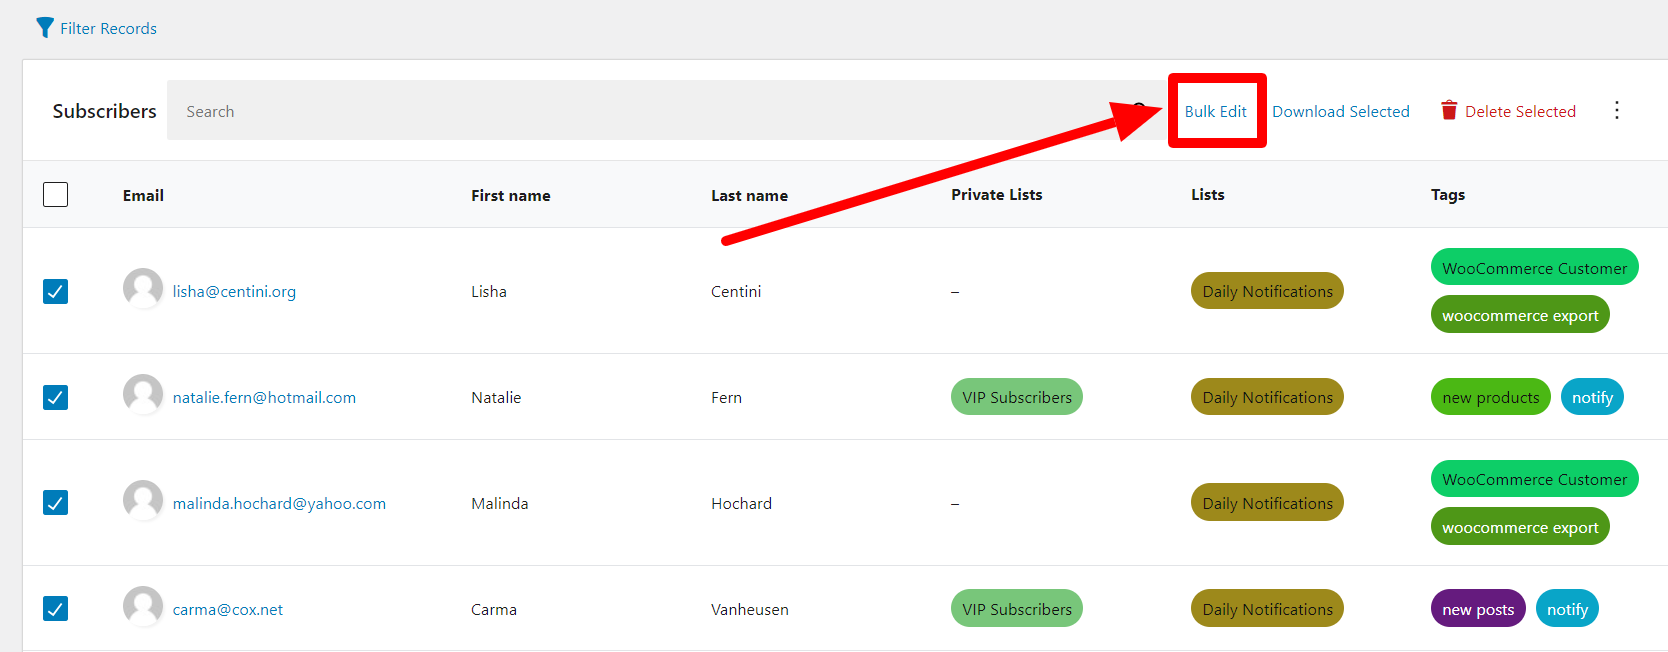
… then scroll down to the lists input box and add or remove lists as needed. Remember to click on the Save Changes button after you’re done.
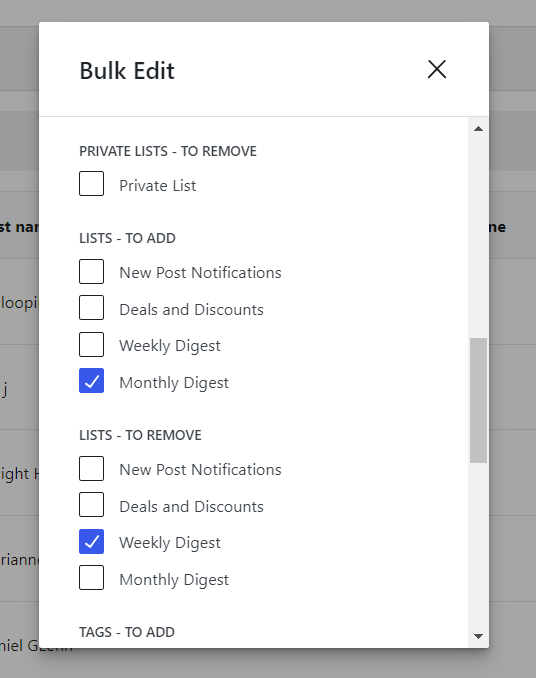
Note:
Any relevant list-based automations will run for the affected subscribers.
Let subscribers select their own lists
To do this,
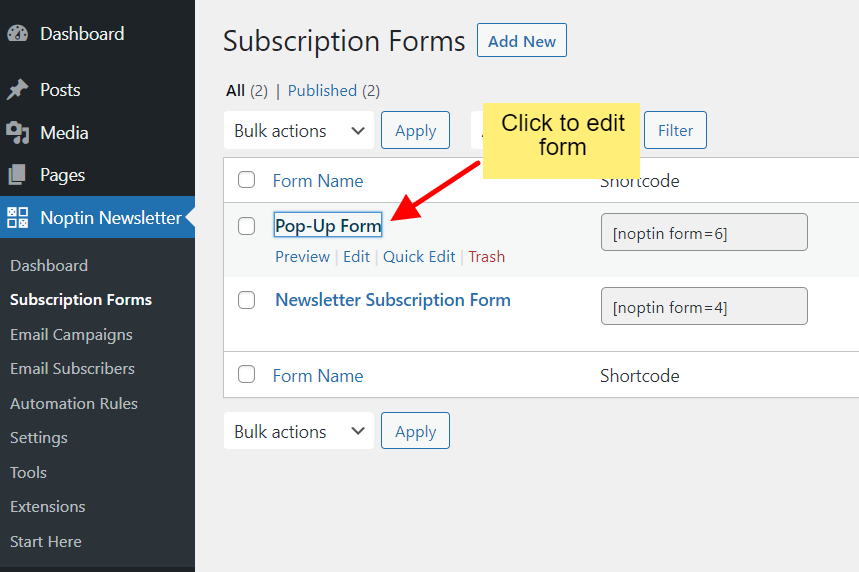
First, click on the name of a subscription form to open it in the subscription forms editor…
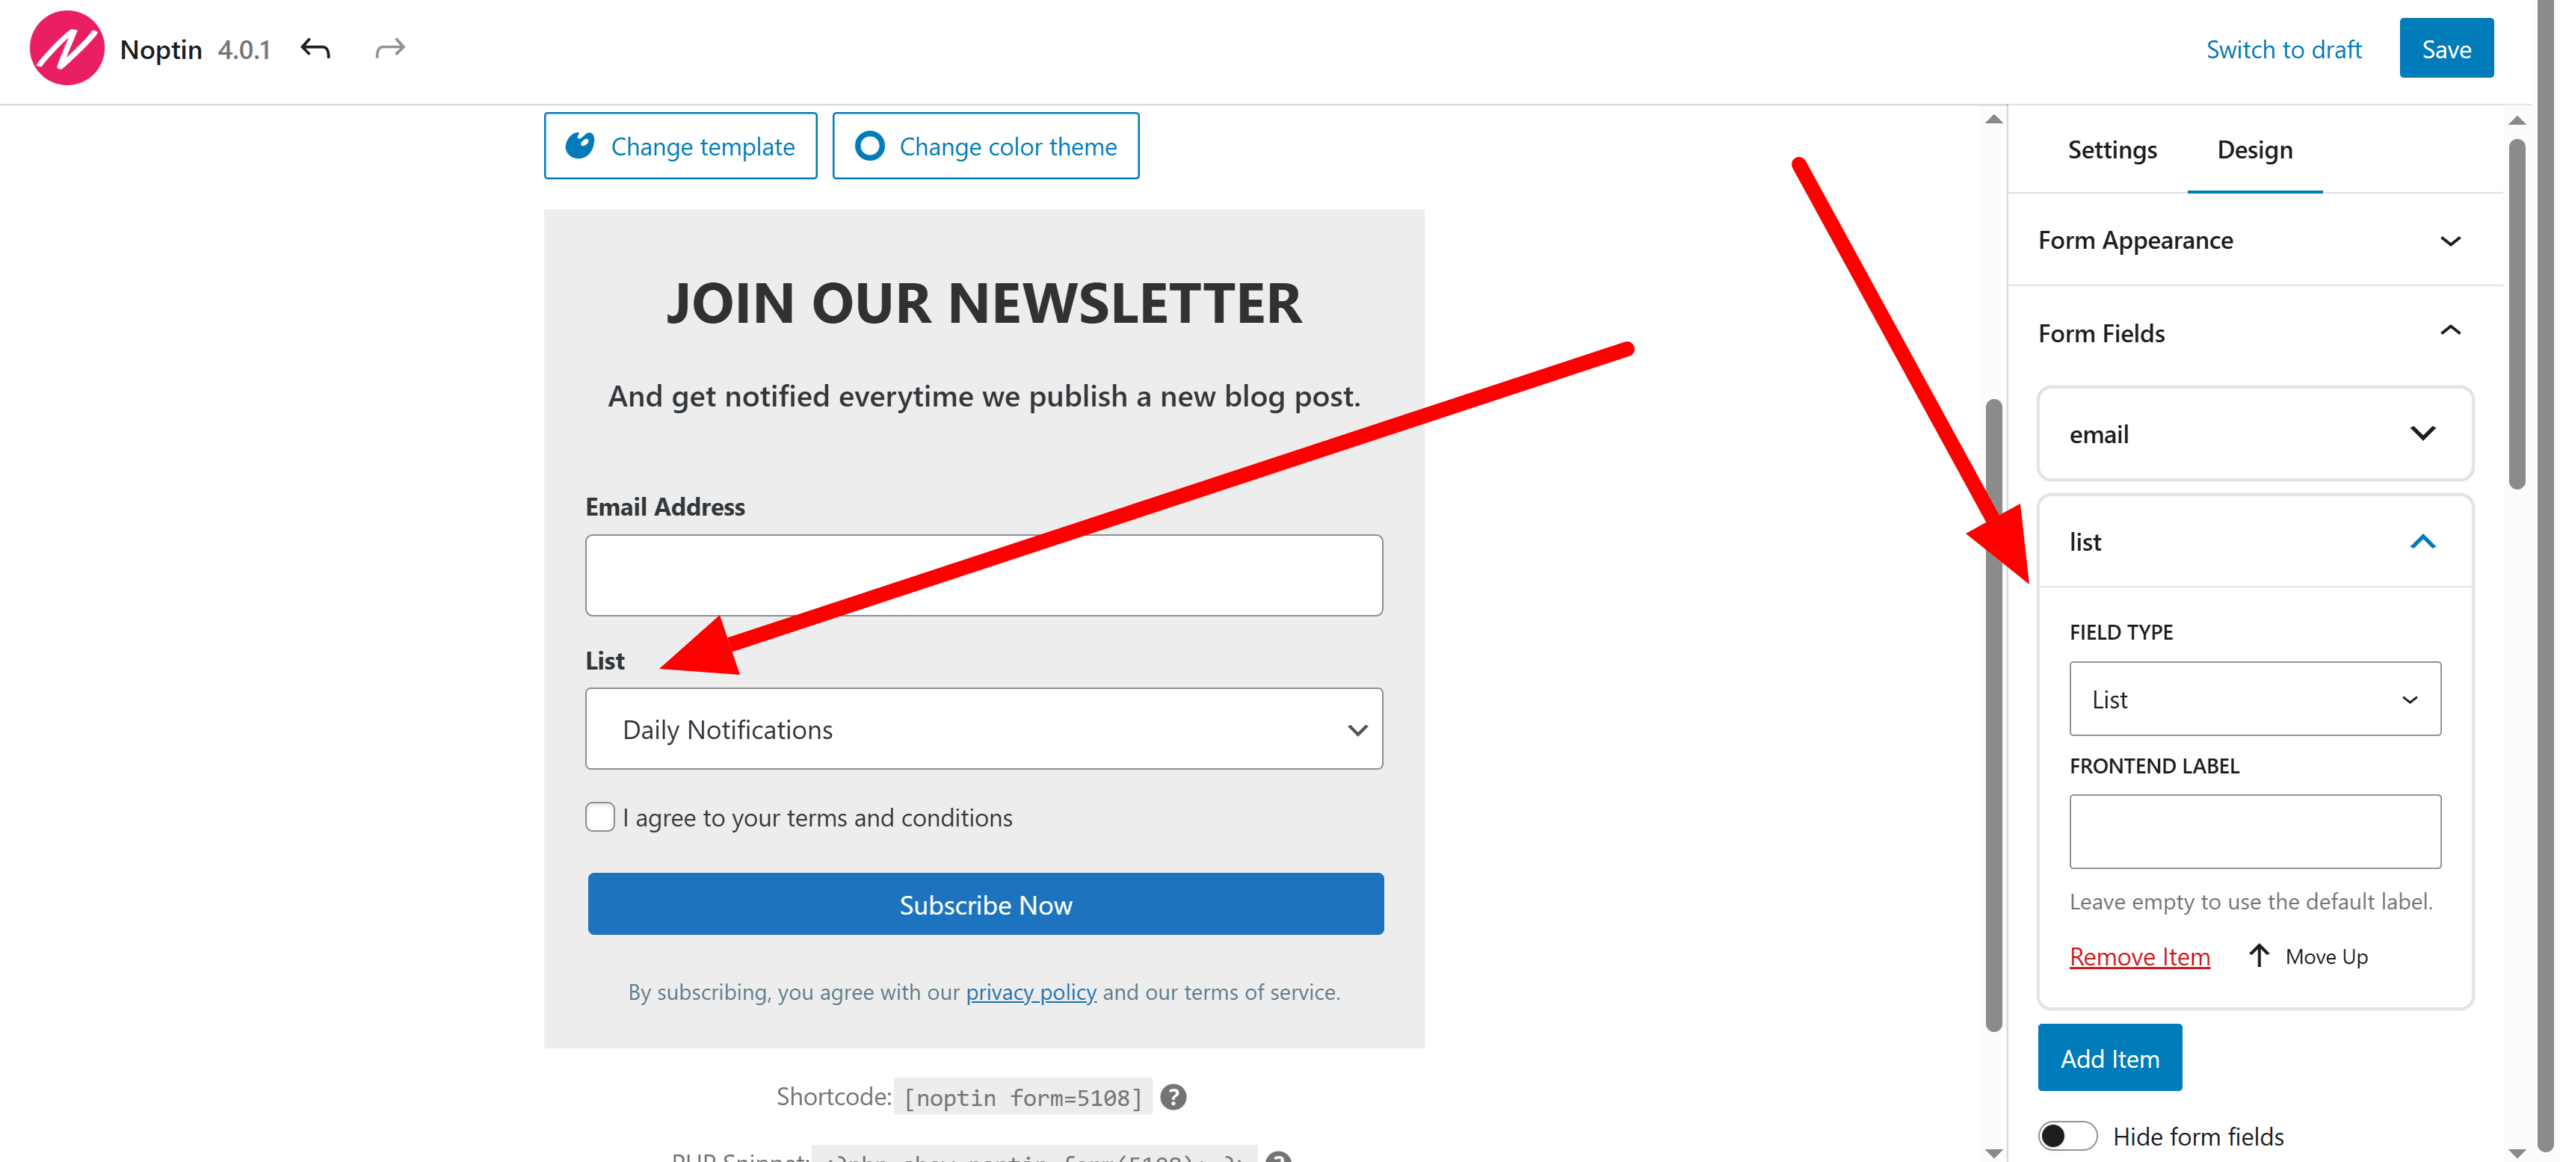
… then add your “lists” custom field to the form.
Automatically add people to lists when they subscribe via specific forms.
Open the form in the subscription forms editor as shown in the previous section, then assign lists to the form.
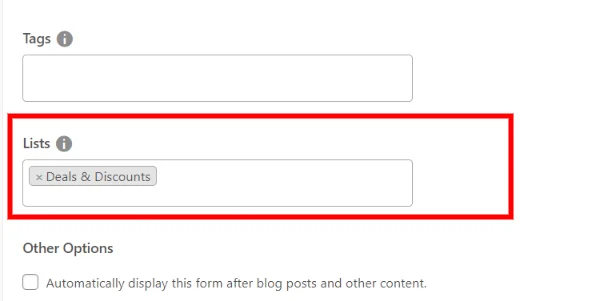
From now on, whenever anyone signs up via the form, Noptin will automatically add them to the selected list.
Connect a list to WooCommerce or any integration
Noptin allows you to add a newsletter subscription checkbox to the WooCommerce checkout form, WordPress registration forms, and other plugins.
You can associate any integration with any list.
For example,
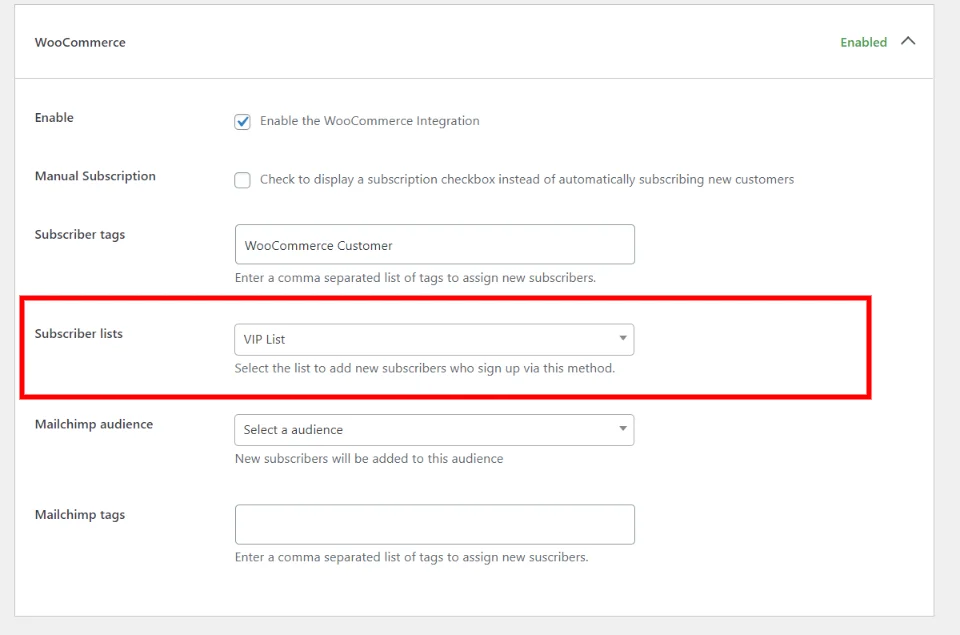
You can create an “Email Course” list and connect it to your WooCommerce checkout. As a result, whenever someone completes the checkout form, Noptin will add them to the “Email Course” list.
To do this:-
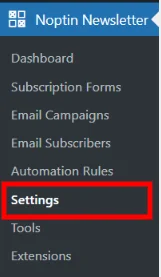
First, click on Noptin Newsletter > Settings to open the settings page.
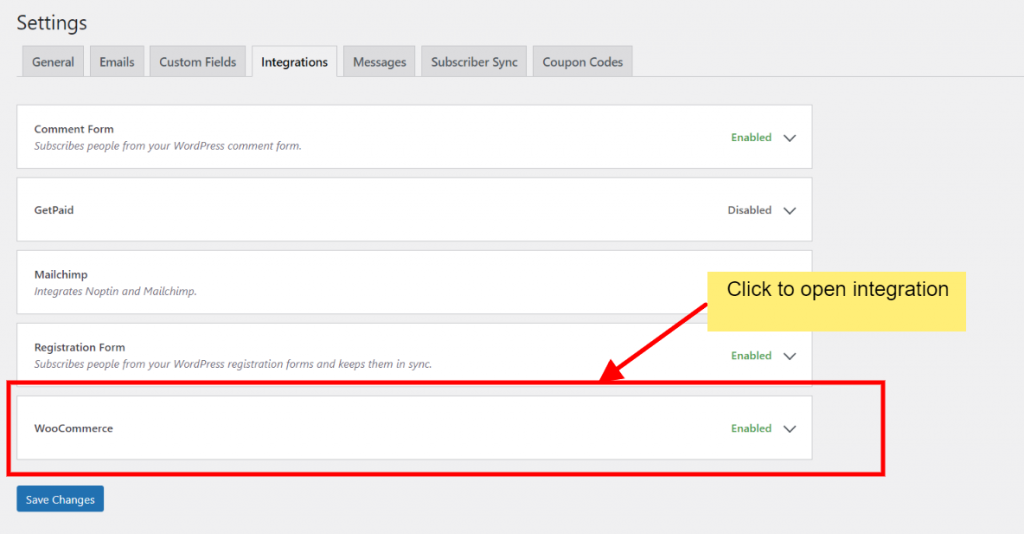
Next, click on the integrations tab, then navigate to the appropriate integration.
Finally, select the lists that you want to connect, then save your changes.
Add imported subscribers to a list
When importing subscribers, Noptin allows you to specify a list to add all the imported subscribers.
You can either add a lists column to your CSV file and then map it when importing subscribers…
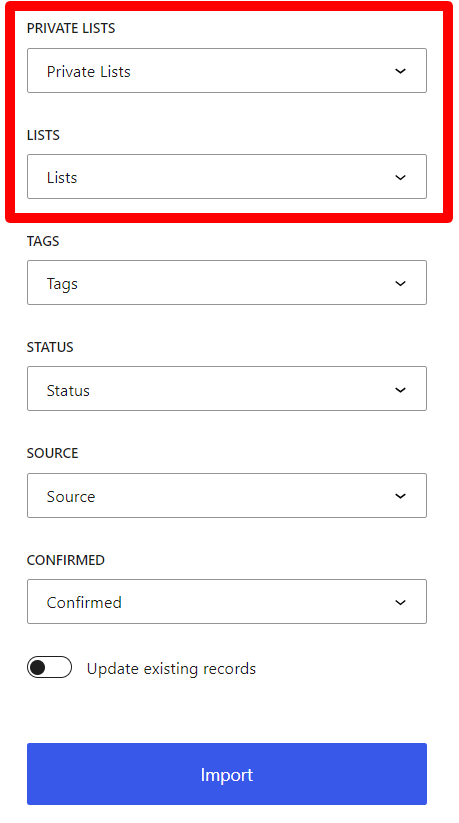
… or manually specify the lists to add to all subscribers.

Only lists that already exist on your site will be assigned. You should therefore create the lists first before importing subscribers.
Remember to use the list id/key instead of the list’s name.
List Automation
Noptin allows you to automatically add or remove subscribers from a list based on which actions they take on your site.
For example, you can automatically add or remove someone from a list when they:-
- Sign up for your newsletter.
- Open a given email campaign.
- Click on a specific link in an email.
- Buy a given WooCommerce product.
- Make a new WooCommerce order.
- Create an account on your site.
- Purchase a given membership.
- Use a certain coupon code.
- Submits a contact form.
- e.t.c
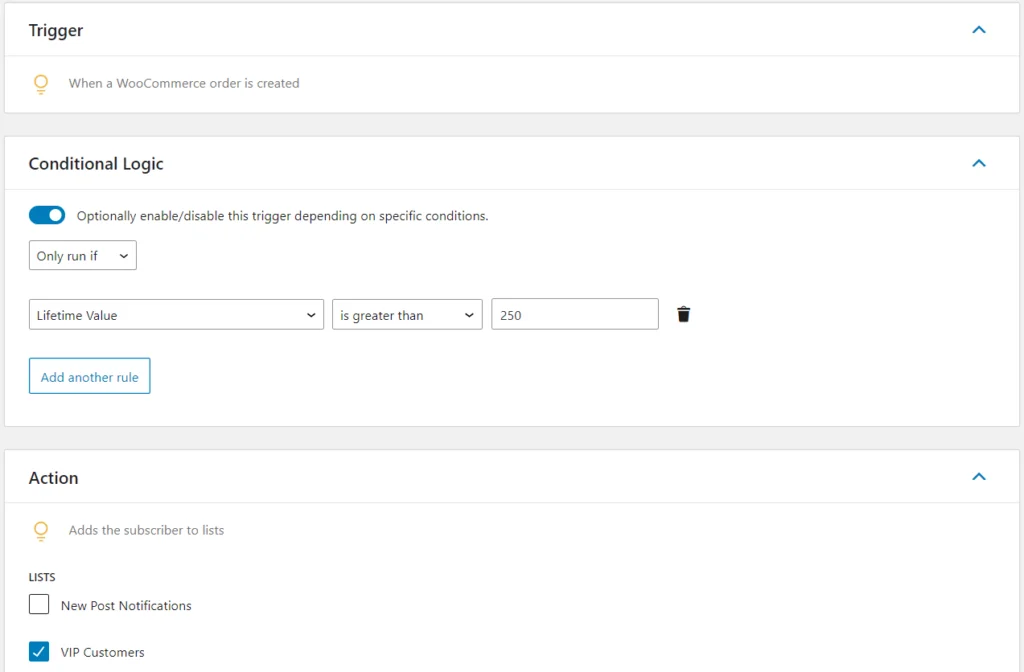
Similarly, you can trigger specific actions whenever a subscriber is added or removed from a given list.
- Sending them an email.
- Sending a webhook to a 3rd party service.
- Creating or updating the contact in your external CRM.
- Creating a new user account.
- Adding or updating their user role.
- Deleting a user account.
- e.t.c
Learn more about automation rules.
View all subscribers in a given list
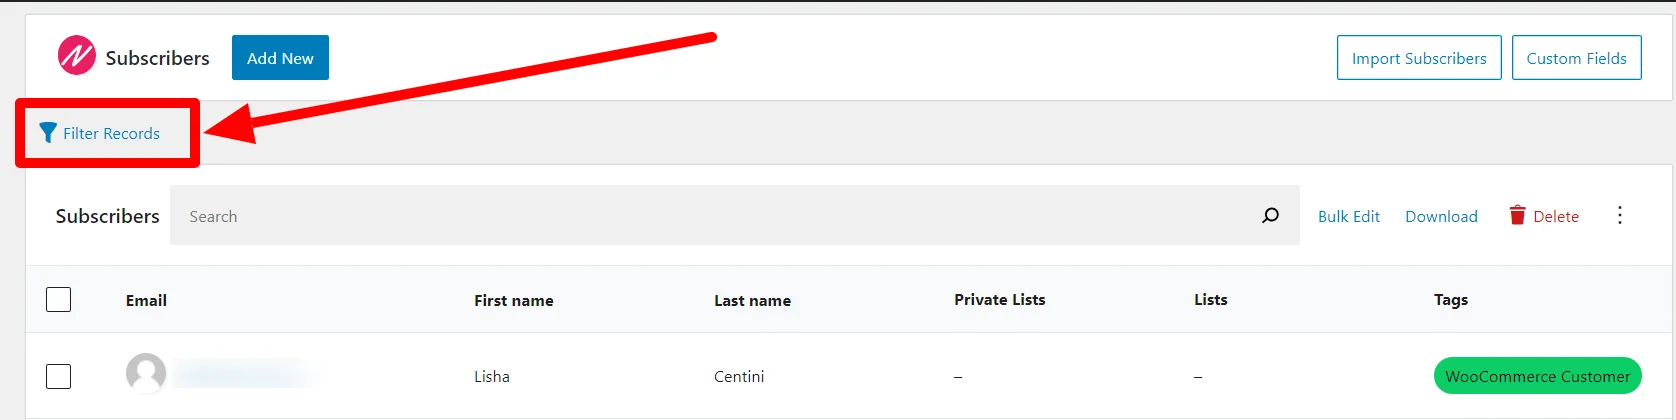
Filtering subscriber records by list requires Noptin Premium.
First, open the subscribers’ overview page…
… and then click on the Filter Records button at the top of the subscribers’ table to open the filter modal.
Finally, select the lists whose subscribers you want to display. You can also select lists whose subscribers you want to exclude.
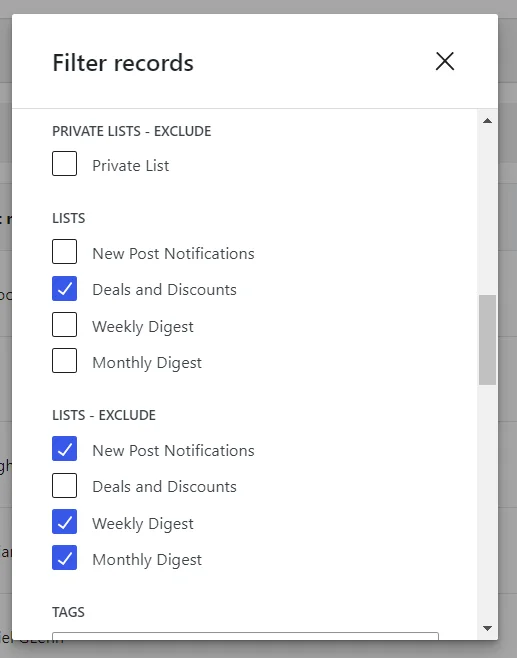
Remember to click on the Apply Filters button to apply your changes.
Delete all subscribers in a given list
First, open the subscribers’ overview page and then filter the subscribers by the given lists as shown in the previous section.
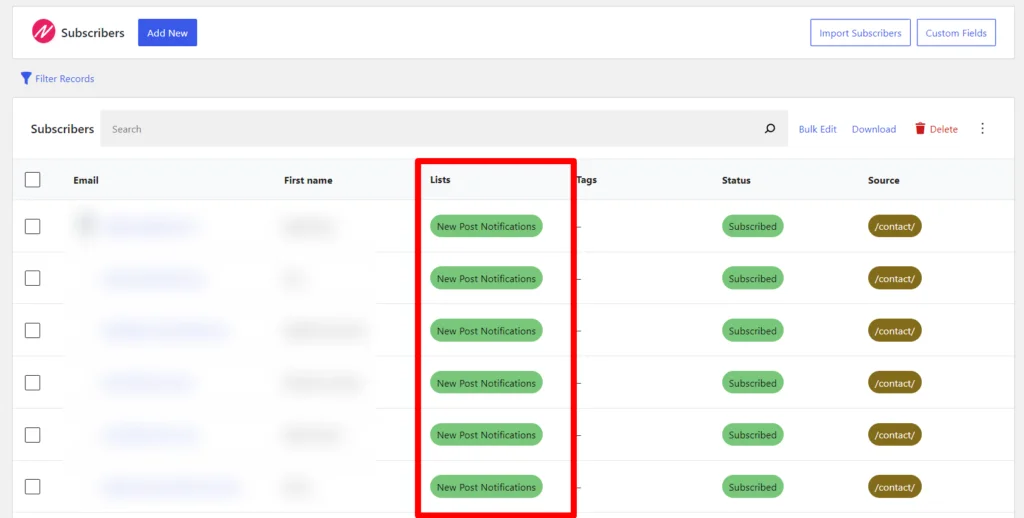
Next, click on the Delete button to delete all matching subscribers.

Alternatively, you can select the individual subscribers that you want to delete before clicking on the Delete button.
Filter email recipients by lists
Automated emails require Noptin Premium.
You can use lists to filter the recipients of your emails. This works for both one-time emails and new post notifications.
To do this, open the email in the email editor and then navigate to the “Recipients” meta box and set the lists to filter by.
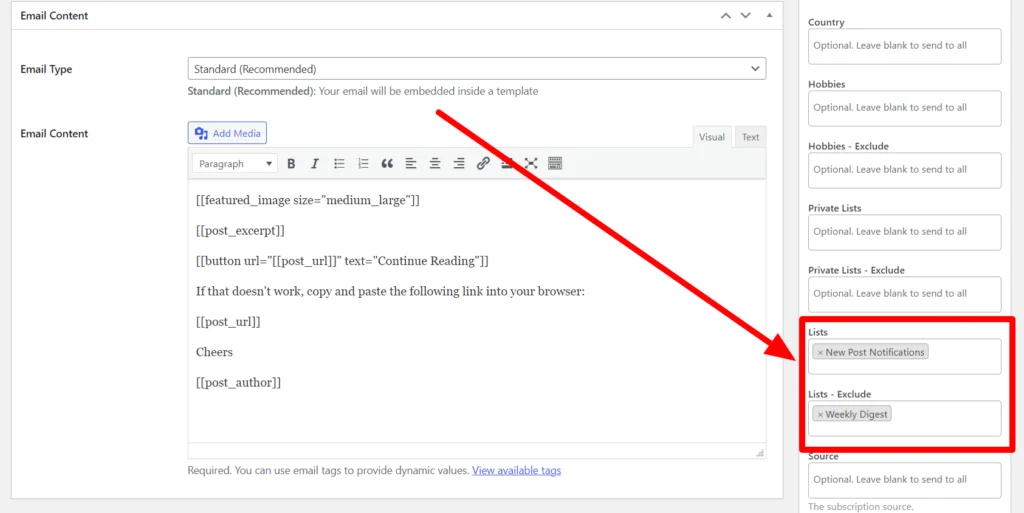
Noptin will send the email to all subscribers who match any of the lists specified in the “Lists” input and none of the lists specified in the “Lists – Exclude” input.
You can click on Noptin > Subscribers and then filter by the same lists to see exactly who will receive the emails.
Leave a Reply