In this guide, you will learn how to add a newsletter subscription checkbox to your WooCommerce checkout forms.
This way, your WooCommerce customers will have the option to subscribe to your newsletter whenever they buy something from you or create an account on your site.
You can then later notify them whenever there is a discount on your website so that they can come back and shop again. Or automatically send them new post notifications.
And the best part is, you’ll be able to do all this for free, and without writing any line of code.
What You’ll Learn
- How to add a WooCommerce newsletter subscription checkbox to your checkout form.
- Automatically adding new customers to your newsletter.
Just like in the example screenshot below.
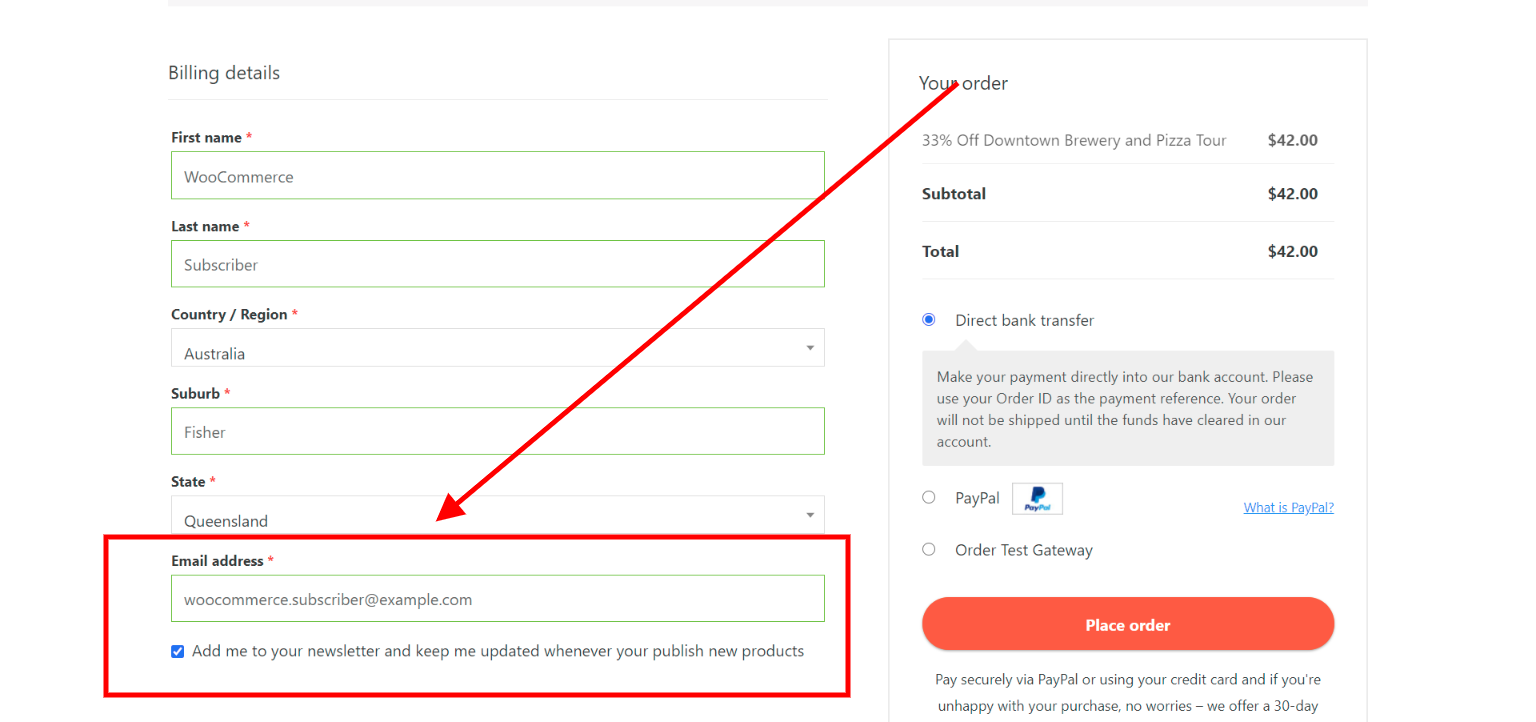
You might also like, how to send a unique WooCoomerce coupon code to new email subscribers.
Prerequisites
To follow along with this tutorial, you need to install at least version 3.0 of WooCommerce (Free) and the latest version of Noptin (also free).
Noptin is a free and lightweight WooCommerce newsletter subscription plugin. To automatically add new WooCommerce subscribers to your email service provider (e.g. Mailchimp), you will have to install the appropriate add-on.
Step 1 – Enable the WooCommerce Newsletter Integration
To do this:-
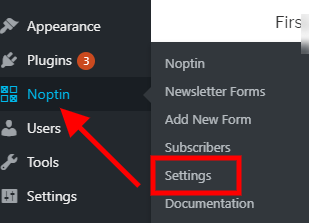
First, click on “Noptin > Settings” to open the Noptin settings page.
Next, click on the Integrations tab to open the integrations settings and scroll down to WooCommerce…
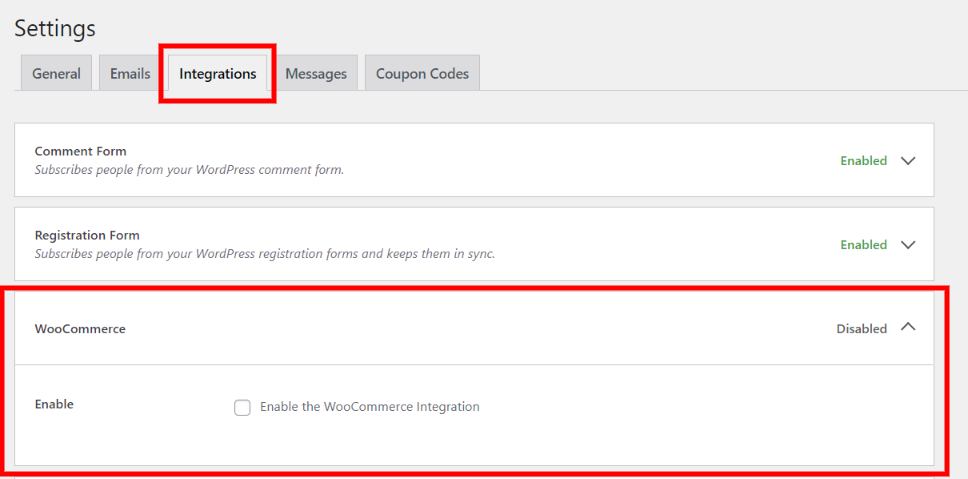
… then enable the integration by checking the “Enable WooCommerce integration” checkbox. This will reveal all WooCommerce newsletter subscription settings that you can use to configure the integration.
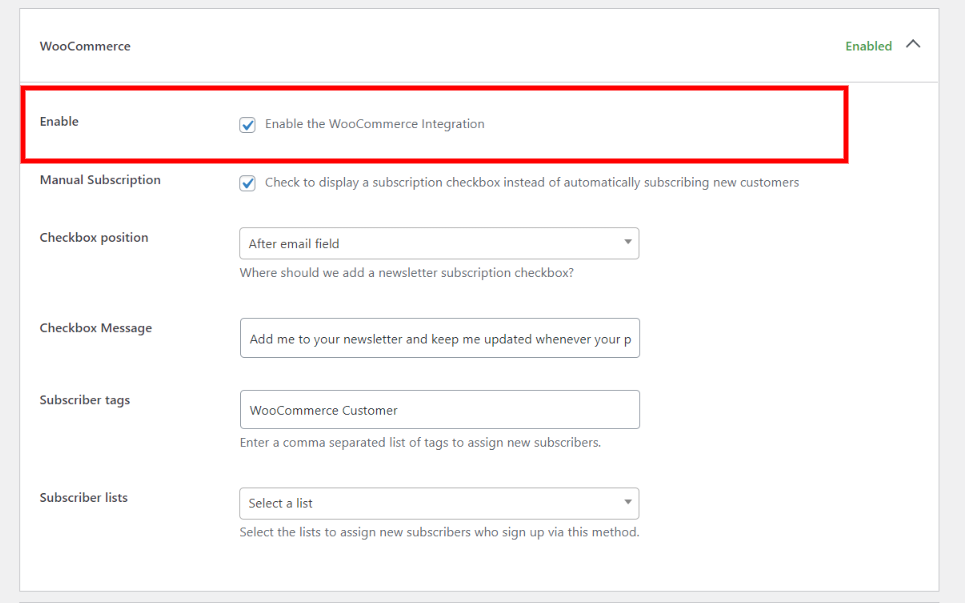
Step 2 – Set-up the WooCommerce Newsletter Subscription Checkbox
When you enable the WooCommerce integration, Noptin will automatically add all new WooCommerce customers to your newsletter.
You can check the “Manual Subscription” checkbox to add a newsletter subscription checkbox to your checkout form instead of automatically subscribing new customers.

This way, your customers will only join your newsletter if they check on the newsletter subscription checkbox.
Noptin allows you to set a custom checkbox message. In this example, I’ve set the message to “Add me to your newsletter and keep me updated whenever you publish new products”.

You can also change the position for the newsletter subscription checkbox.

The default behavior is to display the checkbox after the email field. However, the following positions are available.
- Email field – Display the newsletter subscription checkbox after the billing email input.
- Billing details – Displays the checkbox after the billing details.
- Shipping details – Adds the subscription checkbox at the end of the shipping details.
- Customer details – Displays the checkbox after all other checkout input fields.
- Order review – Adds a newsletter subscription checkbox after the WooCommerce order review section.
- Submit button – Displays a newsletter subscription checkbox before the checkout submit button.
- Order notes – Displays the checkbox after the order notes section.
Click on the save changes button after you’re done to save your changes.
That’s all.
From now on, whenever someone buys anything on your website…

… Noptin will add them to your newsletter subscribers’ list.
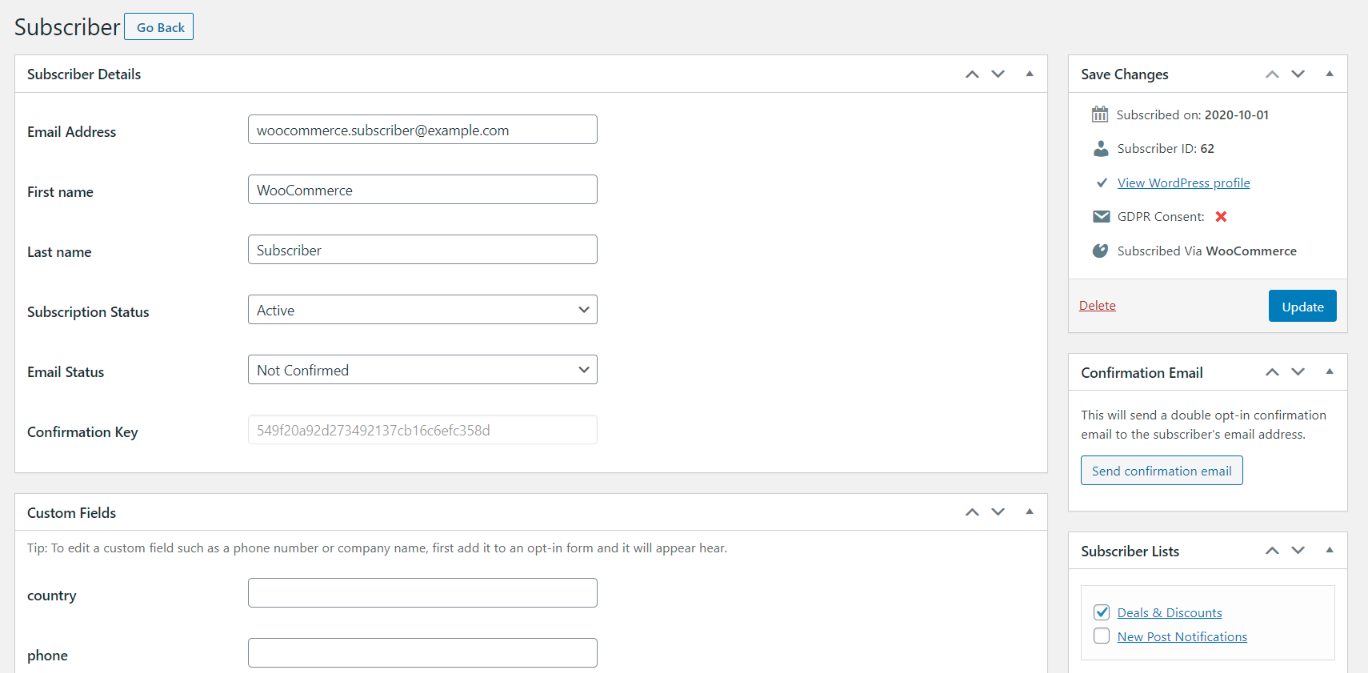
Setting Subscriber Lists
The Ultimate Addons Pack allows you to set the list where subscribers who sign up via the WooCommerce checkout page should be added.

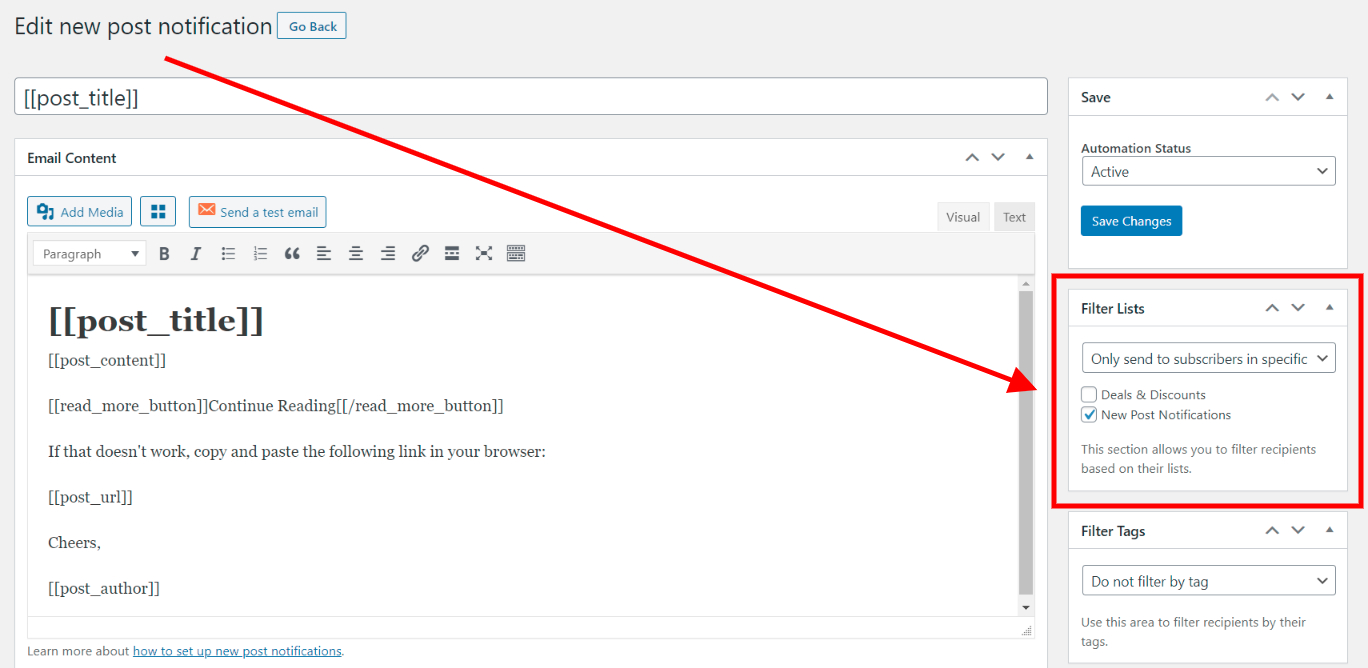
In the above example, you can set up new post notifications that should only be sent to subscribers in the “New Post Notifications” list.
Schedule a Series of Follow Up Emails
You can use the Ultimate Addons Pack to send your WooCommerce subscribers follow-up emails.
You can either schedule the emails to be sent out to all the people who subscribe via WooCommerce, or only those people who bought a specific product.


Leave a Reply