Have you ever wished you had several newsletter sign-up forms on different websites that all collected subscribers into a single newsletter list?
This guide shows you how to do that.
This is a premium feature.
To follow along with this tutorial, ensure you’ve installed the latest versions of both Noptin and the Ultimate Addons Pack on each website you would like to connect.
Step 1: Create a listener on the master site.
Open one of the sites and then create an automation rule that listens to incoming webhooks and creates or updates a subscriber.
To do this,
First, log into your site’s admin dashboard and then click on Noptin > Automation Rules to open the automation rules overview page…
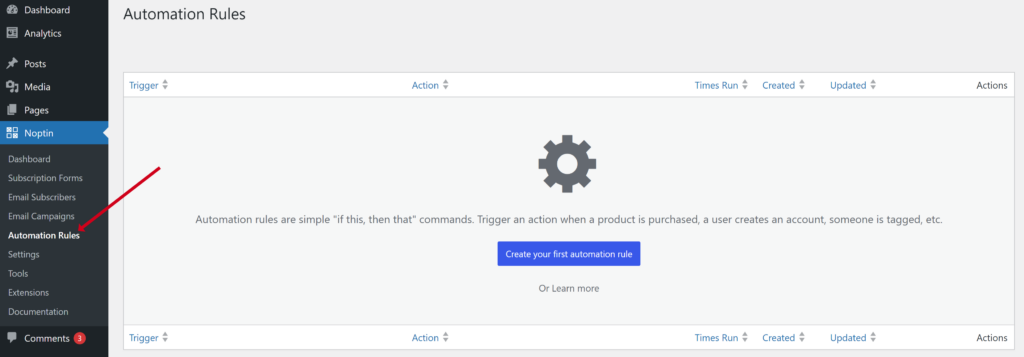
… and then create a new automation rule that creates/updates a subscriber whenever there is an incoming webhook.
Noptin will provide you with a secret URL for your webhook, but you can still set a secret verification key for added security. Feel free to use this random password generator to generate a secret verification key.
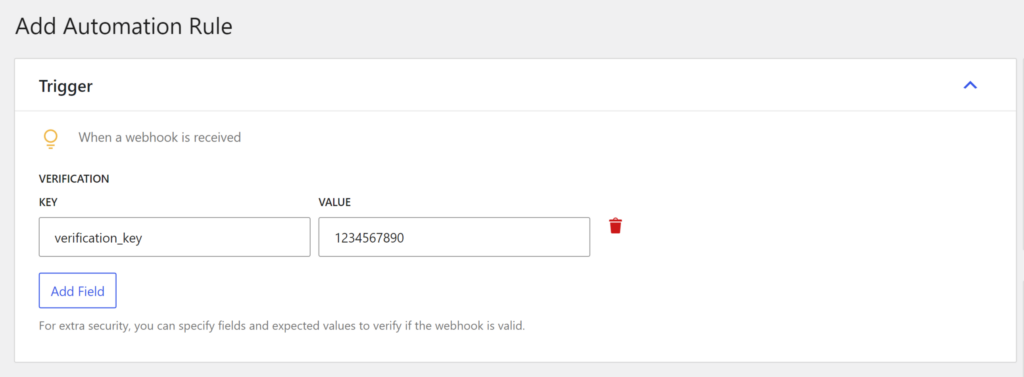
Next, map the subscriber fields as shown below and then save your automation rule.
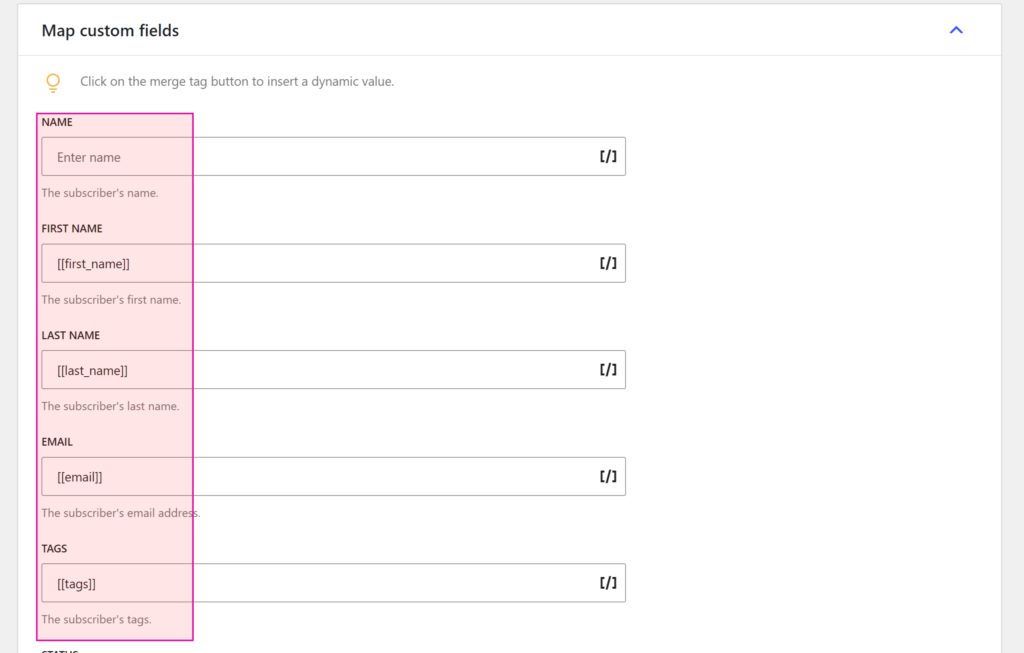
TIP:
The merge tags in the above screenshot won’t show when you click the merge tags button.
Don’t worry, we’ll provide them in step 2.
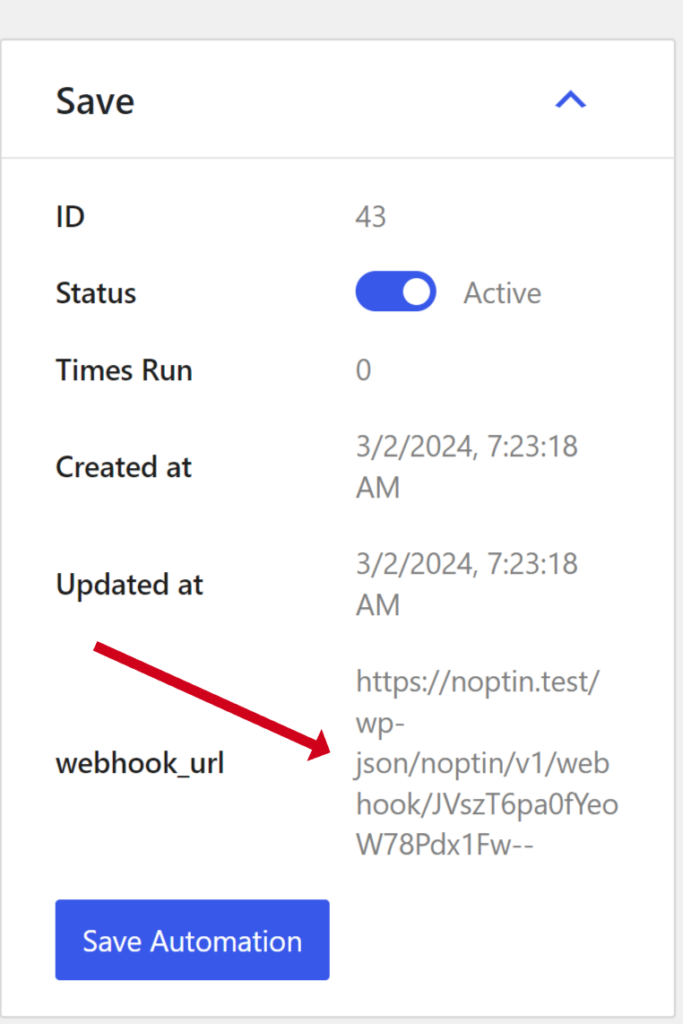
Noptin will save the automation rule and then reveal its secret URL. Copy it and head to the next step.
Step 2: Create outgoing webhooks on the external sites
The final step is to visit each website where you would like to sync subscribers and then create an automation rule to sync the subscribers.
To do this,
First, log into your site’s admin dashboard and then click on Noptin > Automation Rules to open the automation rules overview page…

… and then create a new automation rule that sends a webhook whenever a subscriber is created or updated.
Tip: Feel free to use any trigger.
For example,
You can create an automation rule that only sends the webhook whenever a subscriber confirms their email address.
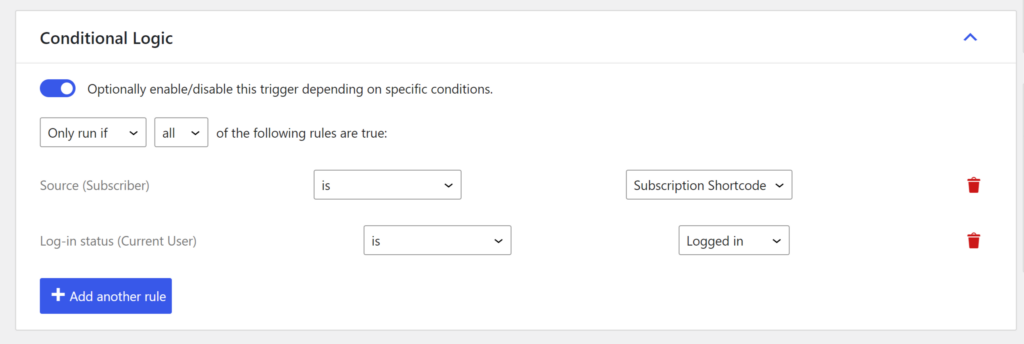
You can set up conditional logic if you want Noptin to only send the webhook when the specified conditions are met.
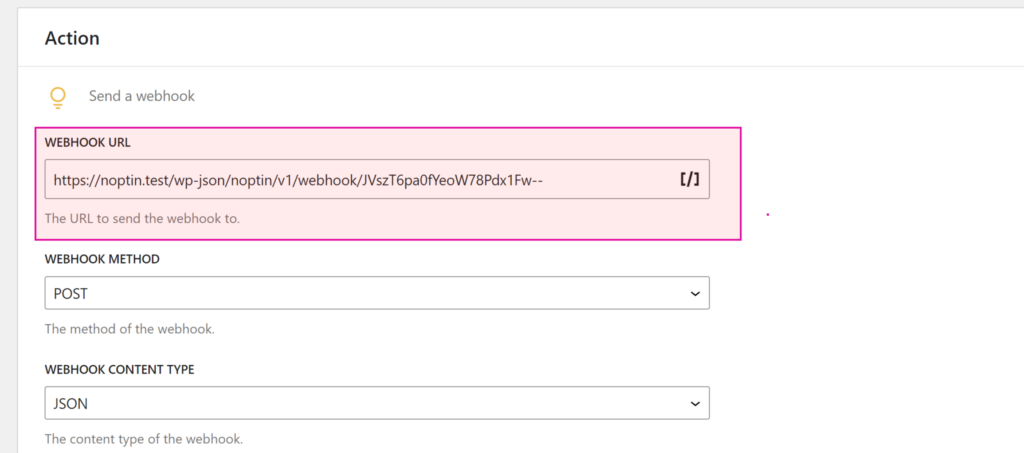
Next, paste the webhook URL that you copied in Step 1 into the “Webhook URL” field and then set the method and content type as shown below:-
Set up the webhook data
Click on the add button to add data to your webhook request as shown below.
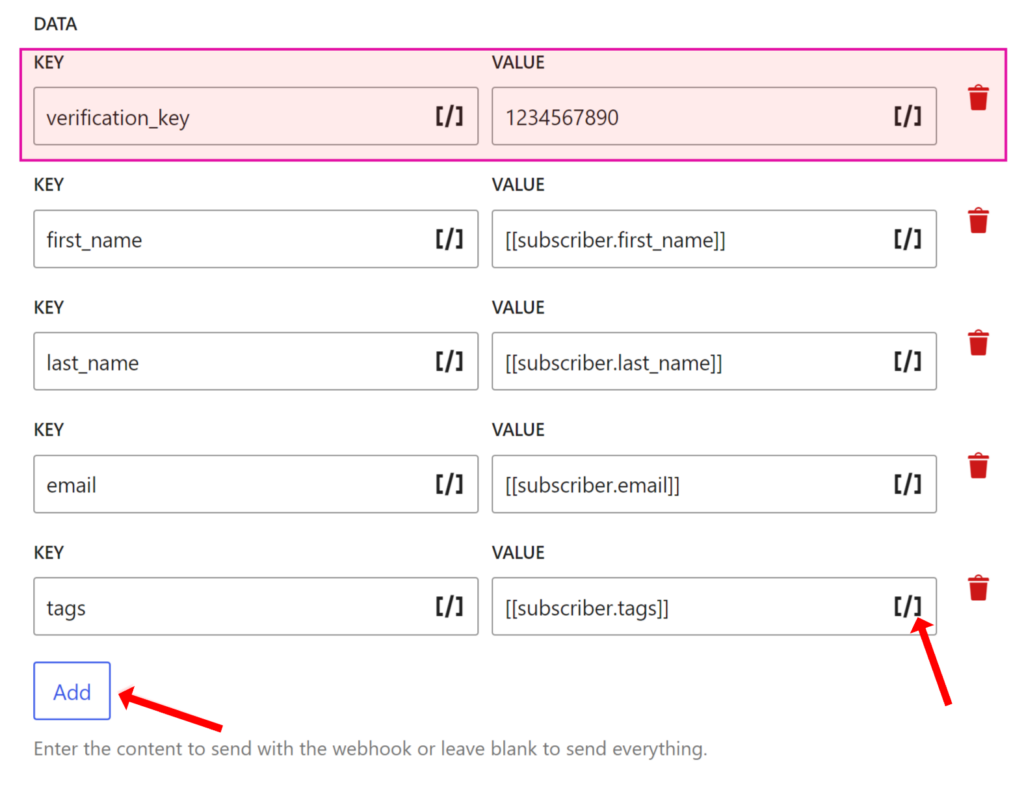
Tip 1: You must include all the verification details you specified in step 1.
Both the key and the value should match those that you used when setting up step 1.
Tip 2: Remember to provide all the merge tags that you used when mapping the custom fields in step 1.
For example,
If you set the subscriber’s name as [[first_name]], you need to add a field in step 2 that has first_name as the key.
You can always map the value in step 2 to a merge tag.
That’s all.
Save your automation rule and test to see if everything works well.
Note that the webhook won’t send if you save a subscriber’s data without changing anything.
What if your REST API requires authentication?
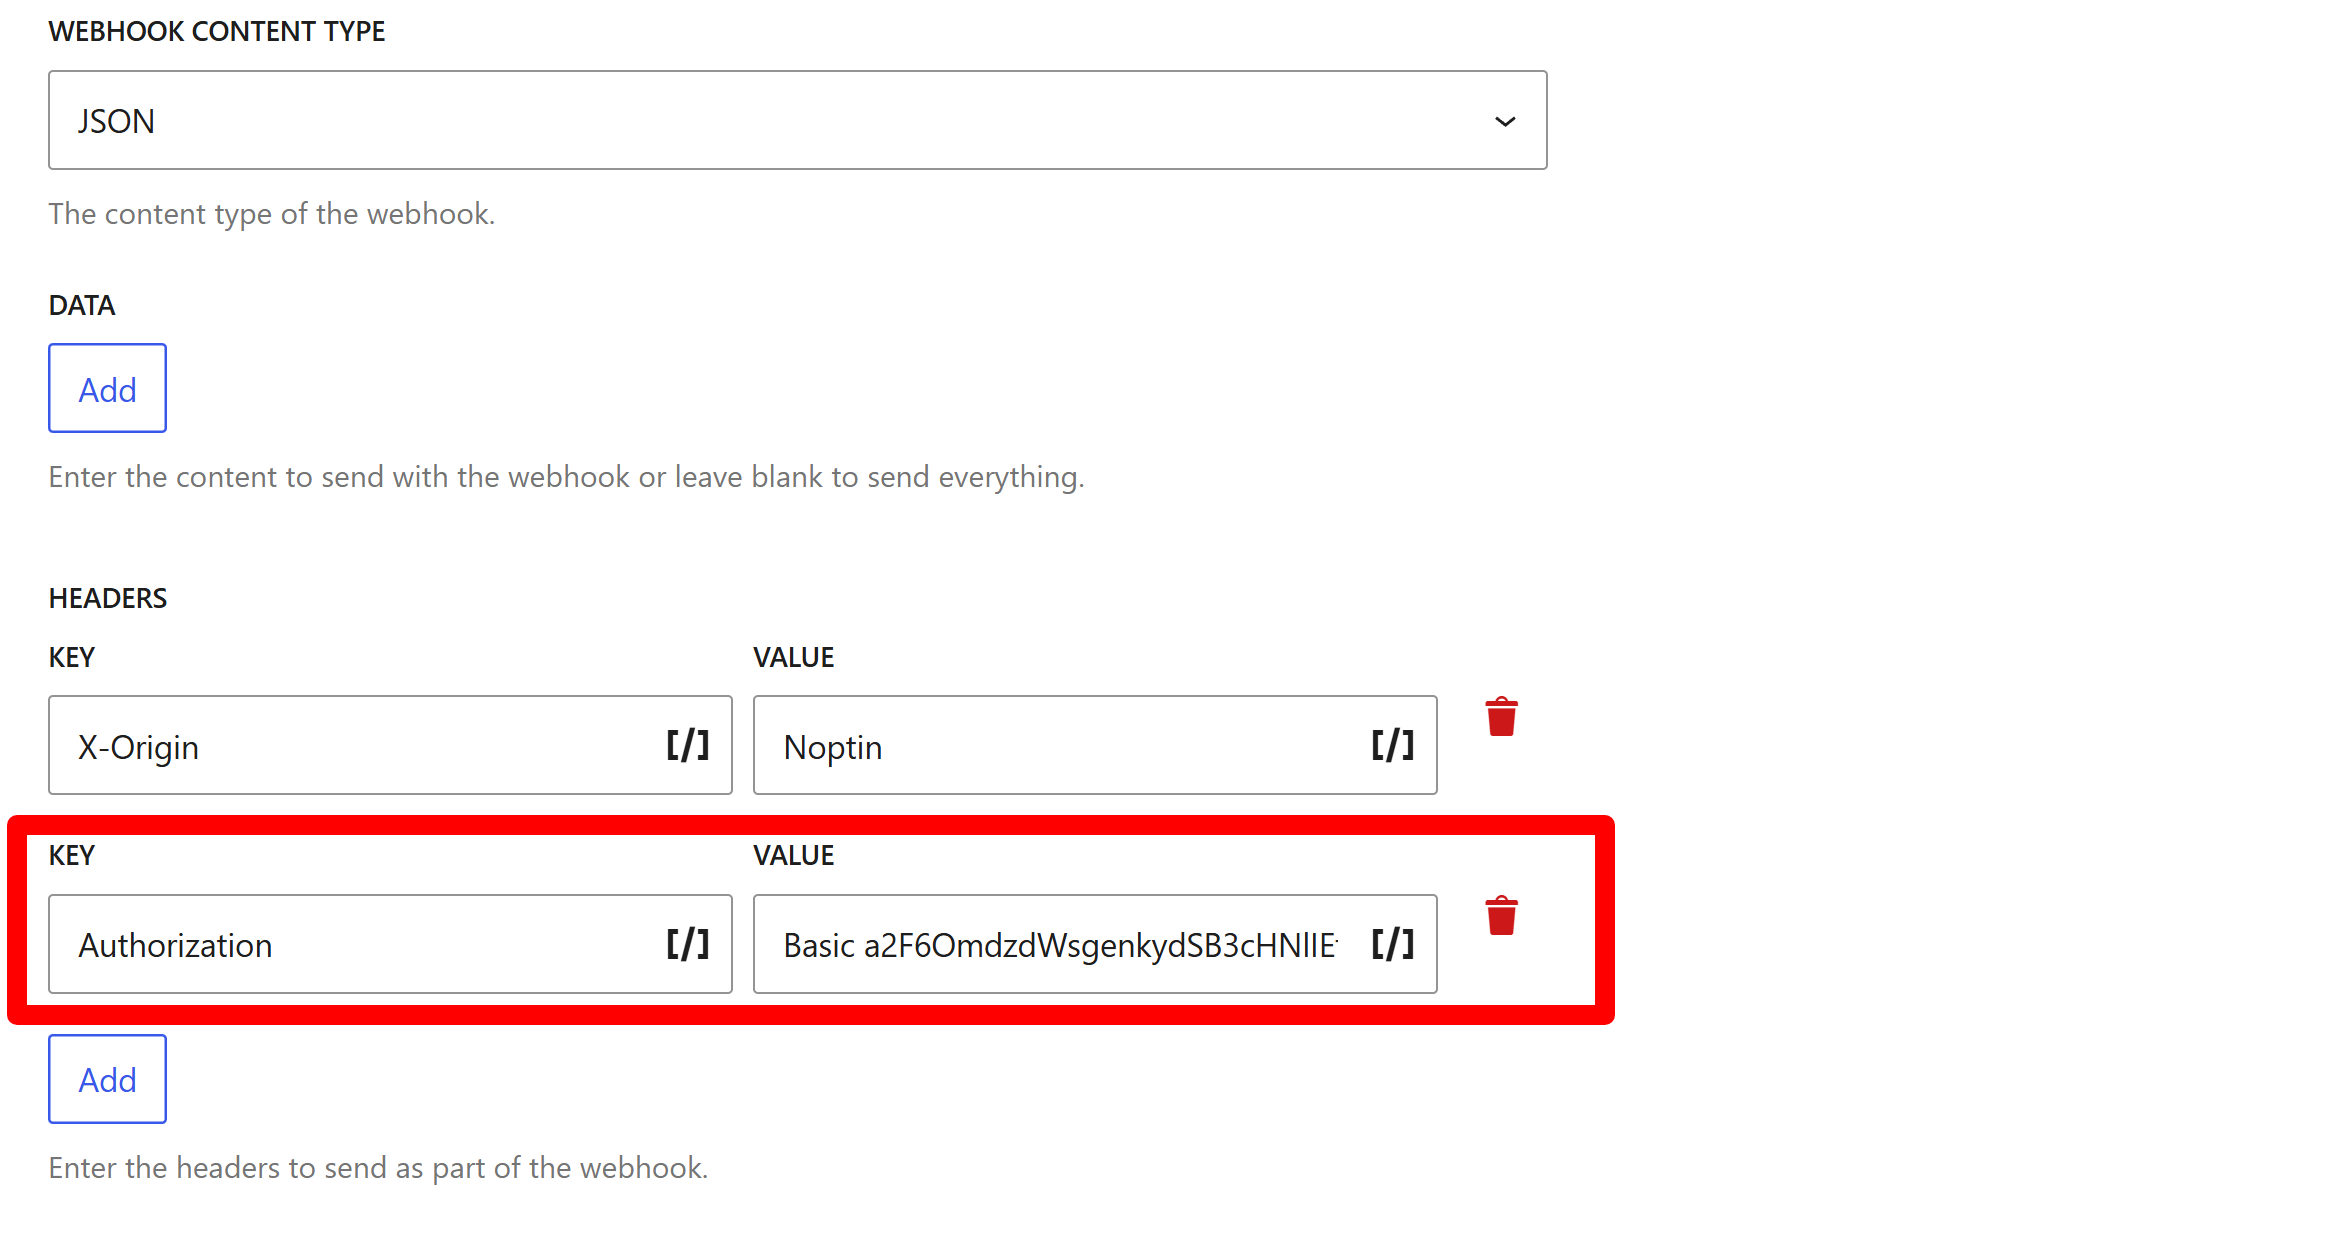
In this case, you need to add an authorization header to each of the external sites’ automation rules.
To do this,
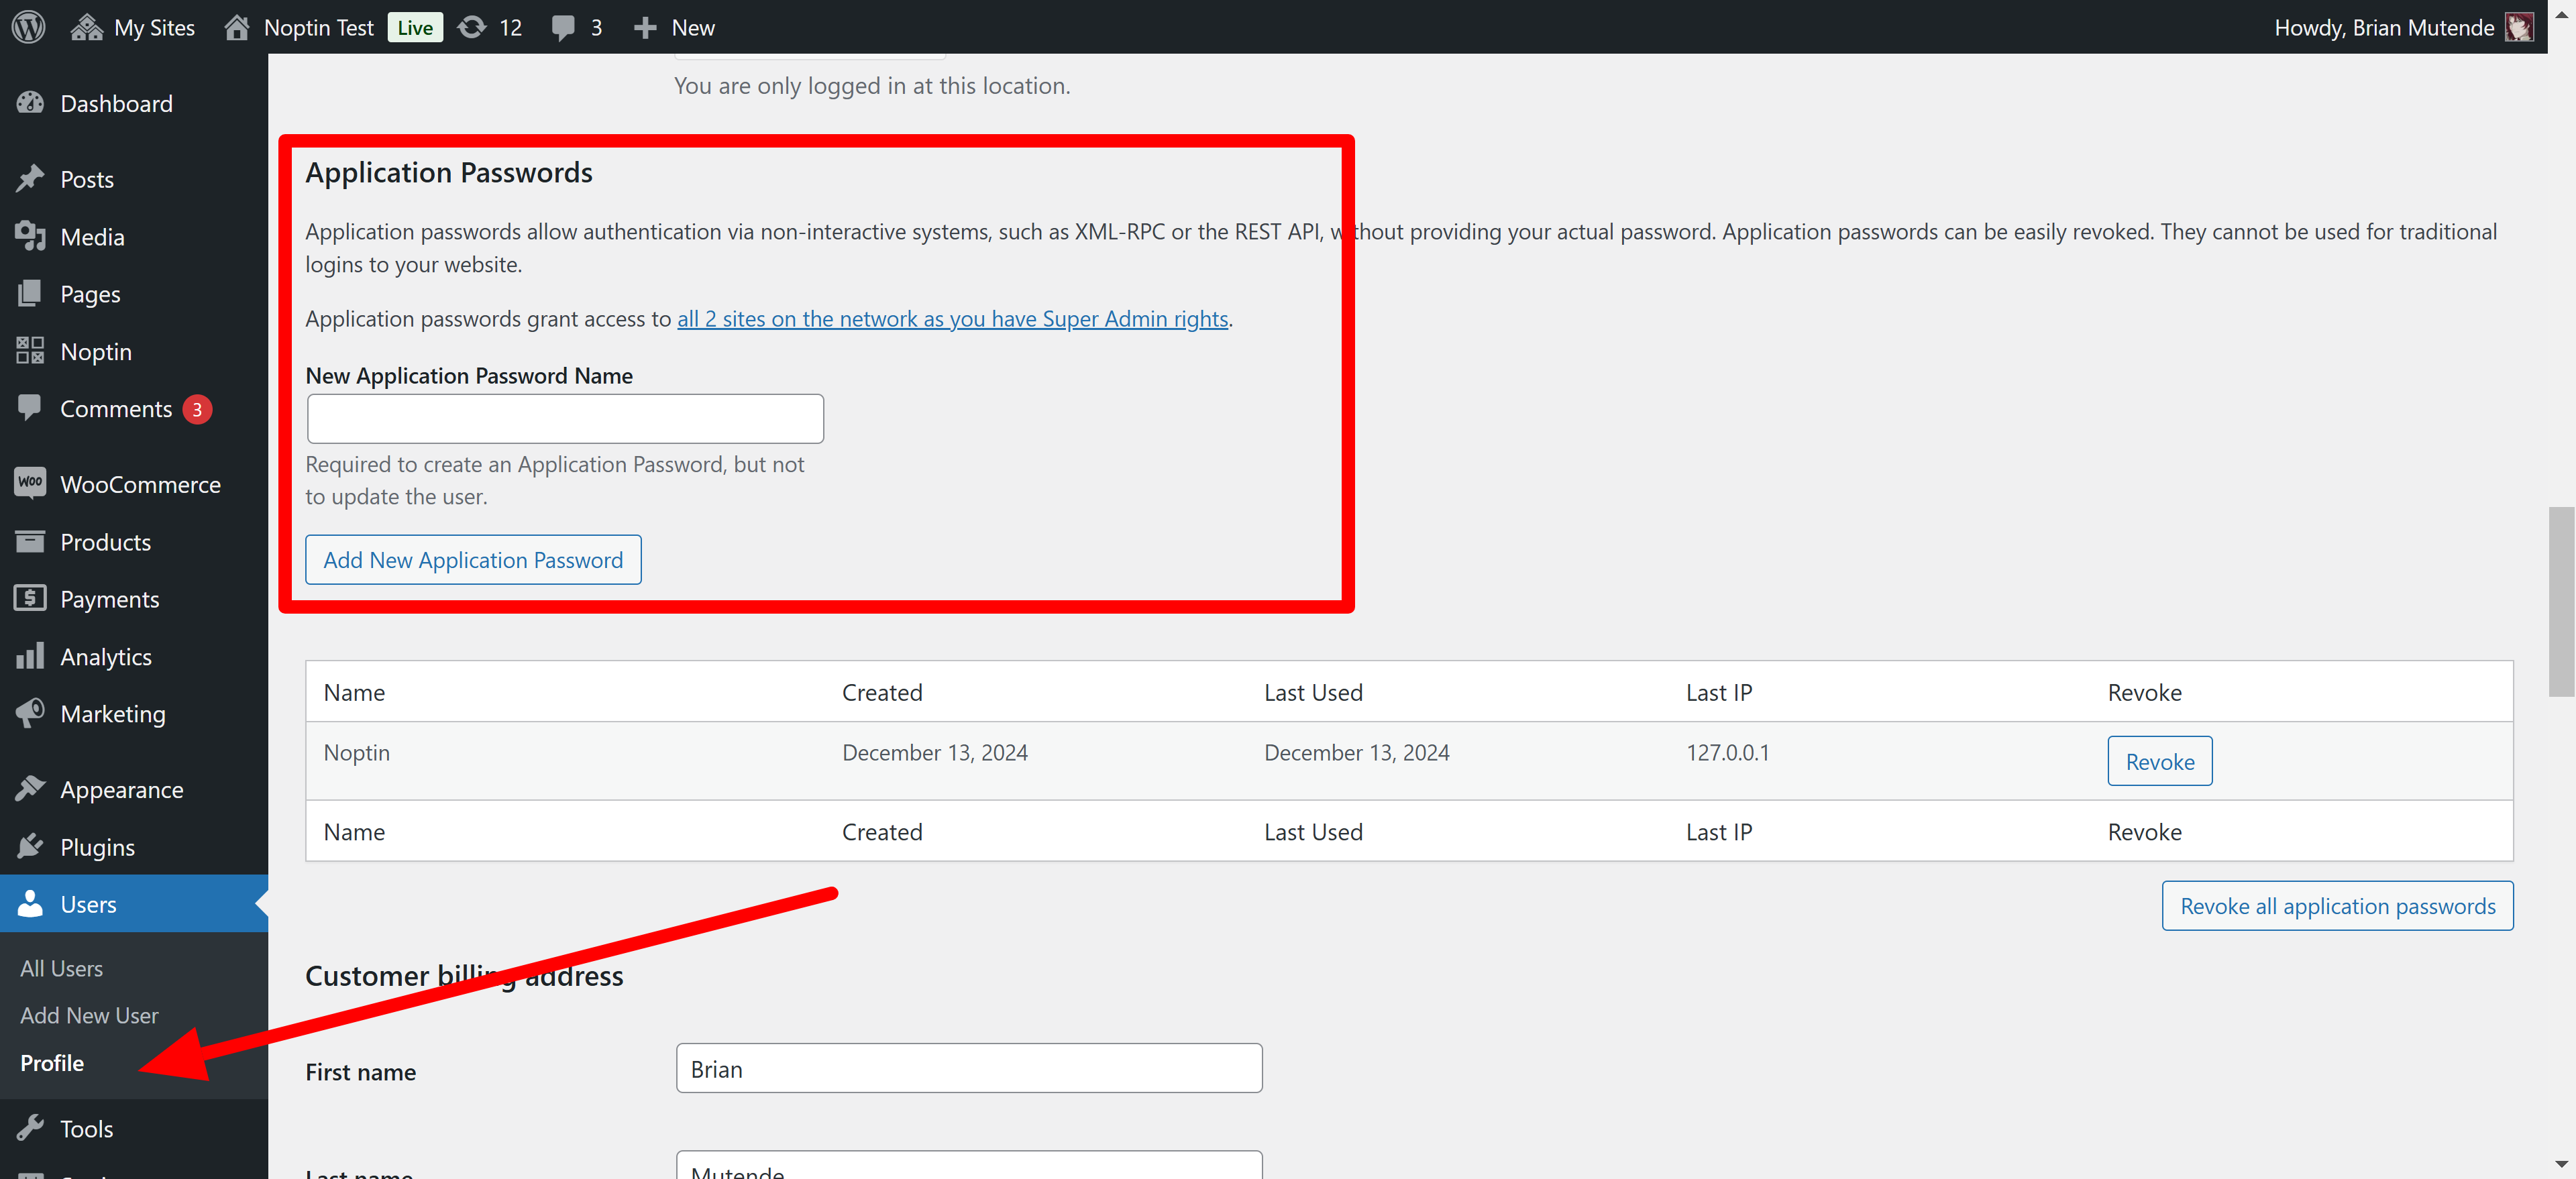
First, click open your “master” site’s admin dashboard and then click on Users > Profile to open your profile edit form.
Next, scroll down to the Application Passwords section and generate a new application password.
Once done, use an online tool such as the one below to base64 encode the username and password.
The username is your WordPress admin username, while the password is your new application password. If you aren’t sure, scroll to the top of your WordPress admin profile page to verify your username.
Header Key: Authorization
Header Value: Basic
Finally, open each of the external sites and add the generated authorization header as shown below:-
Leave a Reply