The Blocked status allows you to exclude specific email addresses from your subscriber list permanently.

Once you block a subscriber, they:

  • Cannot receive any future emails
  • Are hidden from default subscriber views
  • Will not be re-added by forms, integrations, or imports
  • Are protected from being resubscribed (even manually)

When Should You Use the Blocked Status?

Use the Blocked status if:

  • A subscriber repeatedly spams your list or resubscribes after deletion
  • You want to prevent known bots or spam traps from re-entering your list
  • A user requests permanent exclusion (e.g., under GDPR or CCPA)
  • You need to suppress an email address without deleting its history

How to Block a Subscriber

You can block a subscriber in the following ways:

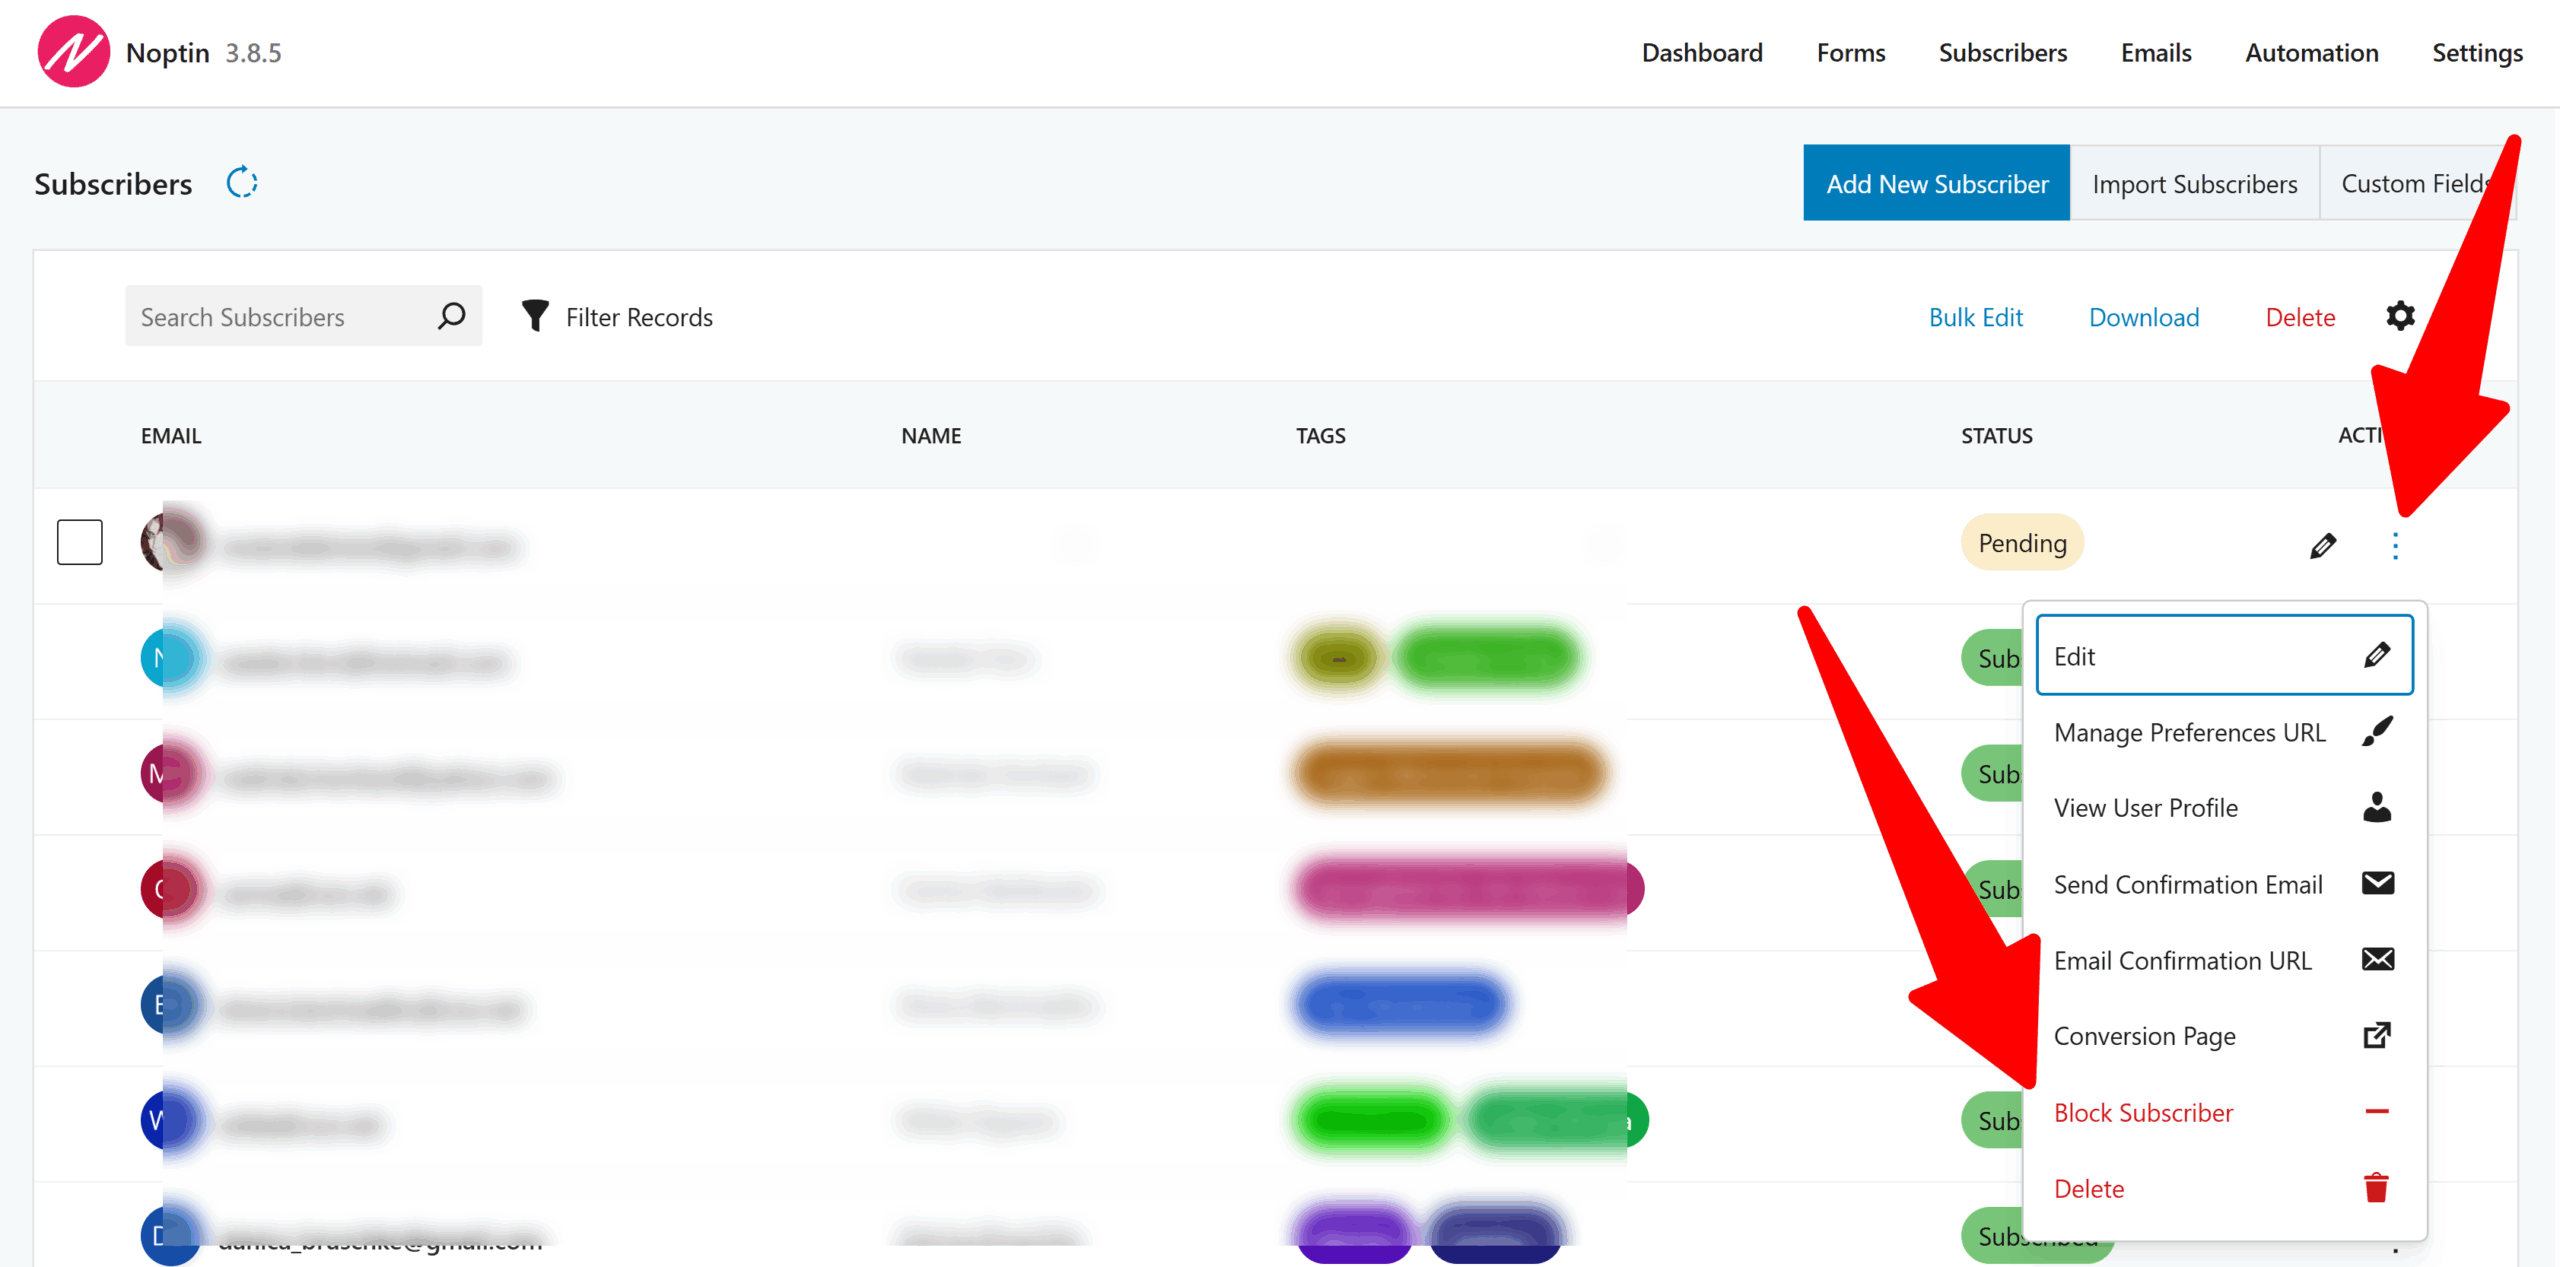
From the Subscriber List:

  1. Go to Noptin → Subscribers
  2. Hover over a subscriber
  3. Click “Block Subscriber” (available under the “More Actions” menu)
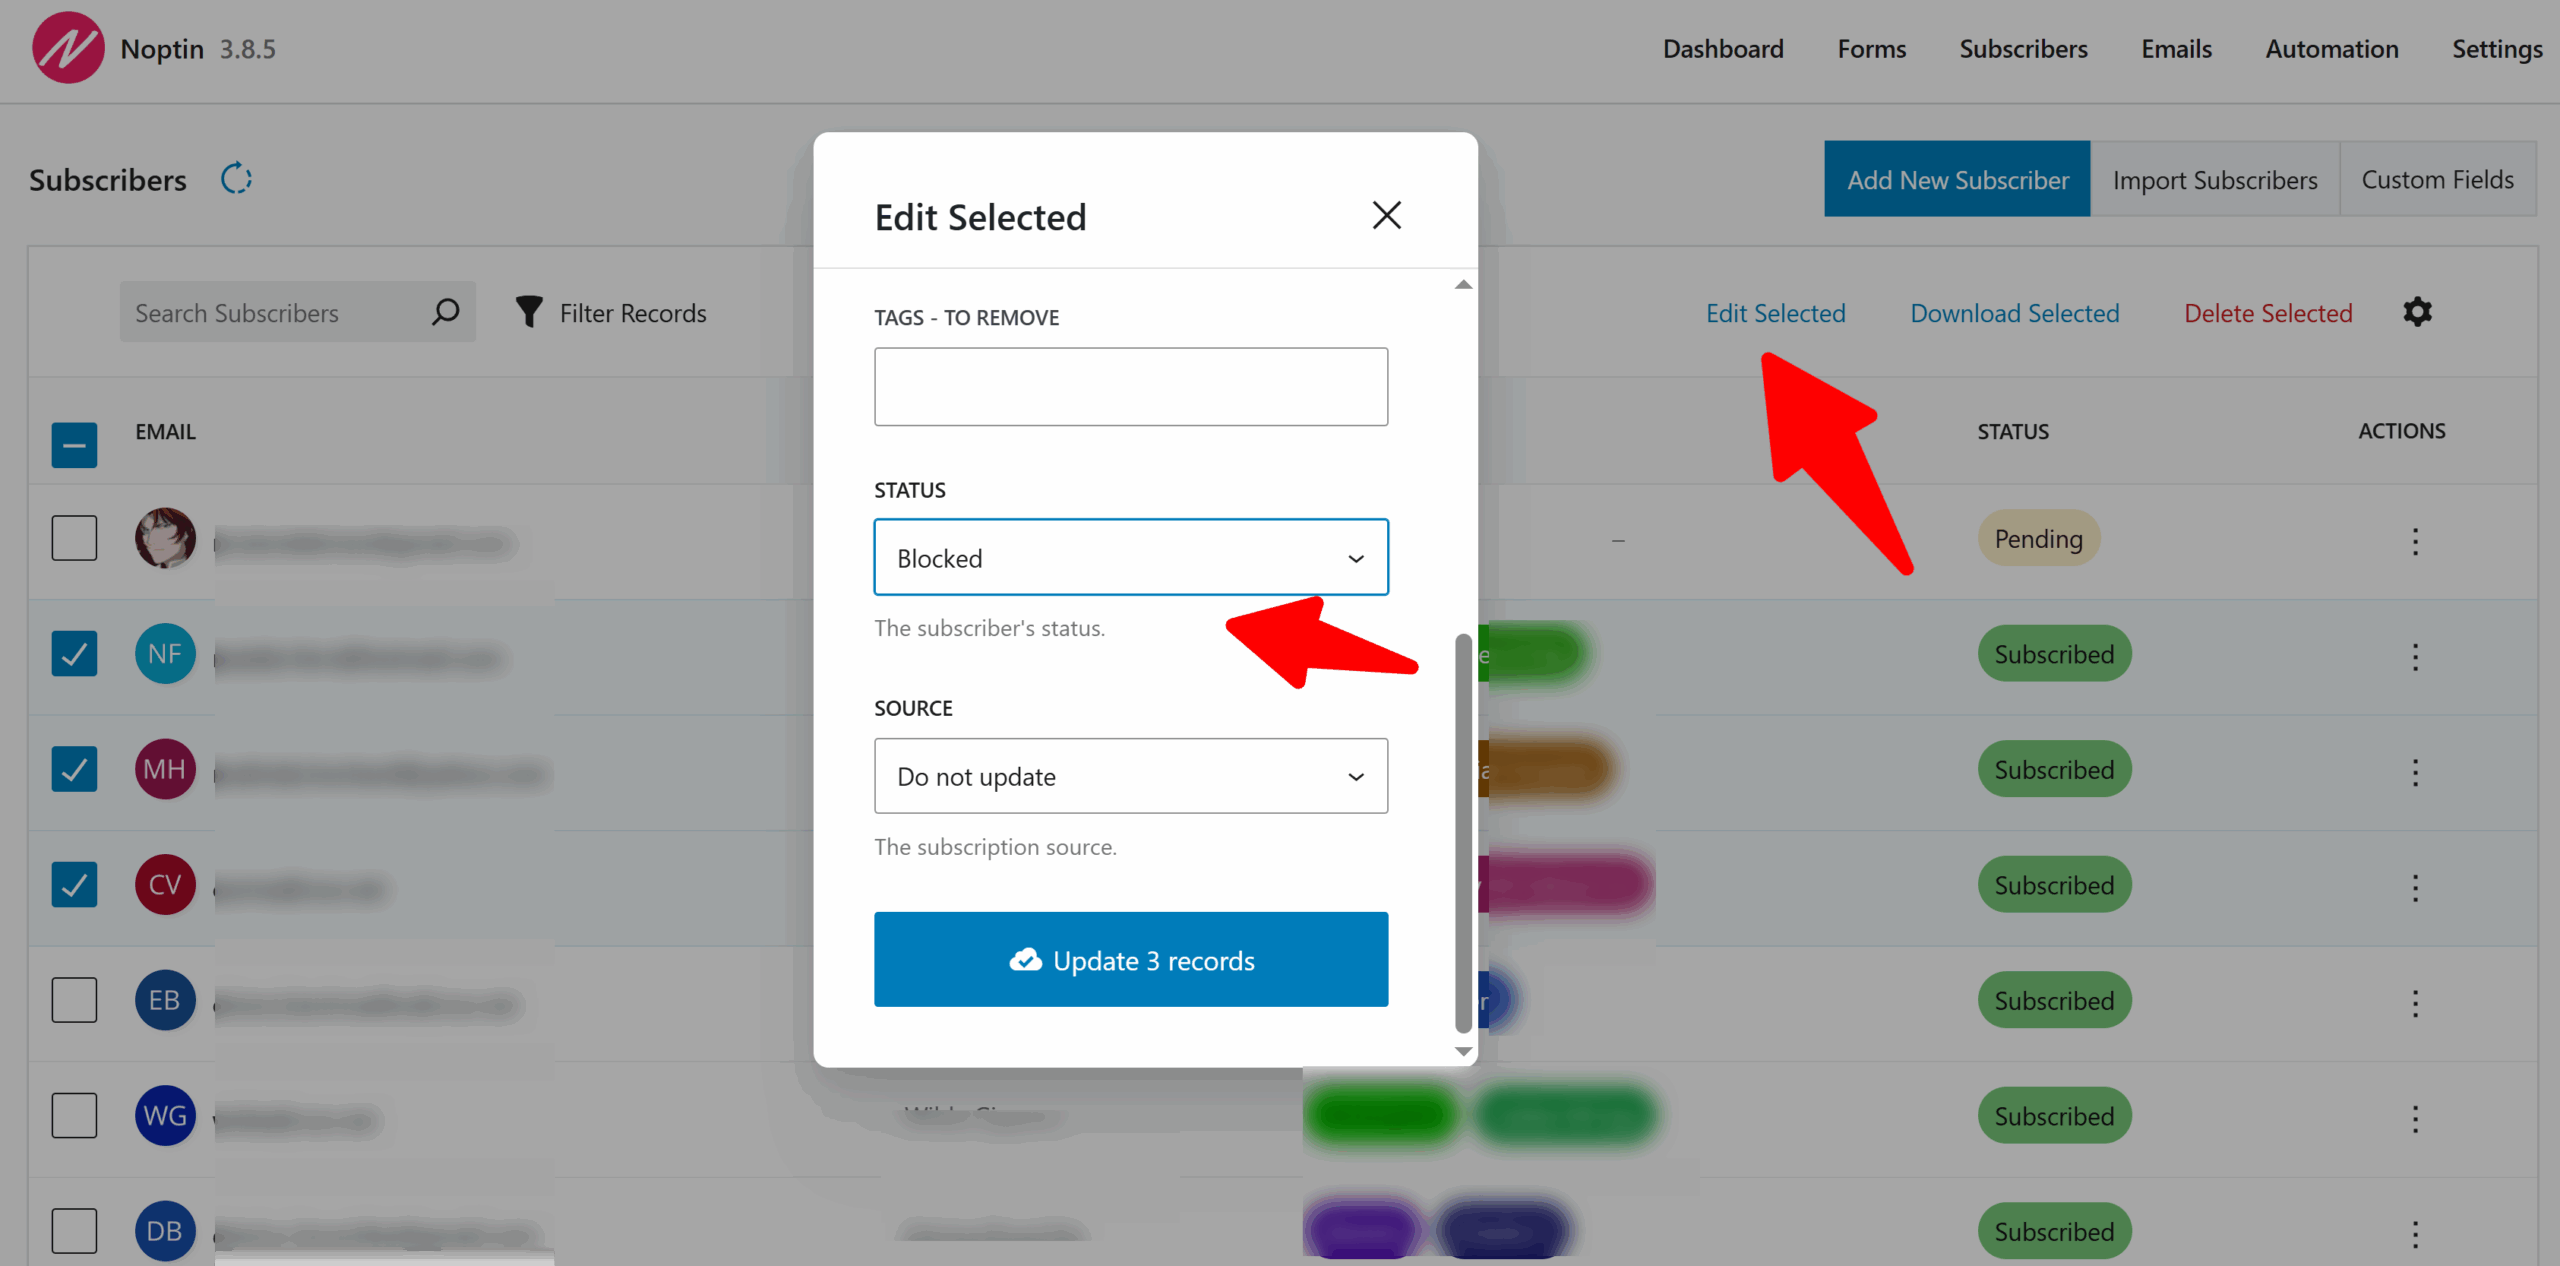
Block a single subscriber in Noptin

In Bulk:

  1. Select multiple subscribers
  2. Click on the “Bulk Edit” action button.
  3. Set their status to “Blocked“.
block multiple subscribers noptin

Can I unblock a Blocked Subscriber?

Yes. You can unblock a subscriber at any time.

Filter your subscribers list to show blocked subscribers, then use the “More Actions” menu to unblock a specific subscriber.

unblock subscriber noptin

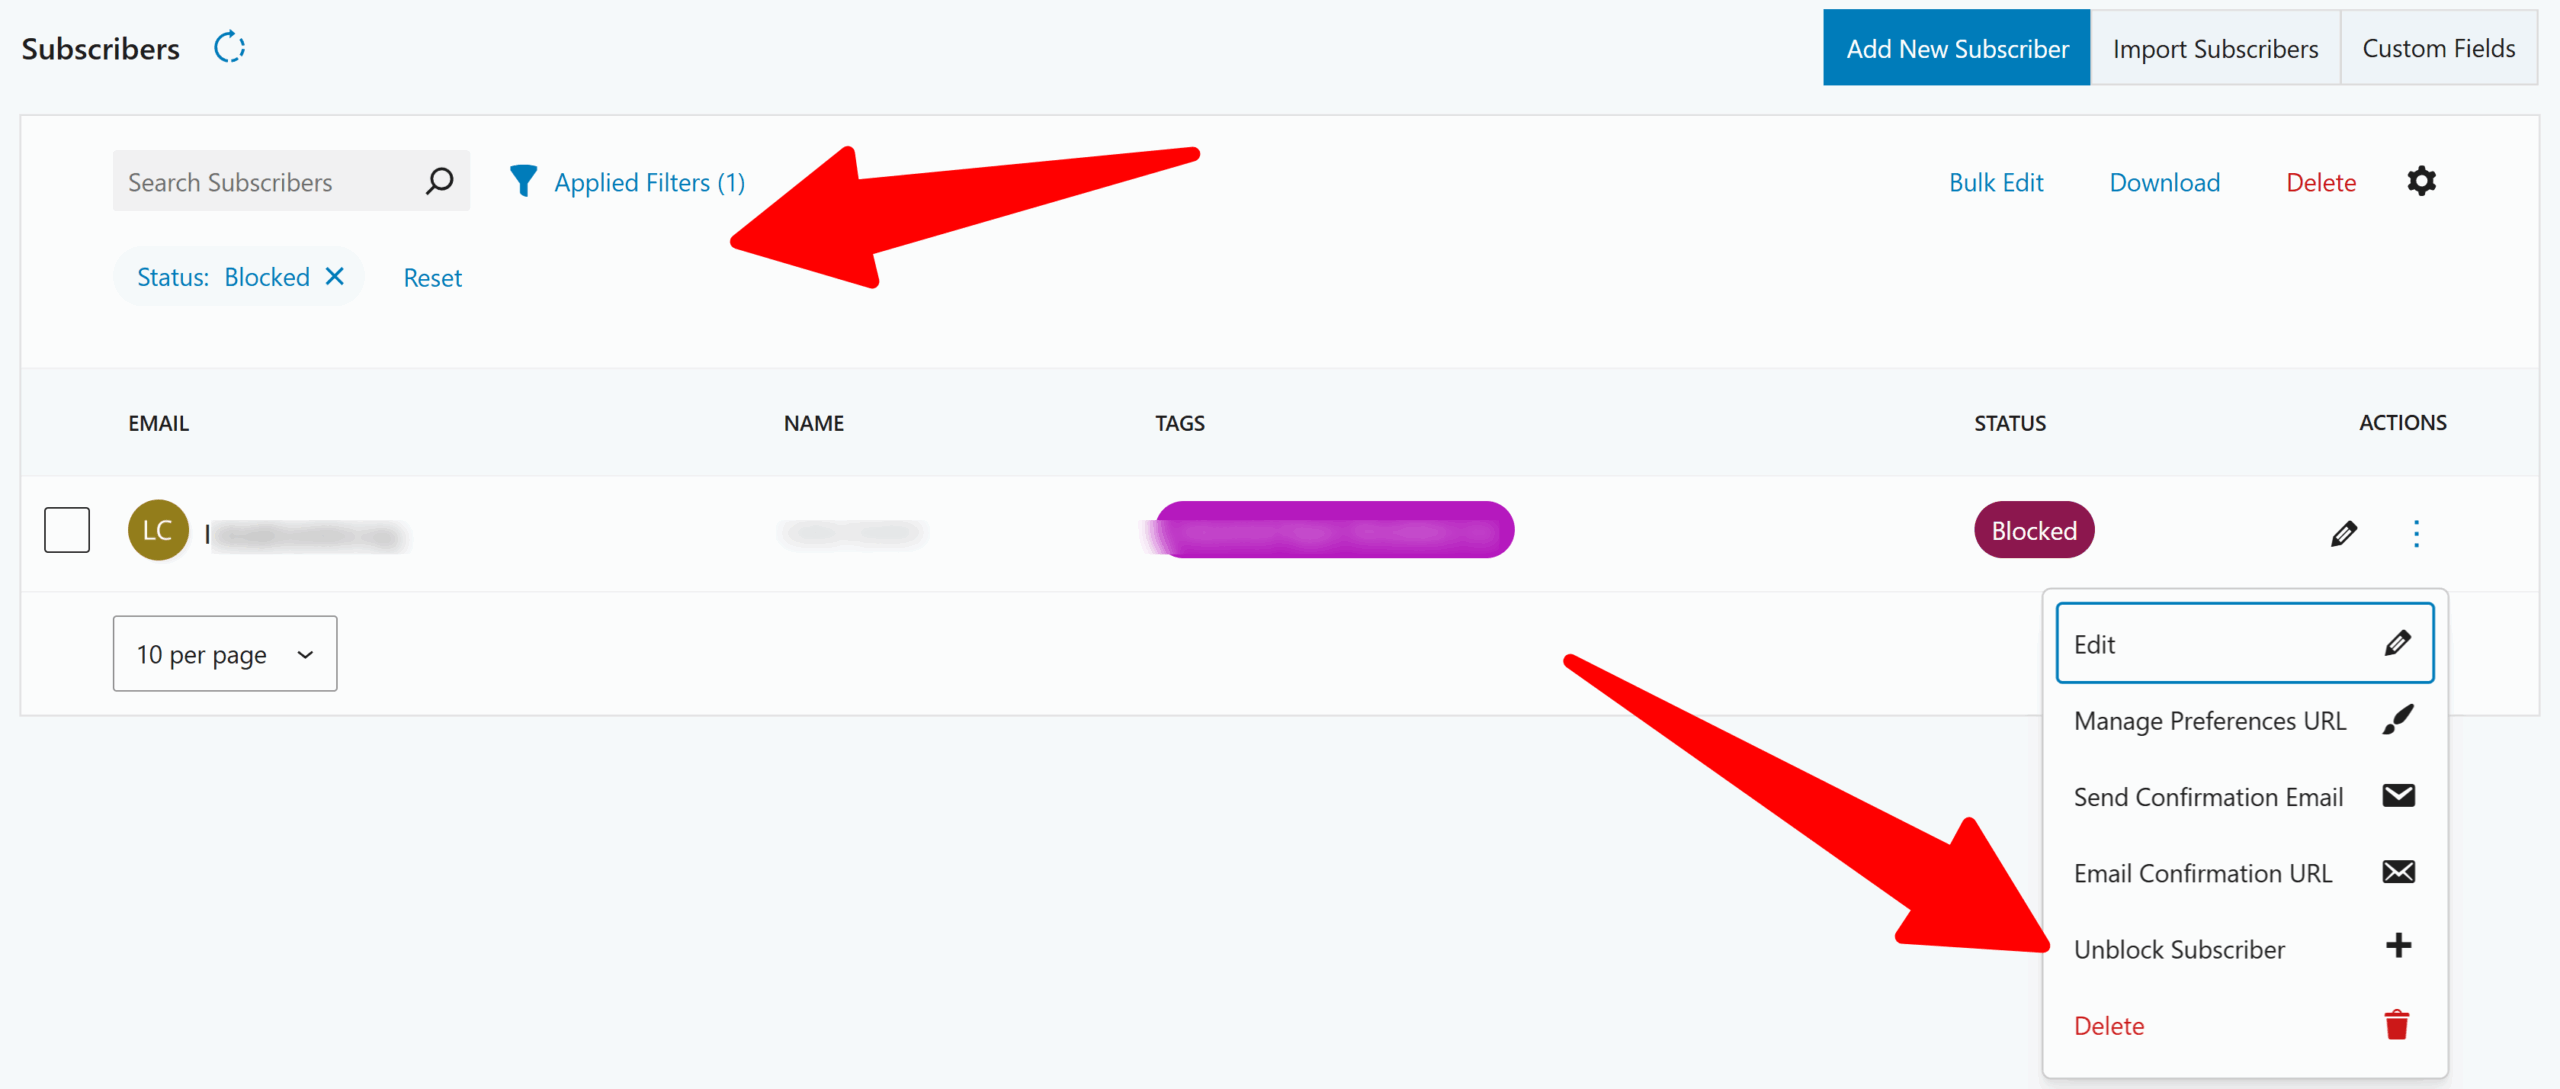
This restores the subscriber and allows them to receive emails again.

TIP:

You can select multiple subscribers and then use the bulk edit button to change their status.

Notes

  • Noptin preserves blocked subscribers in the database for historical and reporting purposes.
  • Import and form submissions will silently skip blocked emails.
  • Automations that include blocked subscribers as triggers or conditions will not execute.
  • Noptin will exclude blocked emails from all email communications, regardless of origin. This includes WooCommerce or EDD integration emails.

Related Guides

  • Bounce Handling

    How to automatically delete subscribers who bounce or report your emails as SPAM

    Read More

  • Sync Subscribers

    Have you ever wished you had several newsletter sign-up forms on different websites that all collected subscribers into a single newsletter list? This guide shows you how to do that. Step 1: Create a listener on the master site. Open one of the sites and then create an automation rule that listens to incoming webhooks…

    Read More

  • Custom Fields

    One of the most powerful features of Noptin is its support for custom fields. You can use custom fields to store more information about your subscribers (such as their phone numbers and birthdays). This guide shows you how to create and edit custom fields. Creating Custom Fields To create a new custom field:- First, visit…

    Read More

  • Importing Subscribers

    Learn how to import subscribers from another system into Noptin.

    Read More

  • Subscriber Lists

    Subscriber lists allow you to categorize your subscribers, similarly to how you use normal categories in WordPress. You can set lists in such a way that subscribers can only be on a single list at a time or multiple lists at the same time. Unlike tags, subscribers can select their own lists either on the…

    Read More

  • Tagging Subscribers

    Learn how to manually or automatically tag or untag subscribers based on how they signed-up and the actions they take on your site. You can then filter email recipients by tags

    Read More

  • Double Opt-in

    This guide shows you how to enable double opt-in and how to edit the double opt-in email. Double opt-in means that subscribers will not receive any marketing emails unless they confirm their email addresses.

    Read More

  • Unsubscribing

    To comply with the CAN-SPAM act and other anti-spamming laws, Noptin allows you to add the [[unsubscribe_url]] merge tag to your emails to give your subscribers a way to unsubscribe from your newsletter. This is added by default to your newsletter’s footer text. You can, however, add it anywhere in the emails you send. Customizing…

    Read More

  • Welcome New Subscribers

    74% of your subscribers expect a welcome email after they sign up for your email list. Invespcro A welcome email is the first email that you send to your subscribers after they sign up for your email list. To set up a welcome email:- First, click on Noptin > Email Campaigns > Automated Emails to…

    Read More

  • Automatically delete non-confirmed subscribers

    If you’ve enabled double opt-in, you can set up an automation rule that automatically deletes any subscriber who does not confirm their email address after a certain period. To do this:- First, open your admin dashboard and then click on Noptin > Automation Rules to open the automation rules overview page. Next, click the “Add…

    Read More

  • Bulk-delete newsletter subscribers

    Noptin allows you to bulk delete your newsletter subscribers. You can delete all your subscribers or filter them by:- This is useful, for example, if you have a comma-separated list of bounced emails and need to bulk-delete all of them. To do this:- First, open your admin dashboard and then click on Noptin > Email…

    Read More

  • Exporting Subscribers

    How to download your subscribers or only a segment of your subscribers.

    Read More

  • Hiding Forms From Existing Subscribers

    It’s annoying when you keep displaying newsletter subscription forms to your existing email subscribers. To hide the forms from existing subscribers:- Open the Noptin settings page and toggle the “Hide From Subscribers” switch. That’s all! Your existing email subscribers will no longer see any subscription forms, checkboxes, or popups. However, subscribers that you imported from…

    Read More

  • Manage Subscription Preferences

    Create a manage preferences form where subscribers can unsubscribe (or resubscribe) from your newsletter or update their subscription details.

    Read More

  • Notify the site admin when there’s a new subscriber

    This guide shows you how to notify the site admin whenever there’s a new subscriber. We’ll use automation rules to achieve this.

    Read More

  • Collecting Secondary Email Addresses

    It is possible to let your subscribers add a secondary email address and send newsletters to both email addresses. To do this, First, create a custom field for the secondary email as shown below:- Next, add the following PHP code snippet to your site.

    Read More

  • How to Retrieve and Restore Your Subscribers from a cPanel Backup

    We recommend that you export your subscribers before installing a major update. This way, you can always re-import the subscribers if anything goes wrong. This tutorial shows you a workaround you can use to import your subscribers in case you forgot to export your subscribers. Step 1: Access cPanel and Open phpMyAdmin Step 2: Locate…

    Read More