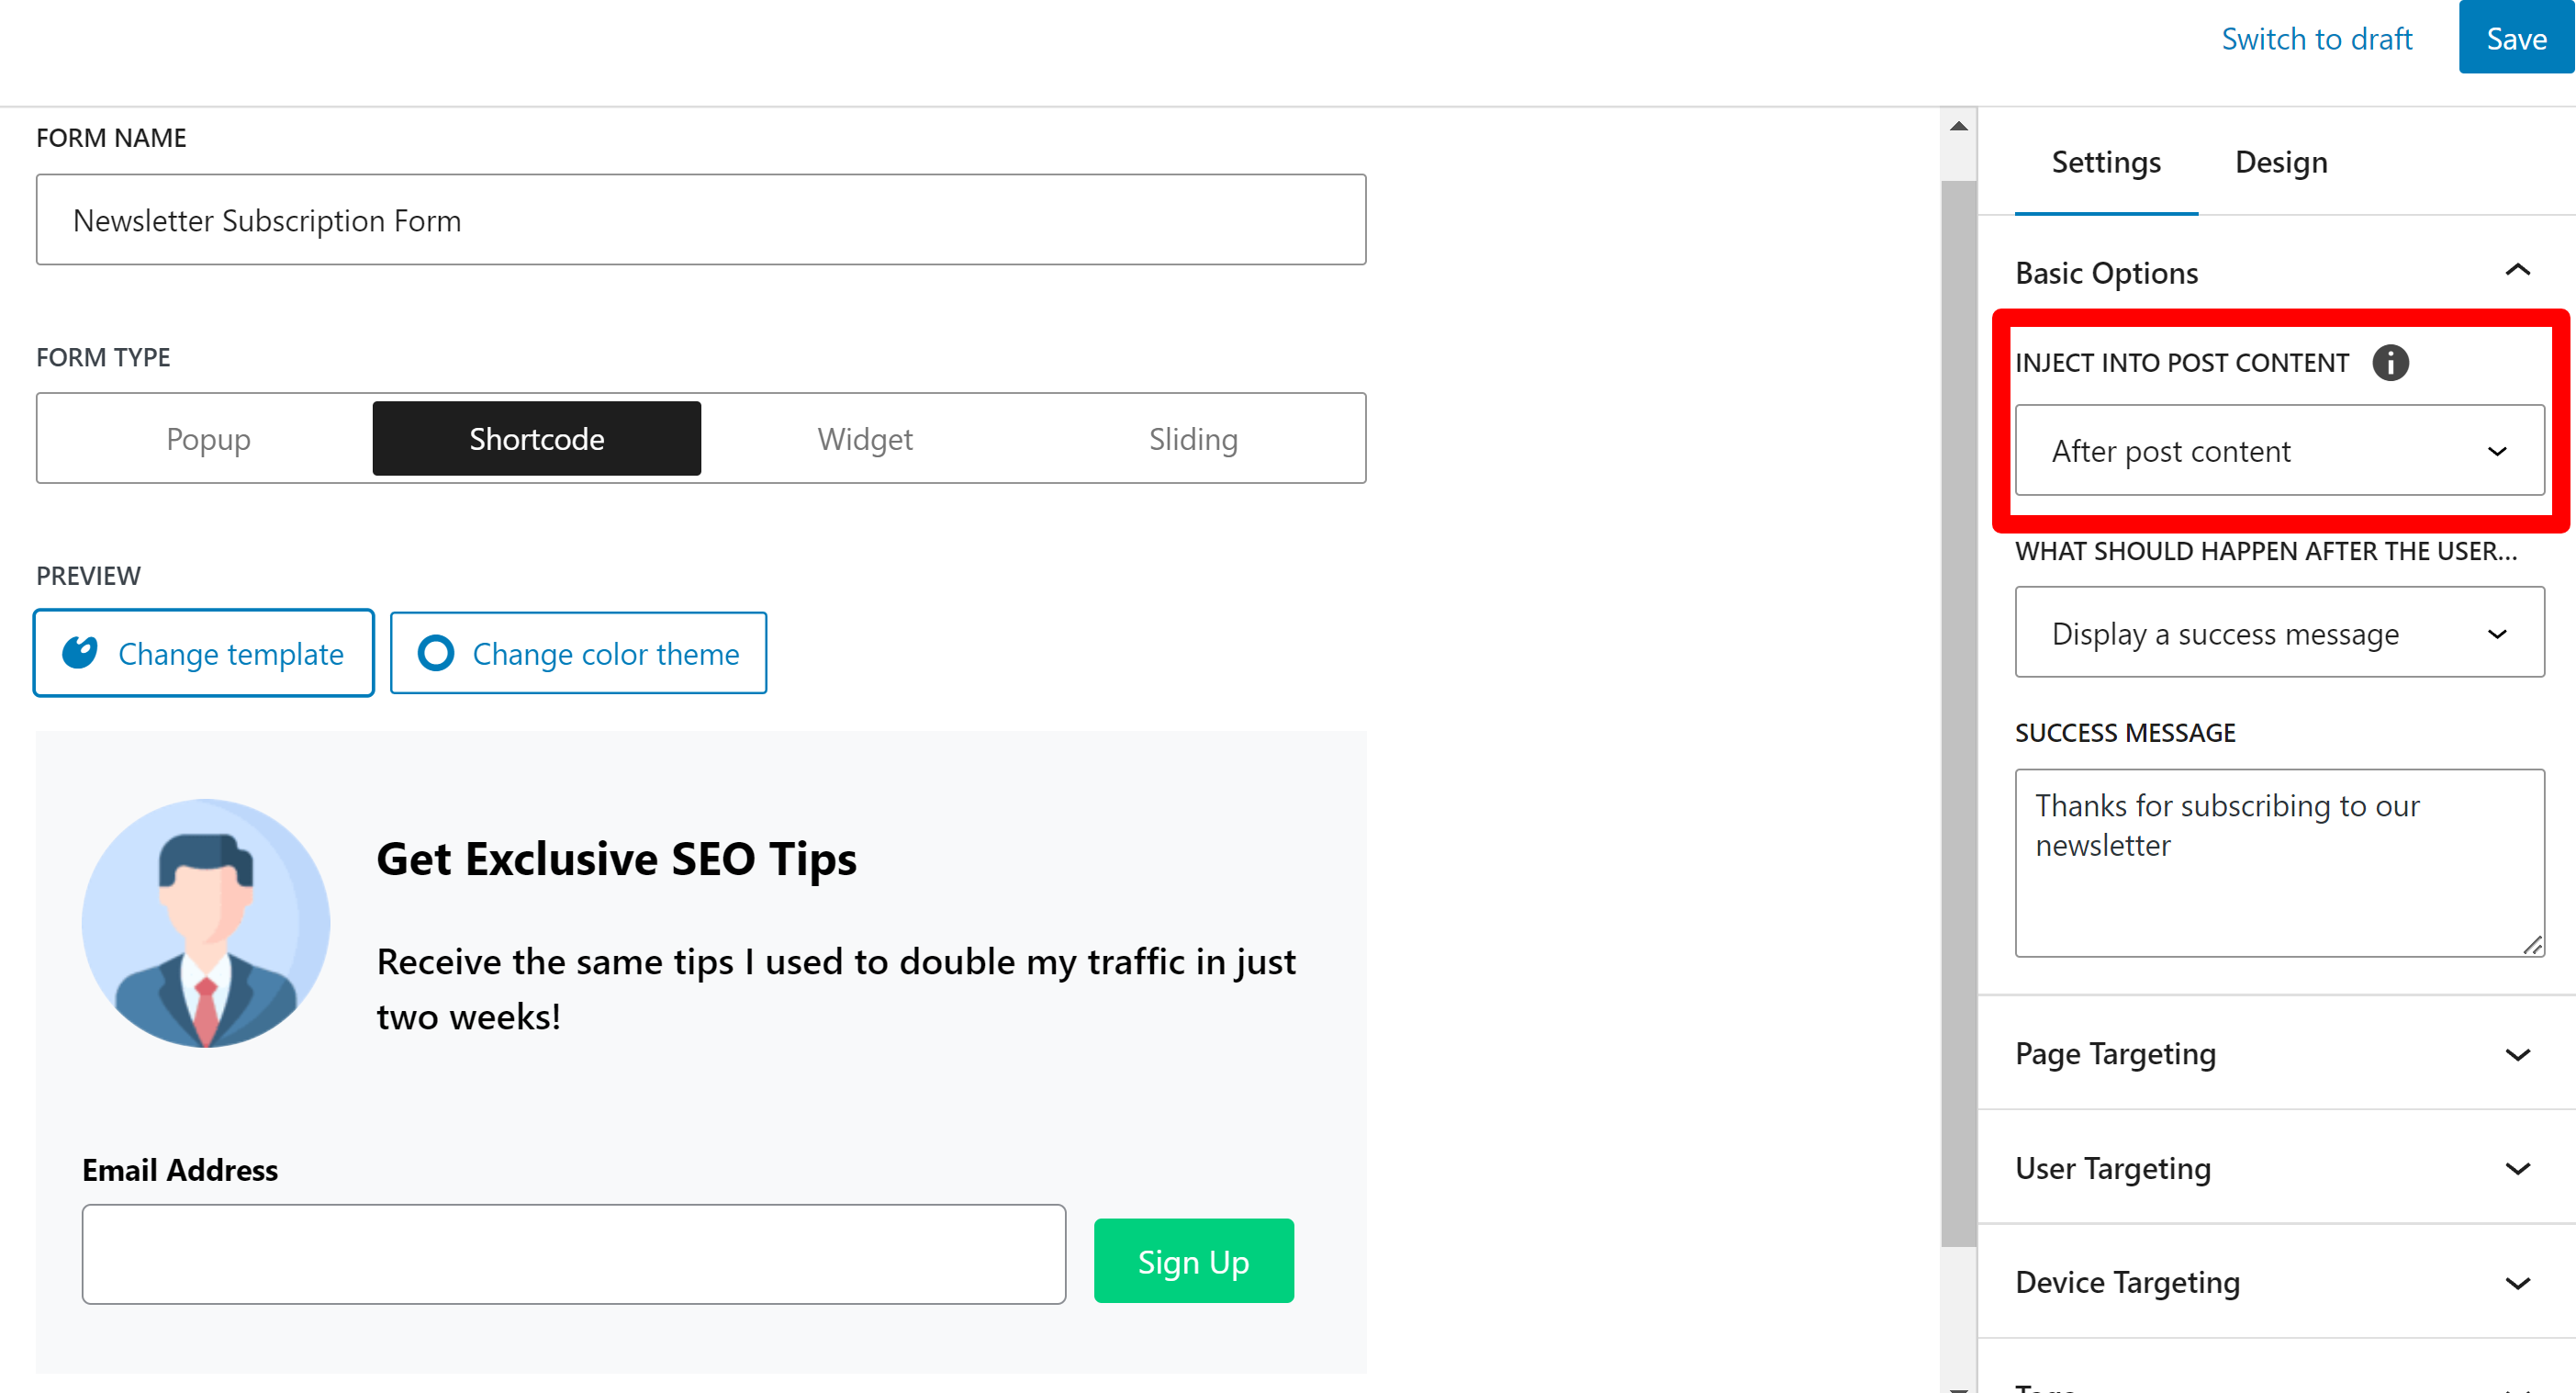
This guide shows you how to create newsletter subscription forms using our form builder.
The form builder gives you complete control over how and where each form is displayed.
For example,
You can use the form builder to translate a newsletter sign-up form using Polylang or WPML …

… or automatically display forms created using the form builder after each blog post or other post type.
Using the form builder is completely optional. If you would rather not use it, Noptin has a default subscription form that you can display using a shortcode, widget, or Gutenberg block.
To create a new subscription form:-
First, open your WordPress admin dashboard and click on “Noptin Newsletter > Subscription Forms” to open the forms overview page.
Next, click the “Add New” button to create a new subscription form.

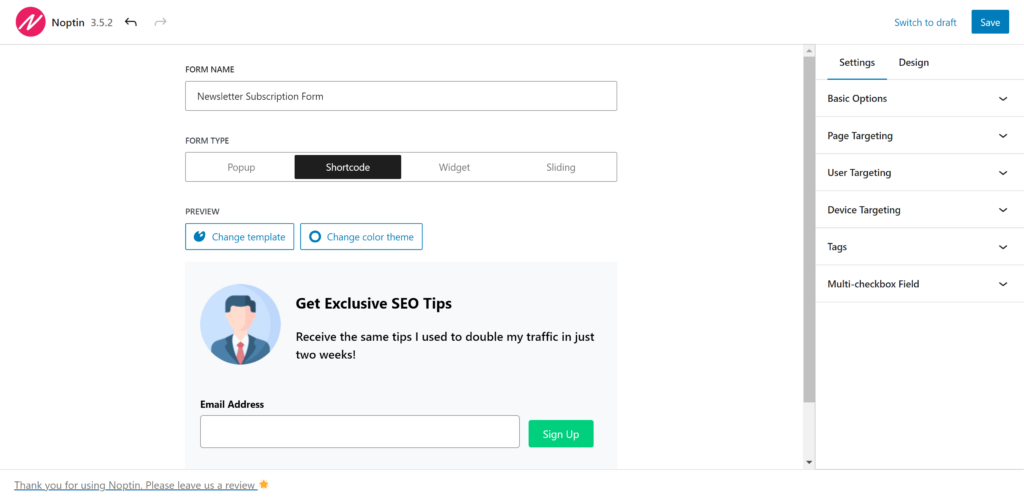
Noptin will open your form in the form editor.
Using the Form Editor
First, give your form a name…

… and then select the form type.

- Popup forms: These suddenly appear on top of the page you’re viewing. They’re hard to miss!
- Sliding forms: These smoothly slide into view from the side or bottom of the page. They’re less intrusive than pop-ups.
- Widget forms: These are small signup boxes that stay in one place on your website, often in the sidebar or footer.
- Shortcode forms: These are forms you can place anywhere in your content, like inside a blog post or on a specific page.
Each type has its own way of catching visitors’ attention and asking them to sign up for your newsletter.
Once you’ve selected the form type, go ahead and select a template and color theme for your form.
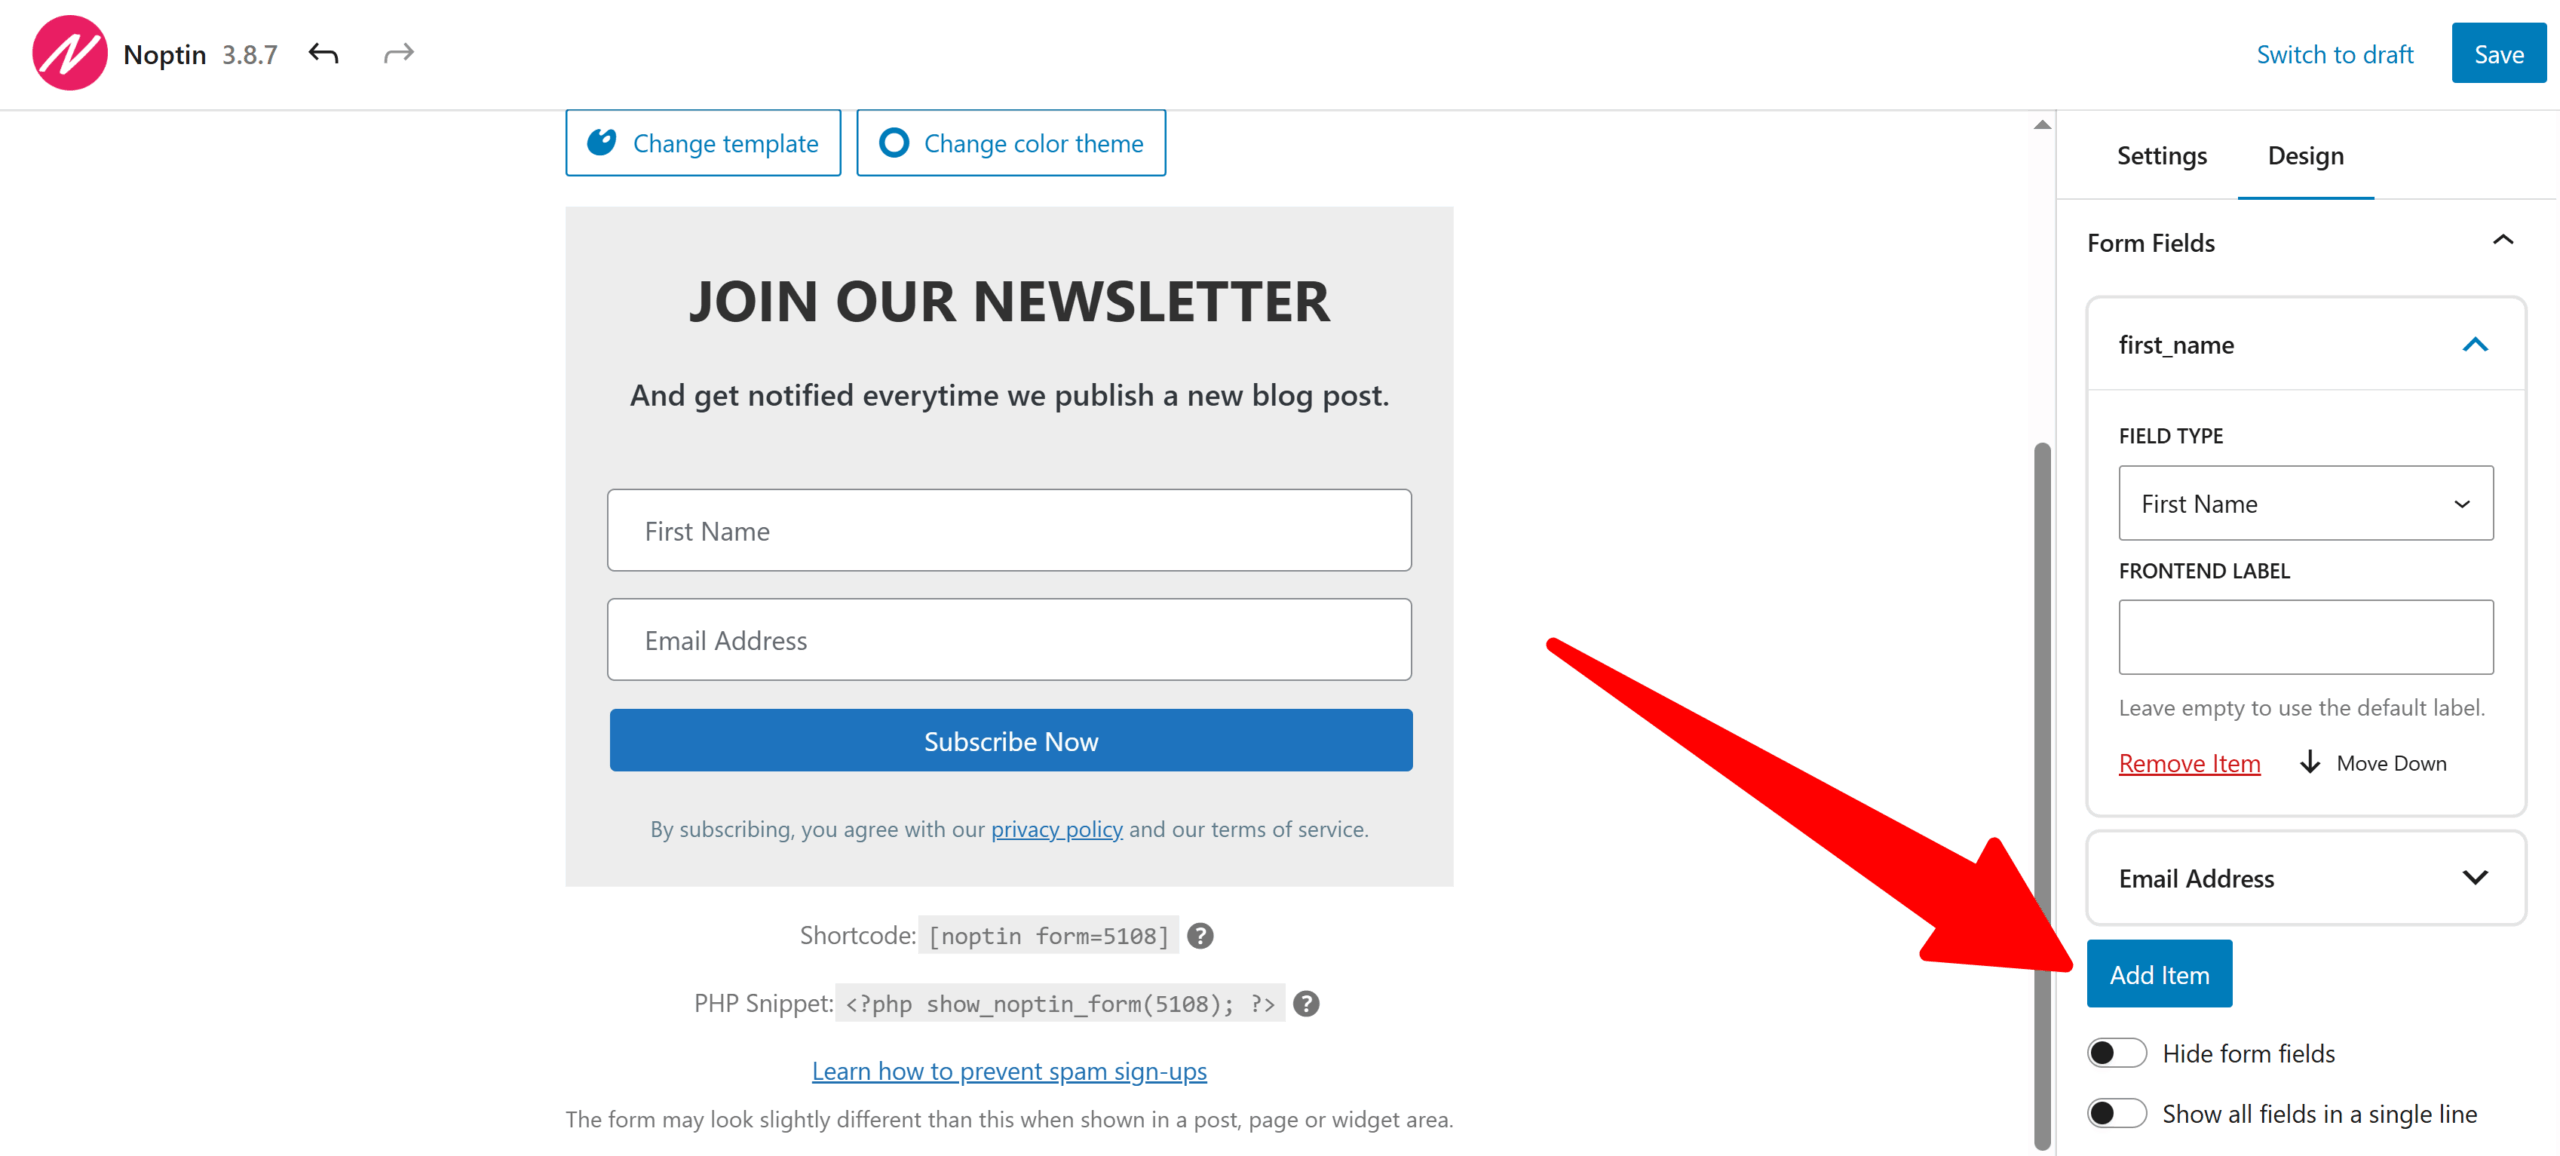
Select form fields
You can create any number of custom fields in Noptin. This allows you to collect more information about subscribers, including their:-
- Phone number
- Birthday dates
- Notification preferences
- Interests
- etc
By adding custom fields to your forms, you can better segment your audience, personalize your email campaigns, and deliver more relevant content to each subscriber.
For example,
You might use a “Product Interest” field to send targeted promotions or a “Location” field to tailor event invitations based on geographic proximity.
You can then add these fields to your newsletter subscription forms via the Form Fields settings panel under the Design tab.
You can use the design tab to further edit your template and colors.
Save your changes once you’re done editing your form.
Leave a Reply