
Send Confirmation Emails

The Send Confirmation Emails tool schedules a double opt-in confirmation email for every unconfirmed subscriber.

Open the Send Confirmation Emails tool

  1. In the left WordPress admin menu, click Noptin, then open Dashboard.
  2. Click Tools in Noptin’s top navigation.
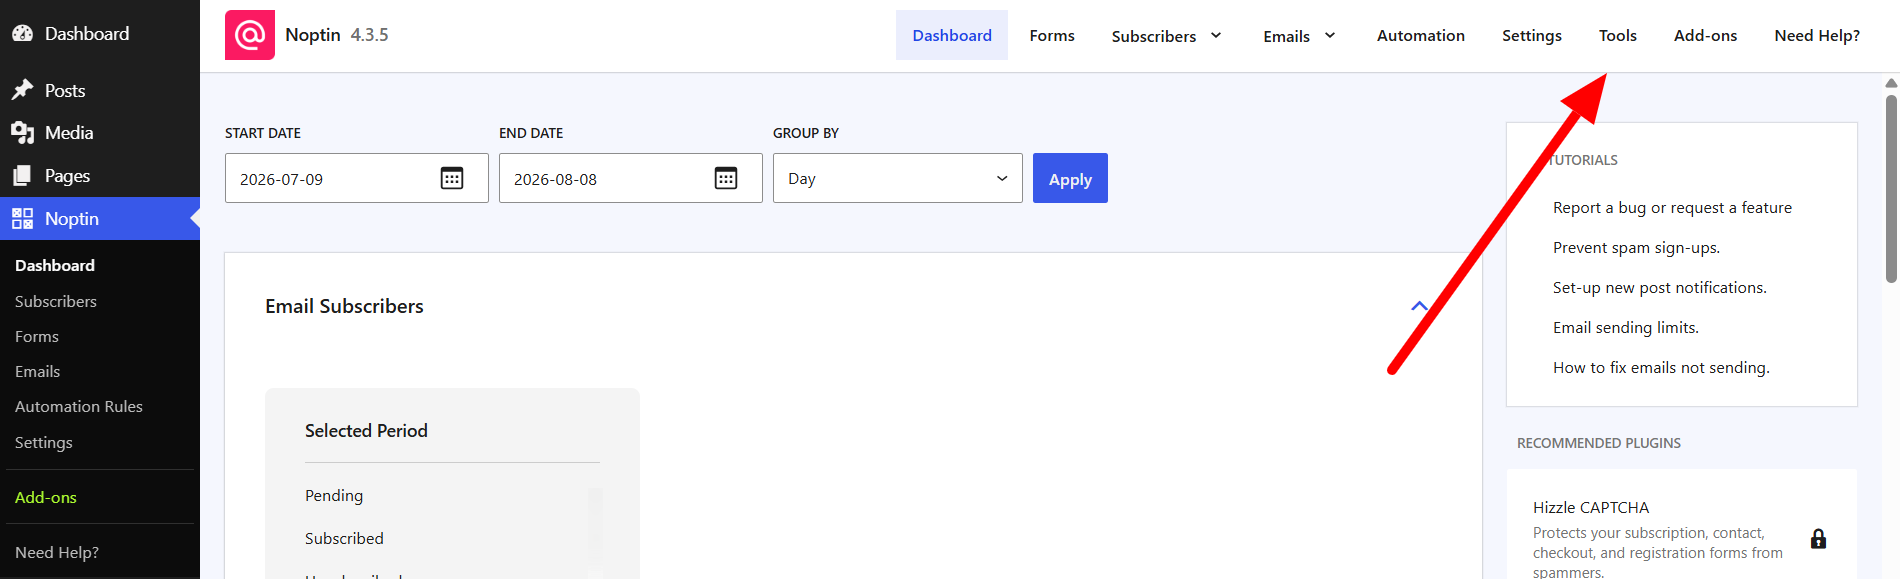
The Tools link in the top navigation of the Noptin dashboard
  1. Find Send Confirmation Emails and click Send.
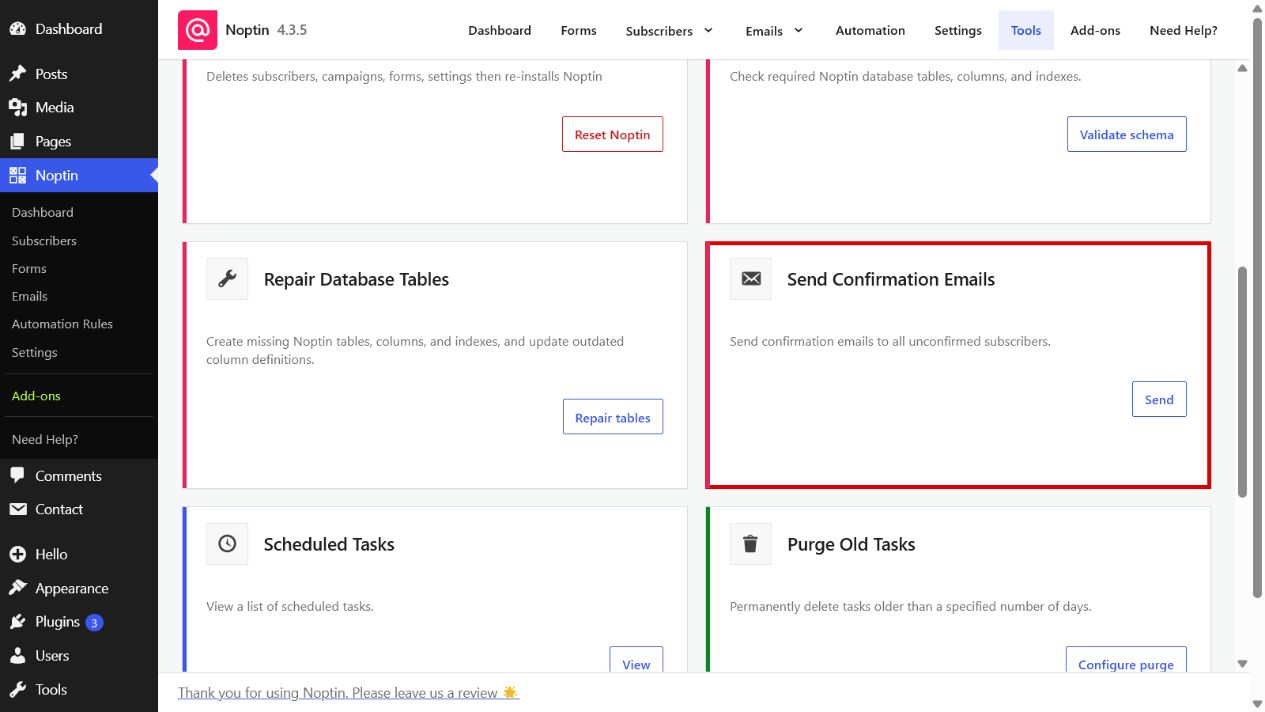
The Send Confirmation Emails card highlighted on the Noptin Tools page

Before running the tool, review your confirmation email in Noptin > Settings > Emails > Double Opt-in.

  1. Confirm that you want to schedule the emails.

The emails are added to Noptin’s background task queue instead of being sent in one long request. The success notice reports how many messages were scheduled. If there are no unconfirmed subscribers, no tasks are created.

Avoid running the tool repeatedly, as recipients may receive more than one confirmation message.

Related Guides

  • Debug Log

    Use Noptin’s Debug Log to review recent notices and errors when troubleshooting email, automation, or background-processing problems.

    Read More

  • New Post Automation

    Manually trigger Noptin new-post automations for a specific WordPress post by entering its post ID.

    Read More

  • Reset Noptin

    Learn what the Reset Noptin tool removes and how to prepare before returning Noptin to a fresh installation.

    Read More

  • Validate Database Schema

    Check whether all required Noptin database tables, columns, column definitions, and indexes are present.

    Read More

  • Repair Database Tables

    Repair missing or outdated Noptin database tables, columns, and indexes, then verify the resulting schema.

    Read More

  • Scheduled Tasks

    View and troubleshoot Noptin’s queued, running, completed, failed, canceled, and manually scheduled background tasks.

    Read More

  • Purge Old Tasks

    Permanently remove old completed, failed, or canceled Noptin tasks using a chosen retention period.

    Read More