
You can edit one subscriber, several selected subscribers, or every subscriber matching the current filters. Edit one subscriber when details such as their email address or name need to change. Use bulk editing when the same status, source, language, tag, list, or supported custom-field change applies to a group.
| What you need to change | Method |
|---|---|
| One subscriber’s complete profile | Open the subscriber and edit the record directly. |
| The same supported fields for specific subscribers | Select their rows, then click Edit Selected. |
| The same supported fields for everyone matching a filter | Apply the filter, leave all rows unselected, then click Bulk Edit. |
Edit one subscriber
- Open Noptin → Subscribers.
- Search or filter the table to find the subscriber.
- Click the subscriber’s email address, or click the row’s edit button.
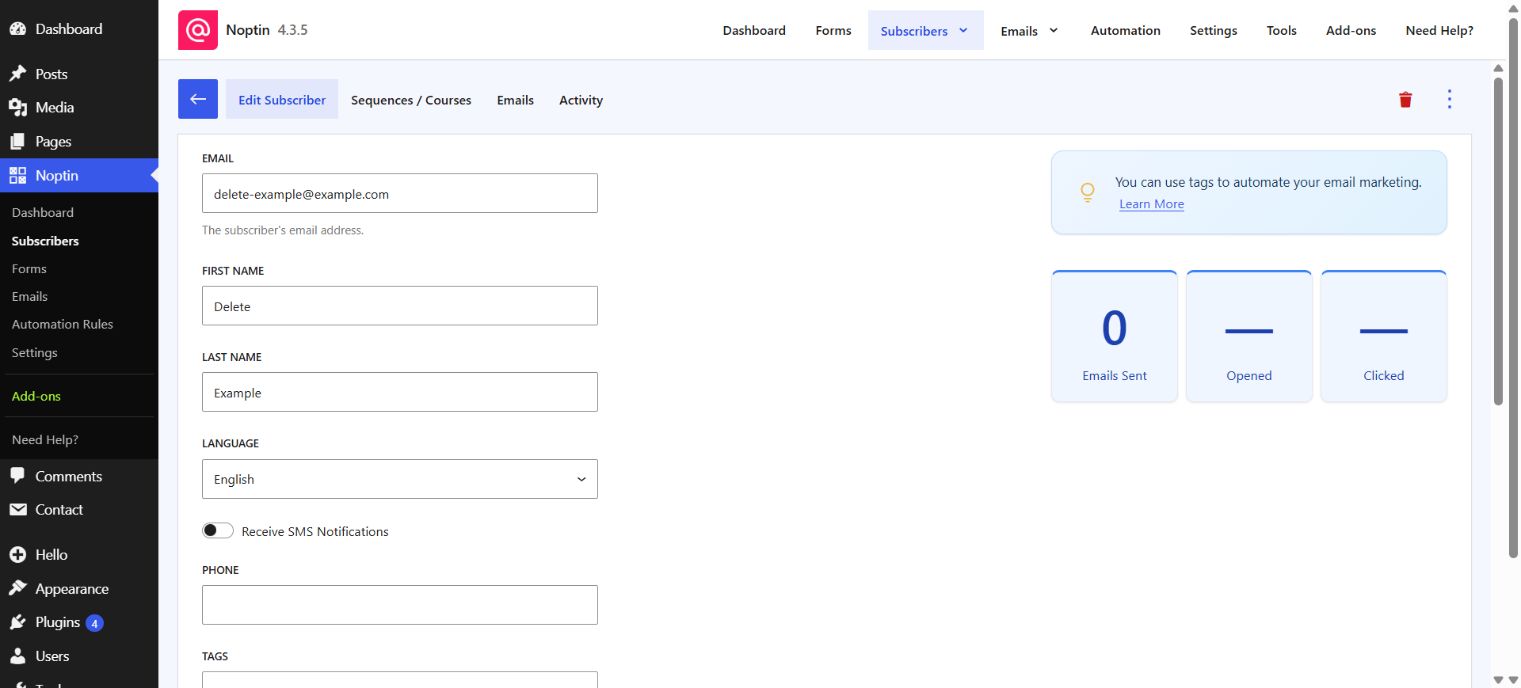
Update the subscriber details
| Field | What changing it does |
|---|---|
| Changes the email address associated with the subscriber. | |
| First Name and Last Name | Updates the subscriber’s name and the values available when personalizing messages. |
| Language | Changes the subscriber’s saved language when multilingual support is available. |
| Phone | Updates the saved phone number. |
| Tags | Adds or removes subscriber tags. |
| Status | Changes the subscriber’s current subscription status. |
| Source | Changes the saved subscription source. |
| Confirmed | Changes whether the subscriber is marked as having confirmed their email address. |
| Custom fields | Updates the additional subscriber information configured on your site. |
Before changing the email address, verify the replacement address and confirm that it is not already assigned to another subscriber.
When adding a tag, press Enter or type a comma to commit the value before saving.
- Review the updated profile values.
- Click Save.
- Wait for the Record saved successfully message.
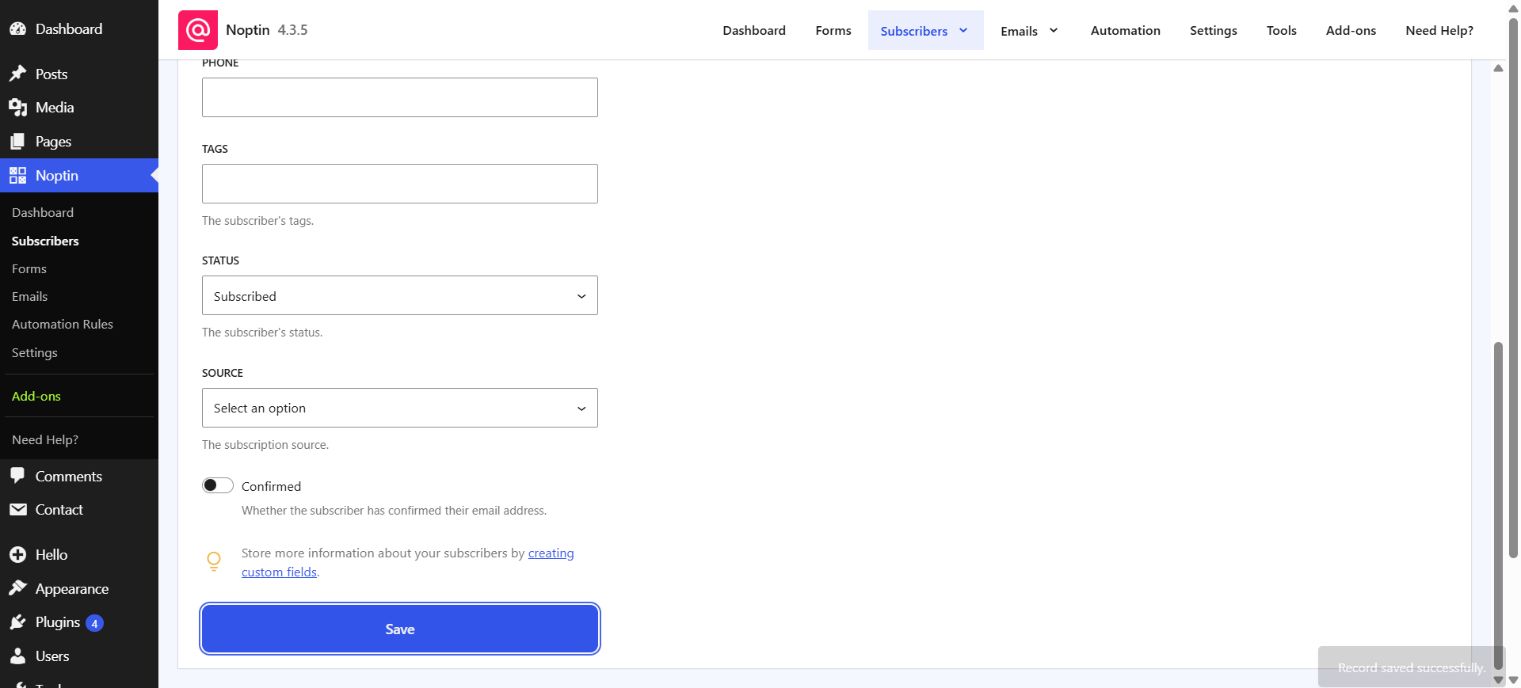
Reopen the subscriber from the table and confirm that the saved values are still displayed. If Noptin reports that the email address is already in use, locate the existing record instead of assigning the same address to two subscribers.
Edit selected subscribers
Use Edit Selected when you know exactly which subscribers should receive the same change.
- Open Noptin → Subscribers.
- Search or filter the table if this helps you locate the required subscribers.
- Select the checkbox beside each subscriber you want to change.
- Click Edit Selected.
- Set only the fields that should change. Fields left at Do not update retain their existing values.
- Click the Update number records button, where number is the number of selected subscribers.
Edit every subscriber matching a filter
You can use Filter Records to target a group by fields such as status, confirmation state, tags, email addresses, source, subscription dates, or supported custom fields.
- Open Noptin → Subscribers.
- Click Filter Records, add the required filters, and apply them.
- Review the matching subscribers and leave every row checkbox unselected.
- Click Bulk Edit. Its tooltip reads Edit all matching records.
- Set only the fields that should change, then click Update number records.
If no subscribers are selected, Bulk Edit applies to every subscriber matching the current filters. If no filters are active either, it applies to every subscriber. Confirm the number shown on the update button before continuing.
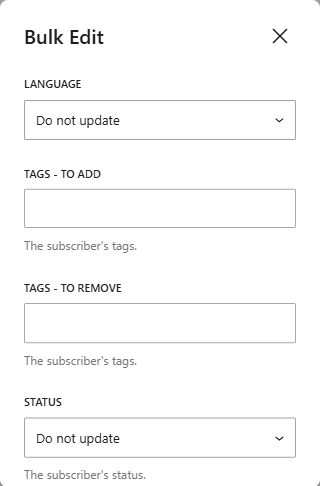
Fields available during bulk editing
Bulk editing shows fields that can safely receive the same predefined value across several records. Depending on your Noptin configuration, these can include:
- Language, when multilingual support is available.
- Tags – To Add and Tags – To Remove.
- Status and Source.
- Lists and other custom fields that provide predefined choices.
For fields that allow several values, Noptin displays separate controls for values to add and values to remove. This preserves other values already assigned to each subscriber. Fields that do not appear in the bulk-edit dialog must be changed from an individual subscriber’s profile.
Copy tagged subscribers into a list
If you previously used tags to track newsletter preferences, you can copy those groups into lists with a one-time bulk edit. For example, subscribers tagged Weekly Newsletter can be added to the matching list option. The same process works for a custom segment that allows multiple selections.
First, create the matching options in your Lists field or custom segment. Filtering subscribers by tag requires Noptin Premium.
Adding subscribers to a list can run automations triggered by that change. Pause any affected automations or automated emails before copying the groups if you don’t want them to run during the migration.
- Open Noptin → Subscribers.
- Click Filter Records and apply a tag filter for Weekly Newsletter.
- Review the matches, leave every row checkbox unselected, and click Bulk Edit.
- Under Lists – To Add, choose Weekly Newsletter. For a custom segment, use its field label followed by – To Add. Leave other fields unchanged.
- Check the number on the Update number records button, then click it and wait for Records updated successfully.
- Replace the tag filter with the next tag, such as Product Updates, and repeat the process with its matching list option.
Using To Add preserves existing list selections. A subscriber with both example tags will have both list options after the two updates. Open a few affected profiles, including someone with both tags, to check the result.
The original tags remain assigned. Before removing them, update any subscription forms, email recipient filters, and automations that still depend on those tags to use the new list or segment instead.
Verify the bulk changes
Wait for the Records updated successfully message. Open one or more affected subscriber profiles and confirm that the intended fields changed while fields left at Do not update remained unchanged.
Leave a Reply