
Noptin AI can build a visual automation rule from a description of an event and the actions that should follow. For example, you can ask it to tag a subscriber when they join your newsletter.
For an email that sends after an event, use Create an Email with AI instead. Automated emails are created under Emails; the visual automation-rule editor has no Send Email step.
AI generation creates saved items on your website. Automated emails and automation rules can be saved active. Start on a test site, ask for an inactive workflow, and check the saved status before using it on a live site. A prompt asking for a draft is not a substitute for checking the result.
Open the AI automation builder
- Open Noptin → Automation Rules.
- Click Add New Automation. The next screen asks What starts this automation?
- In the Want to create this rule with AI? banner, click Create with AI.
- Activate your Noptin license if prompted. If included credits are exhausted, follow the credit options shown for your plan.
Describe the trigger and actions
State when the workflow should start, what it should change, and whether it should wait or check a condition. Name the exact tag, list, integration, or other value you want to use. Ask AI to keep the workflow inactive while you review it.
When a new Noptin subscriber is created, add the tag "Gardening newsletter". Name the workflow "Tag new gardening subscribers". Keep the workflow inactive: set the root status to false. Do not send any emails.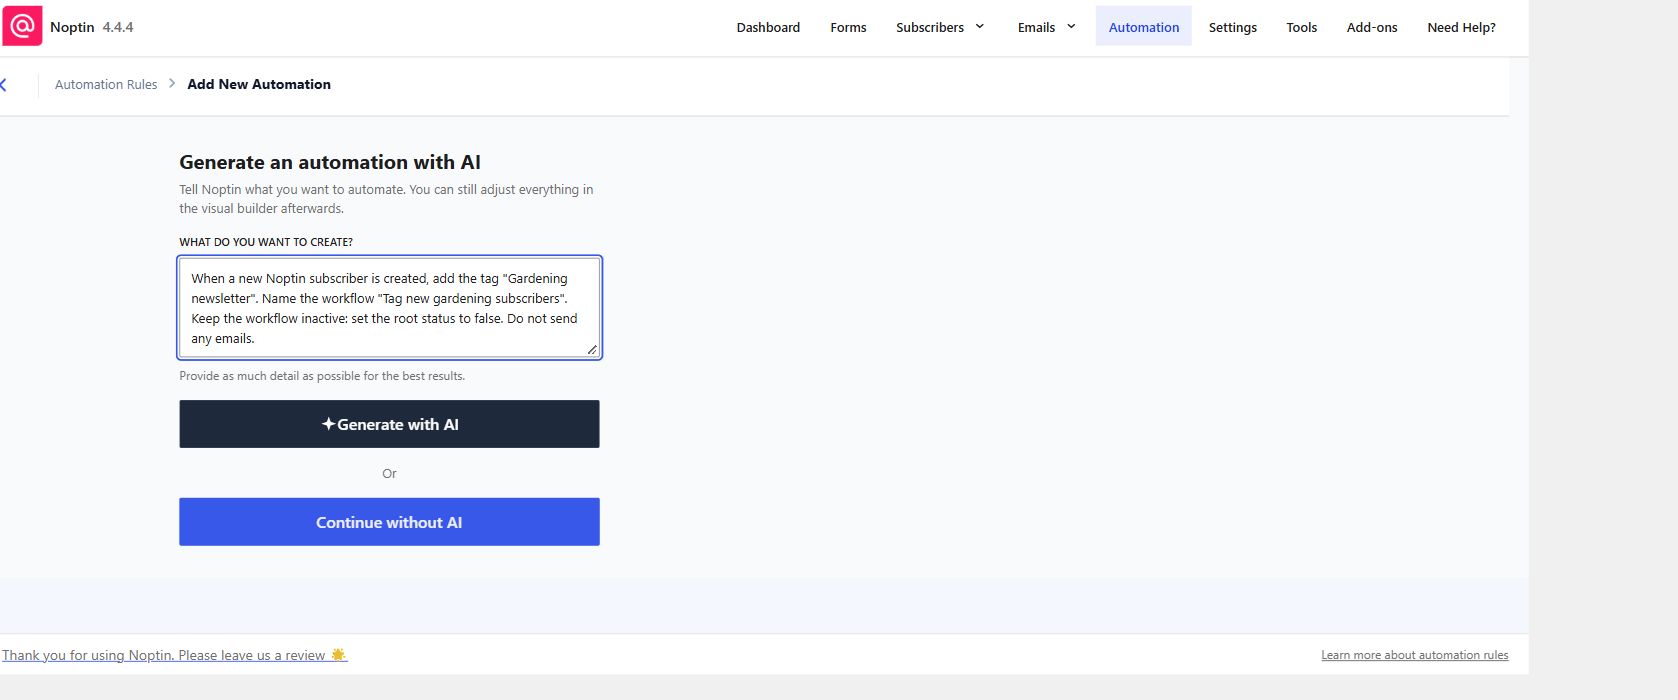
Click Generate with AI. Answer any follow-up question, then click Continue. AI can use the features available on your website; it cannot replace installing and connecting a required add-on.
Review the saved workflow
- Click Edit Rule on the completed result.
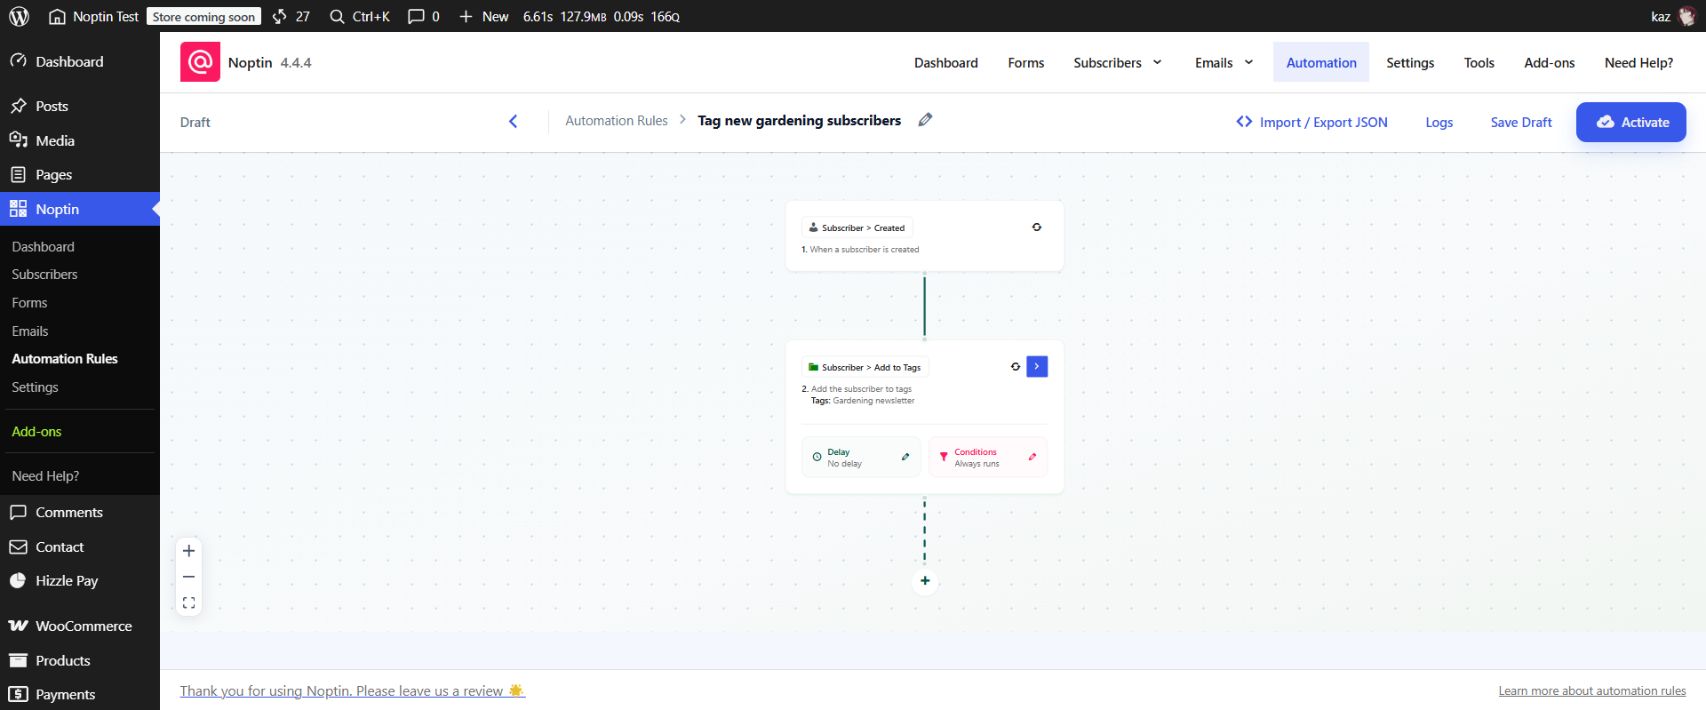
- Check the workflow status immediately. For the example above, confirm it shows Draft and offers Activate. If it is already active, make it inactive while you review it.
- Check the trigger. The example uses Subscriber > Created; choose a subscribed or confirmation-related event instead if your action should wait for that point.
- Click the action’s Configure control and verify the target and values. Here, the action should add the triggering subscriber to Gardening newsletter.
- Inspect delays and conditional logic on every relevant step. Check that a condition is attached to the step it is meant to control.
- Save your changes. Keep the workflow inactive until you are ready to test it.
Test and activate
On a test site, activate the reviewed workflow and perform its trigger event. For the example, create a new test subscriber and confirm that its Tags field contains Gardening newsletter. Open Logs to check the recorded run if the result is unexpected.
When the test behaves as intended, review the workflow again on the website where it will run and activate it there. Turning a workflow inactive stops new trigger events; it does not necessarily cancel delayed work already scheduled.
If the result is incomplete
Check whether the named integration is installed and connected, and whether the trigger supplies the data your action needs. Simplify a complex request into a specific trigger and first action, then extend the workflow in the visual editor. Use Troubleshoot Noptin AI for generation errors.
Leave a Reply