One of the easiest ways to get more email subscribers and increase your WooCommerce sales is by sending new email subscribers a unique coupon code.
There is one problem though.
Manually creating a new coupon code and sending it to new subscribers is tiresome. And wastes time for both you and your subscribers. That’s why it makes sense to automate the process.
In this tutorial, I’ll show you how to set up a system that automatically sends a coupon email to new email subscribers.
Prerequisites
To follow along with this tutorial, you need to install at least version 3.0 of WooCommerce (Free) and the latest version of Noptin (also free).
You also need to install the Ultimate Addons Pack for Noptin (premium). This addon will automatically create new unique coupon codes when someone subscribes to your newsletter. You can then include the coupon code in your double opt-in or welcome emails using the [noptin_coupon_code] merge tag.
Step 1: Create a WooCommerce Coupon Template
We’ll start by creating a WooCommerce coupon template.
A coupon template is just a normal WooCommerce coupon that Noptin uses when creating new coupon codes. All the properties of this template will be copied to the auto-generated coupon codes.
This includes the coupon type, amount, usage restrictions, and usage limits. The expiry date and allowed emails are ignored.
To create a coupon template:-
First, open your WordPress admin dashboard then go to Marketing > Coupons > Add Coupon to create a new WooCommerce coupon code.
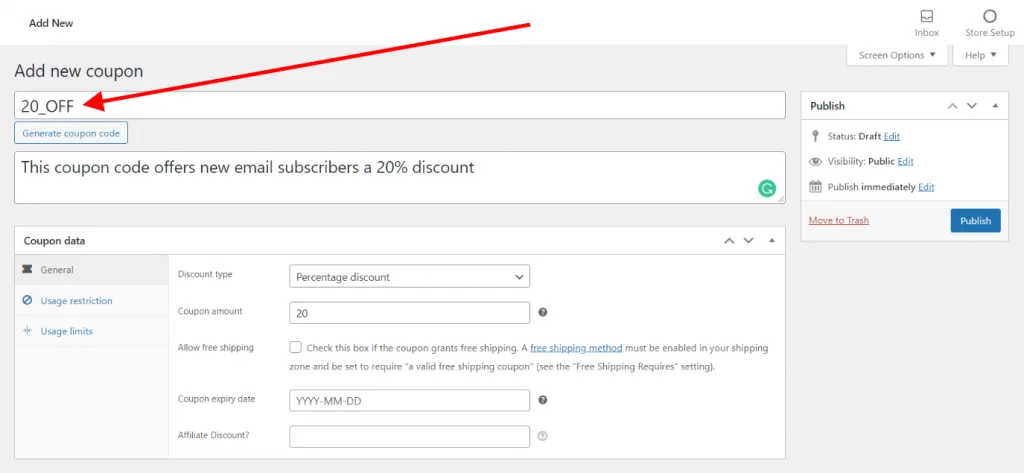
Next, fill in the fields as if you were creating a normal WooCommerce coupon code. After you’re done, click on the publish button to save your discount code.
Make sure the coupon code is set as published, otherwise, it will not work. You can set the expiry date in the past if you don’t want normal customers using the coupon.
Finally, copy the coupon code. This is needed for the next step. In the above example, the coupon code is 20_OFF.
Step 2: Add the Template to Noptin
Noptin needs to know about your coupon template before it can create unique WooCommerce coupon codes for new email subscribers.
To add your coupon template to Noptin:-
First, open your WordPress admin dashboard then click on Noptin > Settings> Coupon Codes to open the coupon code settings.
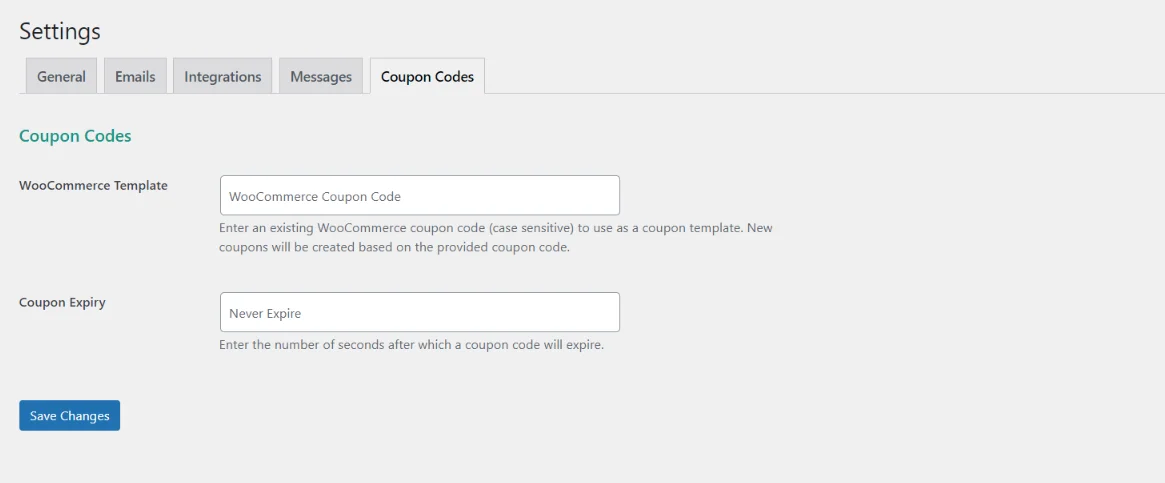
Next, enter the coupon code that you created in the previous step into the “WooCommerce Template” input box. In the above example, the coupon code is 20_OFF.

You can also set the coupon expiry (in seconds). When a new unique coupon code is created, it will expire after the number of seconds that you specify here. You can leave this blank if you want the coupon code to last for a lifetime.

Finally, click on the “Save Changes” button to save your changes.
From now on, whenever someone subscribes to your newsletter, Noptin will create a unique WooCommerce coupon code that they can use when purchasing from you.
Noptin will automatically delete the automatic coupon code if it expires before being used.
In the next step, we’ll send them their new coupon code.
Step 3: Automatically Send New Email Subscribers their WooCommerce Coupon Code
Now that we’re automatically creating unique coupon codes for new subscribers, let’s set up a welcome email that sends them their coupon code.
To do this:-
First, click on Noptin > Email Campaigns to open the email campaigns management page.

Next, click on the Automated Emails tab to open the automated emails management page…

… then click on the “New Campaign” button to open the automated campaign creation page.

If this is your first time creating an automated email, Noptin will open the campaign creation page without first opening the campaign overview page.
Finally, click on the “Welcome New Subscribers” button to create a new campaign. You should click on the “Welcome New Users” button in case you want to send the coupon email to new WordPress users instead of newsletter subscribers.
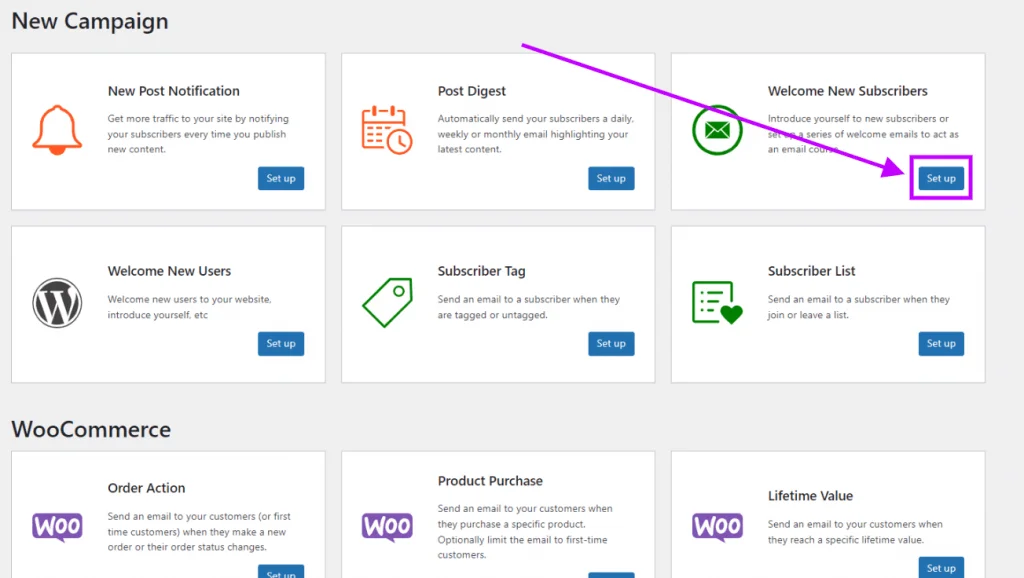
Noptin will open a new screen allowing you to edit and save your campaign.
Use the editor to give your email a subject line, write the email content, and set whether you would like to send the email as soon as someone sign-ups or if you would like to delay for a given number of minutes, hours, or days. You can also specify a subscription source if you only want to send the coupon code to people who sign-up via a specific form.
Save your email automation when you’re done editing.
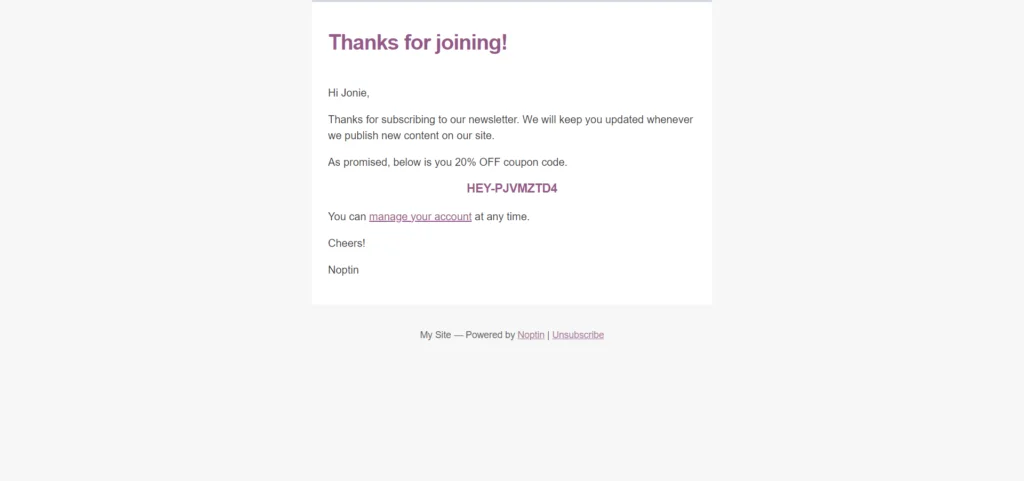
From now on, when someone subscribes to your newsletter, Noptin will automatically generate and email them a unique WooCommerce coupon code.
Below is an example email.
Step 4: Retarget subscribers who don’t use their coupon codes
It is advisable to remind subscribers to use their coupon code before it expires.
To do this:-
- Automatically save the unique coupon code to a subscriber’s custom field…
- … then remove it after they use it to purchase something from your WooCommerce store.
- Finally, send an email X days later to those subscribers who do not use their coupon code.
The following sections go into further detail on how to automate this process.
Automatically save the unique coupon codes to a subscriber’s custom field
Noptin allows you to set up an automation rule that automatically saves the generated coupon code to the subscriber’s custom field. This might be useful, for example, if you need to later retarget customers who’ve not yet used their coupon codes.
To do this:-
First, click on Noptin > Settings > Custom fields to open the custom fields management screen.
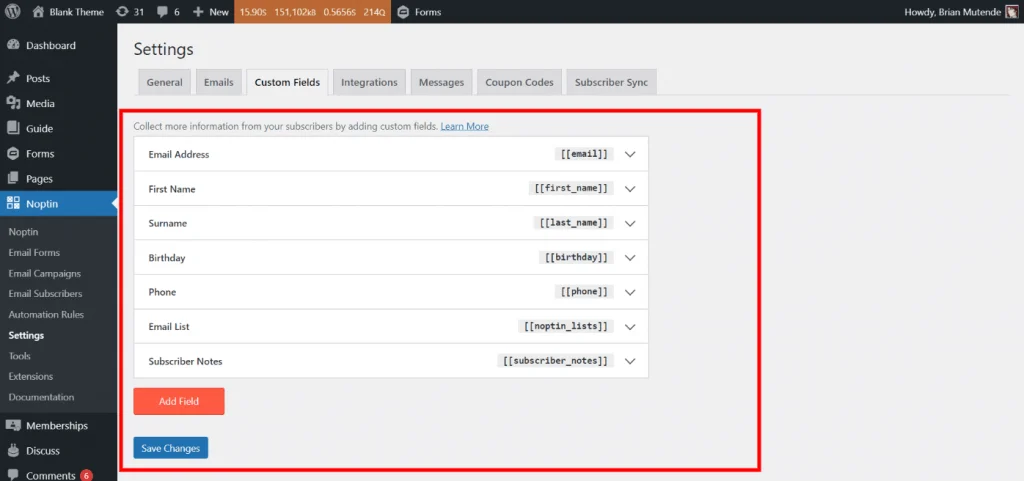
Next, click on the Add Field button to create a new custom field. You can set any name for the field. Remember to uncheck the box that says “Can subscribers view and edit this field?” and then save your changes after you’re done.
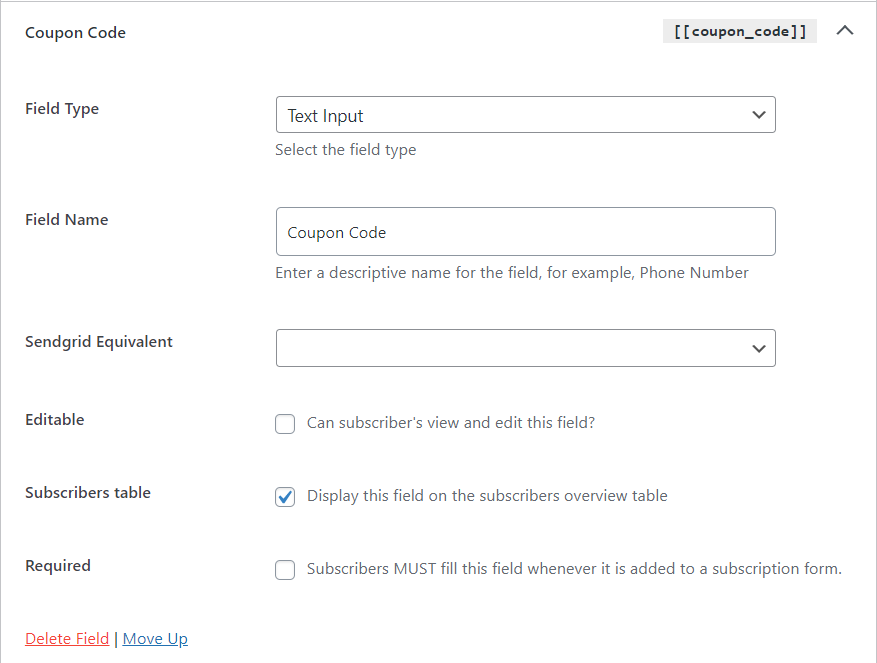
The next step is to create an automation rule that automatically updates this field with the generated coupon codes.
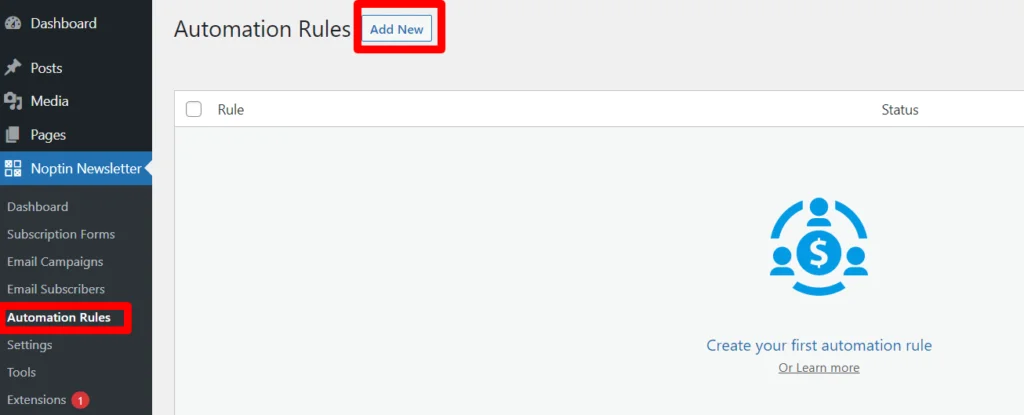
To do this, click on Noptin > Automation Rules > Add New to open the automation rules creation page.
Select a trigger for the automation rule, then set “Update Subscriber Field” as the action. The example below executes when there’s a new subscriber.
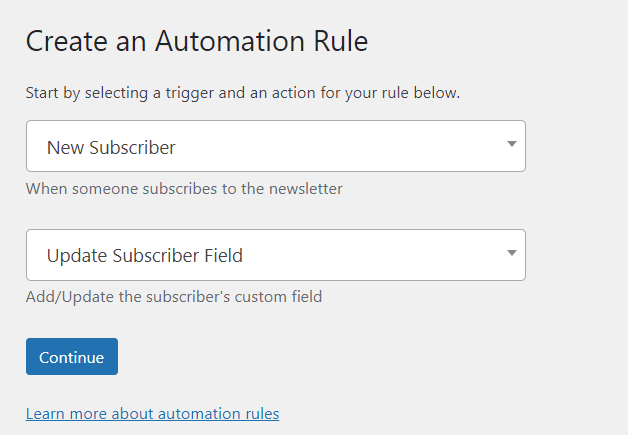
Noptin will create the automation rule and then redirect you to the edit page. You should set the custom field dropdown to the field you created in the first step, in our case, the field was called “Coupon Code”.
Next, set the [noptin_coupon_code] merge tag as the field value then save your changes.
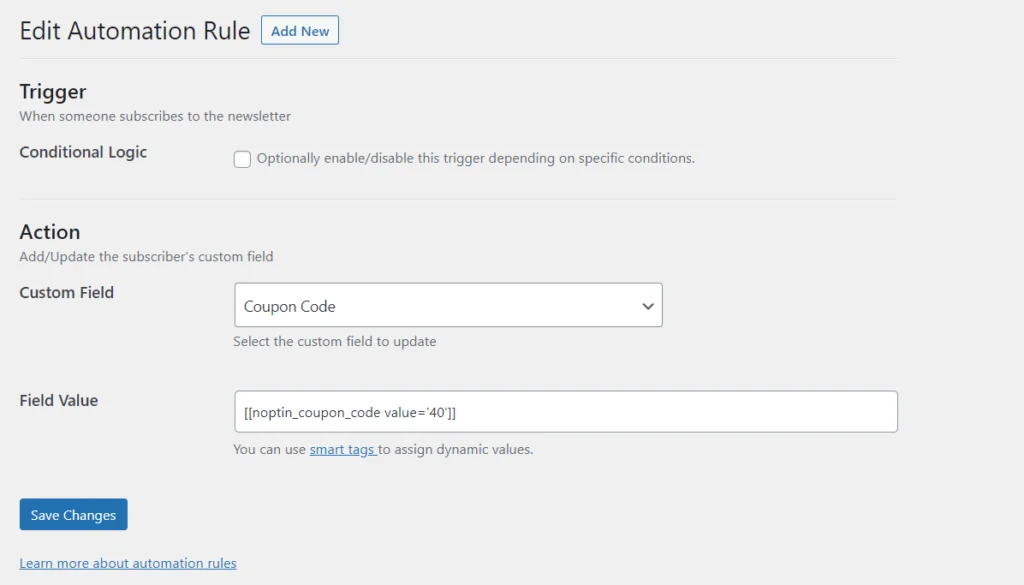
That’s all. If you’re using an external email service provider, you can still follow the same steps but instead of mapping a Noptin field, you map your integration’s custom field.
Automatically update a subscriber’s custom field when they use a generated coupon code
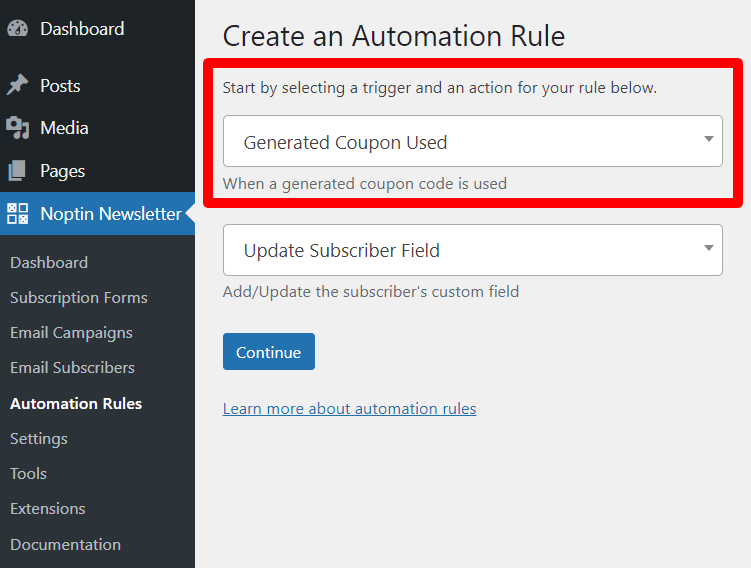
Similar to the previous section, you have to create a new automation rule and then set the trigger to “Generated Coupon Code Used” as shown below.
Finally, select the custom field that you created in the previous section then leave the field value blank.
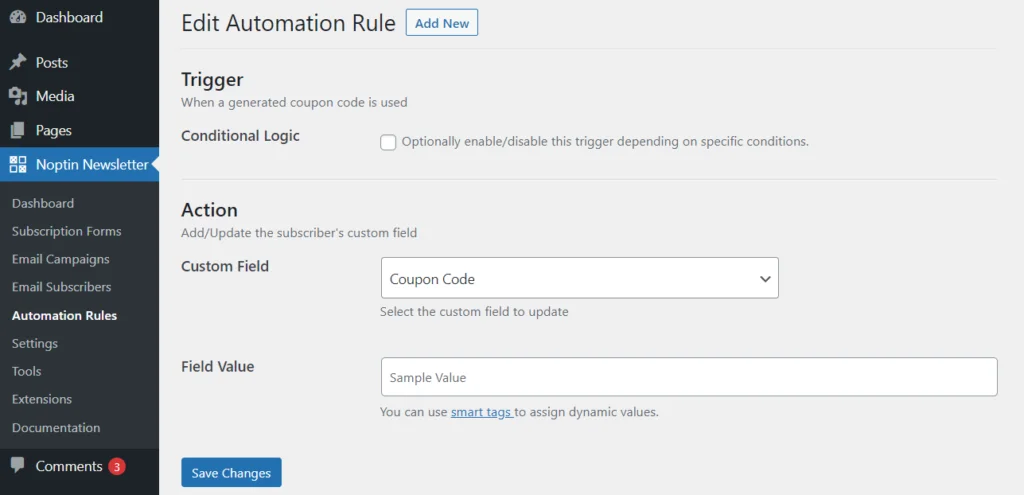
This way, Noptin will clear the custom field value as soon as a generated coupon code is used.
Send an email X days later to those subscribers who do not use their coupon code
The final step in this section is to set up an email that reminds your subscribers to use their coupon codes.
To do this, we’ll create a final automation rule that sends an email to new subscribers.
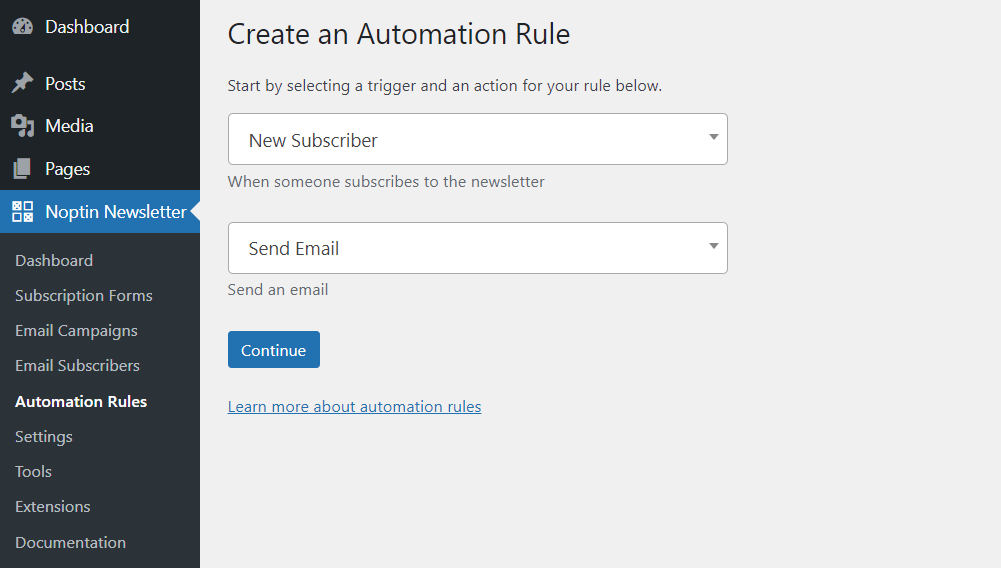
Remember to add a conditional logic rule that only sends the email if the Coupon Code custom field is not empty. In addition, set a delay for the email as shown below.
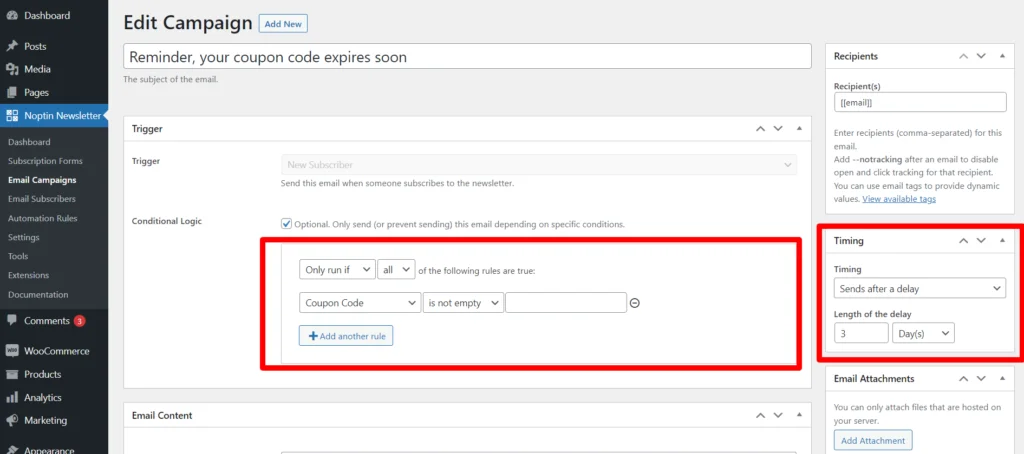
Noptin evaluates the conditional logic before sending the email. This means that if you set an email to send after a delay, then the conditional rules will be evaluated after the delay as well.
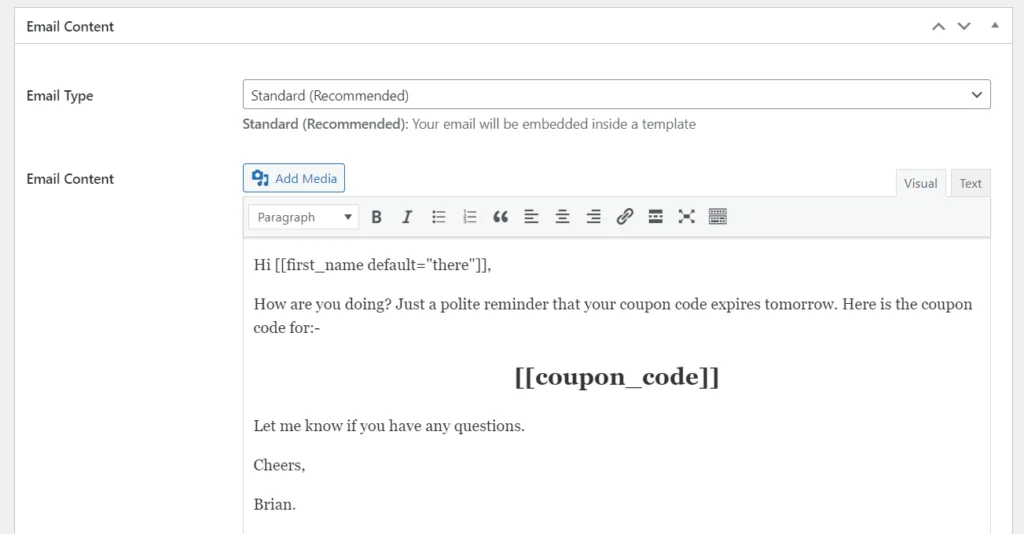
Remember to use your custom field’s merge tag instead of the normal [noptin_coupon_code] merge tag as shown below.


Leave a Reply