Email marketing is a powerful tool for businesses to engage with customers and promote their products or services. However, email campaigns can be negatively impacted by bounced emails.
A bounced email occurs when an email is undeliverable and returned to the sender.
This can happen for various reasons, such as an invalid email address, a full inbox, or a spam filter. Not only do bounced emails lower your email engagement metrics, but they can also damage your sender’s reputation and potentially result in your email being marked as spam.
Therefore, it’s crucial to regularly remove bounced subscribers from your email list to ensure that your campaigns reach your intended audience.
In this article, we will provide a step-by-step guide on identifying and deleting bounced subscribers to improve your email marketing strategy
Pre-requisites
To follow along with this tutorial, you’ll need to:-
- Install the latest version of Noptin.
- Install the latest version of Ultimate Add-ons Pack.
We’ll use the Ultimate Add-ons Pack to set up a webhook listener that automatically deletes the matching subscriber after it receives a call.
Step 1: Set up an automation rule
To set up an automation rule:-
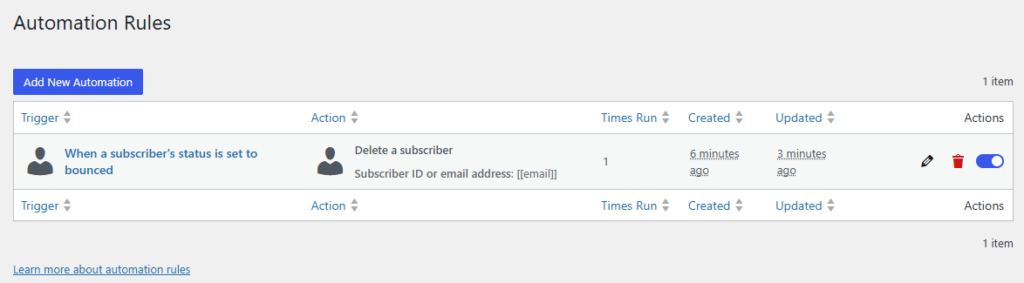
First, click on Noptin > Automation Rules from the left sidebar menu. You’ll see an empty automation rules dashboard with columns for Trigger, Action, Times Run, Created, Updated, and Actions.
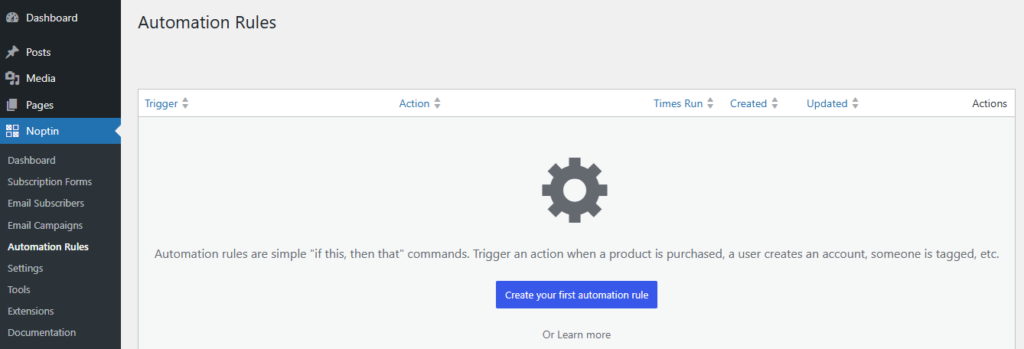
Click on the Create your first automation rule button to get started.
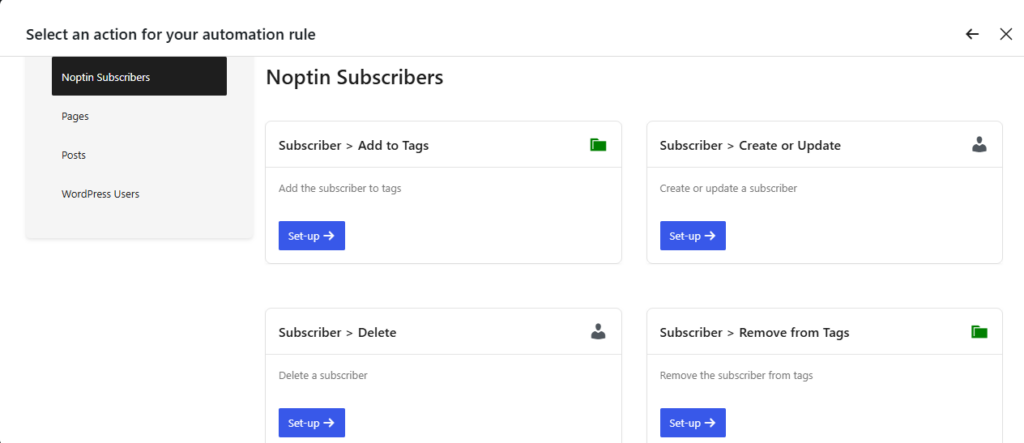
Next, you’ll be prompted to select a trigger for your automation rule. From the categories on the left sidebar, select Noptin Subscribers. Then, from the options displayed, choose Subscriber > Bounced. This trigger will activate whenever a subscriber’s status is set to bounced.

Click on the Use trigger button to continue.
Then, you’ll need to select an action to perform when the trigger occurs. From the available options, select Subscriber > Delete. This action will automatically delete the subscriber when their status is changed to bounced.
Noptin will redirect you to a page where you can configure the automation rule.
At the top of this page, you’ll see a webhook URL that the automation rule listens to. We’ll need this in the next step.
Step 2: Configure the Automation Rule
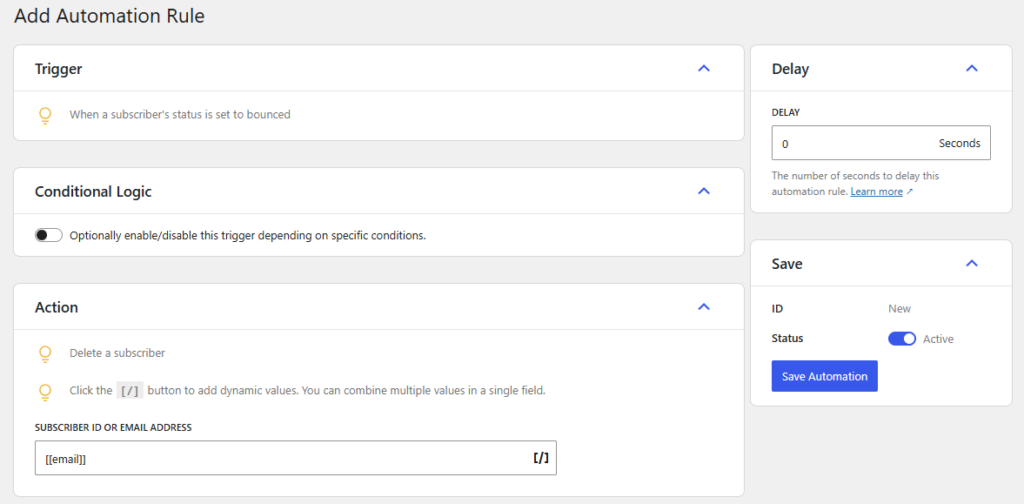
After selecting the trigger and action, you’ll be redirected to the “Add Automation Rule” configuration page:.
First, verify that the correct trigger is displayed: “When a subscriber’s status is set to bounced”
Second, check the Action section, which should show “Delete a subscriber”. The subscriber ID or email address field should already contain the dynamic value [[email]] which will be replaced with the actual email of the bounced subscriber when the automation runs.
Third, you can optionally configure the following settings:
- Delay: If you want to delay the deletion, you can set a number of seconds in the Delay field. For immediate deletion, leave it at “0”.
- Conditional Logic: You can toggle this option on if you want to add conditions to when this rule runs. When enabled, you can choose between:
- “Only run if” – the rule will only run when specific conditions are met
- “Do not run if” – the rule will run unless specific conditions are met
- Save: In this section, you can set:
After saving, your automation rule will be active and will automatically delete any subscriber whose status is set to “bounced”.
Step 3: Test Your Automation Rule
To ensure your automation rule is working correctly:
- Verify that the subscriber is automatically deleted from your list
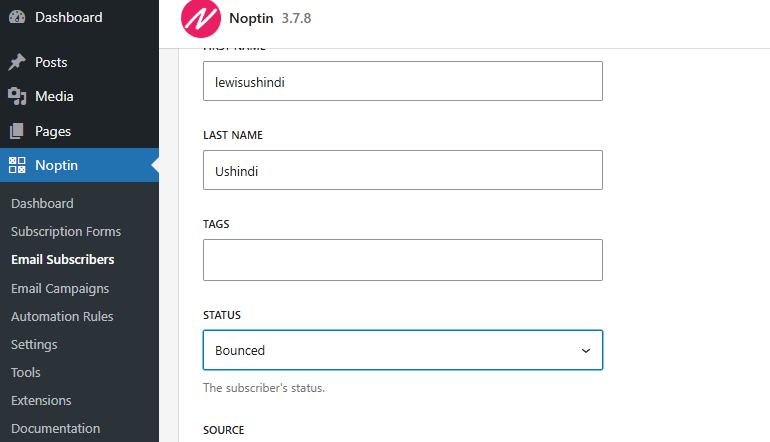
- Go to your email subscribers list
- Select a test subscriber
- Change their status to “bounced”
Step 4: Monitor Your Automation
You can monitor how your automation is performing by:
- Reviewing the “Updated” column to see when it was last triggered
- Going to Noptin > Automation Rules
- Checking the “Times Run” column to see how many times your rule has executed
By following these steps, you’ve successfully set up an automation rule to automatically clean your email list by removing bounced subscribers, helping to improve your email deliverability and engagement metrics.
Leave a Reply