
You install a signup form, add a newsletter checkbox, promise a free download, and wait for subscribers. Then the first confirmation email never arrives. Or it lands in spam. Or WooCommerce sends order emails sometimes, but not always.
That’s the part most email list advice skips.
If you’re learning how to build an email list from scratch in WordPress, the form is only half the job. The other half is technical. Your site needs a reliable sending path, a verified domain, and a clean opt-in flow that email providers trust from the first message.
That matters even more on WordPress because a lot of sites still try to send important emails through whatever the host happens to allow by default. That setup is fine for password reset tests on a staging site. It’s not fine for newsletters, welcome emails, checkout notices, or lead magnet delivery.
A professional list starts with delivery. Once that’s stable, everything else gets easier. Your automations work, your subscribers receive what they requested, and you can grow without wondering whether the system is failing in the background.
Why Your WordPress Emails Are Going to Spam
Most WordPress owners run into the same pattern. A contact form submission works. A password reset email works once. Then a subscriber says they never got the confirmation email, and your first reaction is to blame the plugin.
The plugin usually isn’t the primary problem.
The default WordPress mail setup is weak
By default, WordPress often sends mail through the server’s basic PHP mail function. That’s simple, but mailbox providers don’t see it as a strong trust signal for business email.
If your server identity, sending domain, and authentication records don’t line up, Gmail and Outlook get cautious. The result is familiar: missing emails, spam folder placement, and inconsistent delivery across providers.
Practical rule: If email matters to your business, don’t rely on the default WordPress mailer for production sends.
This is why list building advice can feel broken in practice. You can create a good lead magnet and a strong opt-in form, but if the welcome email or confirmation email isn’t delivered, the funnel collapses before the subscriber even joins.
The acquisition side still matters. A working funnel usually includes a lead magnet, a dedicated landing page, a minimal form, and an automated welcome email triggered after confirmation, as described by Webfor’s email list building guide. But that welcome sequence only helps if your sending infrastructure is stable.
Spam problems usually start before the first campaign
When I audit WordPress email setups, the same issues keep showing up:
- Shared hosting sends with poor trust because the site uses the host’s default outgoing mail path.
- From addresses don’t match the domain so the message looks suspicious to receiving servers.
- Authentication is missing which makes legitimate mail harder to verify.
- Plugins compete for sending control and one of them overrides the other without the site owner noticing.
A list isn’t just a database of addresses. It’s a system made of forms, confirmation emails, welcome automation, and sender reputation. If one part is weak, the rest underperforms.
Before you try to grow faster, fix delivery. If your emails already drift into spam, start with a practical deliverability checklist like this guide on how to fix emails going to spam.
What good looks like
A healthy setup does a few basic things well:
- Sends through a real email service
- Uses your domain consistently
- Authenticates the domain in DNS
- Confirms subscribers before marketing sends begin
- Separates critical site emails from casual experiments
Once you have that foundation, list growth tactics stop leaking value.
Choosing Your Email Delivery Engine
You have three realistic ways to send email from WordPress. They’re not equal.
Some site owners pick whatever works fastest, then revisit deliverability after customer emails start disappearing. That usually creates more cleanup later. It’s better to choose the sending method that matches your site now.
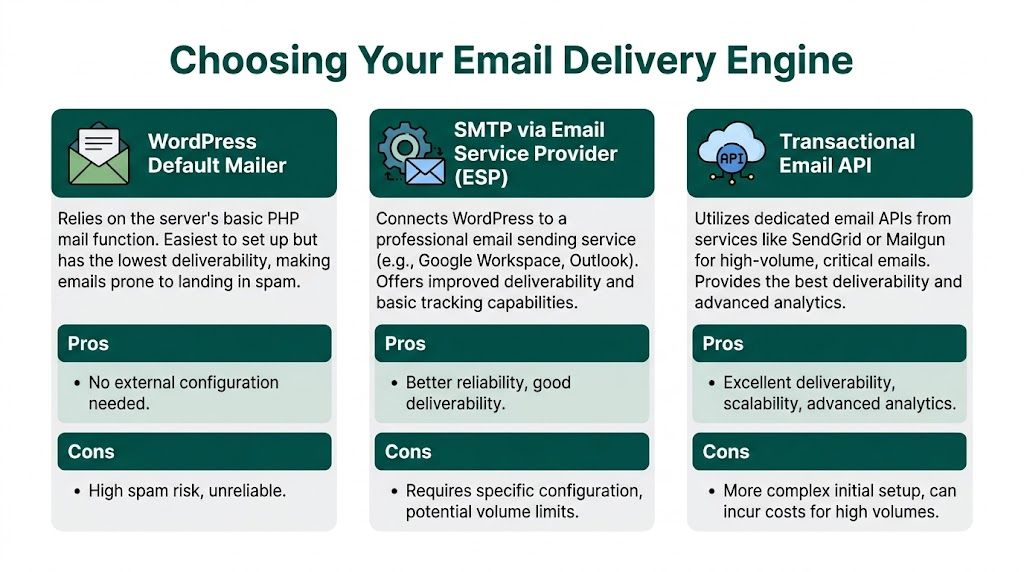
What each option actually means
The first option is the built-in WordPress mailer. It requires almost no setup, which is why beginners use it. The trade-off is reliability. It’s the easiest method to start with and the hardest one to trust.
The second option is SMTP through an email provider such as Google Workspace or Outlook. This gives WordPress a proper relay path and usually improves delivery for routine site email. For many blogs, membership sites, and smaller stores, this is the practical middle ground.
The third option is a transactional email API through services such as SendGrid, Mailgun, or Brevo. This is the most reliable path for sites that send frequent or business-critical mail. It’s also the one I prefer when a WooCommerce store depends on order and account emails arriving every time.
WordPress Email Delivery Method Comparison
| Method | Deliverability | Cost | Best For |
|---|---|---|---|
| WordPress Default Mailer | Low and inconsistent | Usually included with hosting | Testing, low-stakes sites |
| SMTP via Email Service Provider | Better reliability | Varies by provider and mailbox plan | Blogs, brochure sites, smaller stores |
| Transactional Email API | Strongest option for production sending | Varies by provider and sending volume | WooCommerce, membership sites, higher-volume email |
The decision criteria that matter
Don’t choose based on setup speed alone. Choose based on what happens when email fails.
- If you publish occasionally and mostly need form notifications, SMTP is usually enough.
- If you run WooCommerce, I’d lean toward a transactional service early.
- If you plan automations and newsletters from WordPress, pick a provider that supports domain authentication cleanly and gives you sending logs.
Default mail is convenient. Convenient doesn’t mean dependable.
A common mistake is assuming “newsletter” and “website email” are separate technical worlds. They’re not. Your signup confirmations, lead magnet delivery, welcome sequence, order notifications, and account emails all shape sender reputation in different ways. One sloppy setup affects everything else.
A simple recommendation
For most WordPress users starting from scratch:
- Start with SMTP if your site is simple and your send volume is modest.
- Start with a transactional API if revenue depends on email arriving.
- Avoid building your list on top of the default mailer unless you’re only testing locally.
That one decision removes a lot of future troubleshooting.
Configuring a WordPress SMTP Plugin
Once you’ve chosen a delivery method, the next step is connecting WordPress to it properly. This part isn’t hard, but it does need care. A single wrong sender address or missing credential can make the whole setup look broken.

The basic plugin workflow
Most SMTP plugins follow the same pattern:
- Install the plugin from your WordPress dashboard.
- Choose your mailer or SMTP provider.
- Enter the sender details and credentials from that provider.
- Save the settings.
- Send a test email.
That sounds obvious, but a lot of failures happen because site owners skip step five and assume the connection works.
The settings that usually trip people up
Here’s what to check carefully during setup:
- From email. Use an address on your own domain, not a free mailbox.
- From name. Keep it consistent with your site or brand name.
- Authentication method. Some providers use SMTP username and password. Others prefer API credentials.
- Forced sender settings. If the plugin offers a way to force the from email and from name, use it to stop other plugins from overriding them.
A WordPress site with WooCommerce, a form builder, and a newsletter plugin can generate mail from several places. Forced sender settings reduce conflicts.
A practical setup sequence
I usually configure SMTP in this order:
First, create the sending identity inside the provider account. That might mean verifying a domain or setting up a mailbox.
Second, install the SMTP plugin and enter only the minimum required values. Don’t tweak every advanced field at once.
Third, send a test message to a mailbox you control. Check whether it arrives, whether it lands in spam, and whether the sender name appears as expected.
Fourth, trigger a real site email. Submit a contact form, request a password reset, or create a test WooCommerce order.
If you want a plugin-specific walkthrough, this guide on using a WordPress SMTP plugin to send your newsletter emails is a useful reference.
Don’t stop at the green success notice
A “test email sent successfully” message inside WordPress only proves one thing. Your site handed the message off.
It does not prove inbox placement. It does not prove the domain is authenticated. It does not prove order emails will behave the same way under load.
Use the plugin test, but also check the mailbox result.
After you’ve got the plugin connected, take a few minutes to watch a full walkthrough of the process: https://www.youtube.com/embed/suvkDYwTCfg
Signs the connection is healthy
You’re in good shape when:
- WordPress test emails arrive consistently
- Contact form notifications show up promptly
- Password reset emails render correctly
- WooCommerce test emails use the expected sender identity
If one of those fails, resist the urge to swap plugins immediately. Most of the time, the issue is upstream. Credentials, sender identity, or domain authentication are more likely causes than the plugin itself.
Authenticating Your Domain for Maximum Deliverability
A working SMTP connection is only part of the job. Inbox providers still want proof that your domain authorizes the mail being sent.
That proof usually comes from three DNS records: SPF, DKIM, and DMARC.

What the three records do
You don’t need to memorize the acronyms. You only need to understand their jobs.
- SPF tells receiving servers which systems are allowed to send mail for your domain.
- DKIM adds a signature that helps verify the message wasn’t altered.
- DMARC tells providers how to handle mail that fails those checks and gives you policy control.
Together, they tell Gmail, Outlook, and other mailbox providers that your emails match your domain and your sending service.
If your domain isn’t authenticated, your email provider is asking recipients to trust mail you haven’t fully verified.
How to add the records in practice
Most providers make this easier than it sounds. Inside your email service account, you’ll usually find a domain authentication or sender verification screen. It will generate the DNS values you need.
Then you open your domain DNS settings, often in cPanel, your registrar, or your host’s DNS manager, and add the requested TXT records exactly as provided.
Use this workflow:
- Open your email provider dashboard and find the domain authentication area.
- Copy each record carefully. One missing character can break validation.
- Add the records in your DNS panel.
- Wait for DNS propagation, then return to the provider dashboard and verify.
The list-building connection most people miss
Authentication affects more than newsletters. It also affects double opt-in, welcome sequences, and lead magnet delivery.
Building an effective list starts with a double opt-in verification system, where a subscriber enters an email address and then confirms through a link sent to that address. That process validates the address while supporting GDPR and CAN-SPAM compliance, and purchased lists create significantly higher spam complaints and unsubscribes than organically built lists, which is why a compliance-first approach matters for sender reputation, as noted in SiteSell’s guide to starting an email list.
If your domain isn’t authenticated, that confirmation email is more likely to struggle. Then valid subscribers never finish the process, and you end up blaming the form instead of the sending layer.
What to check after verification
After SPF, DKIM, and DMARC are in place:
- Send another test email from WordPress
- Confirm your provider shows the domain as verified
- Check that your signup confirmation flow still works
- Keep your sender address on the same domain you authenticated
This is also the right time to tighten your forms. Ask for minimal information, collect consent clearly, and keep your opt-in path simple.
A technically clean setup beats a flashy one every time.
Handling WooCommerce and Transactional Emails
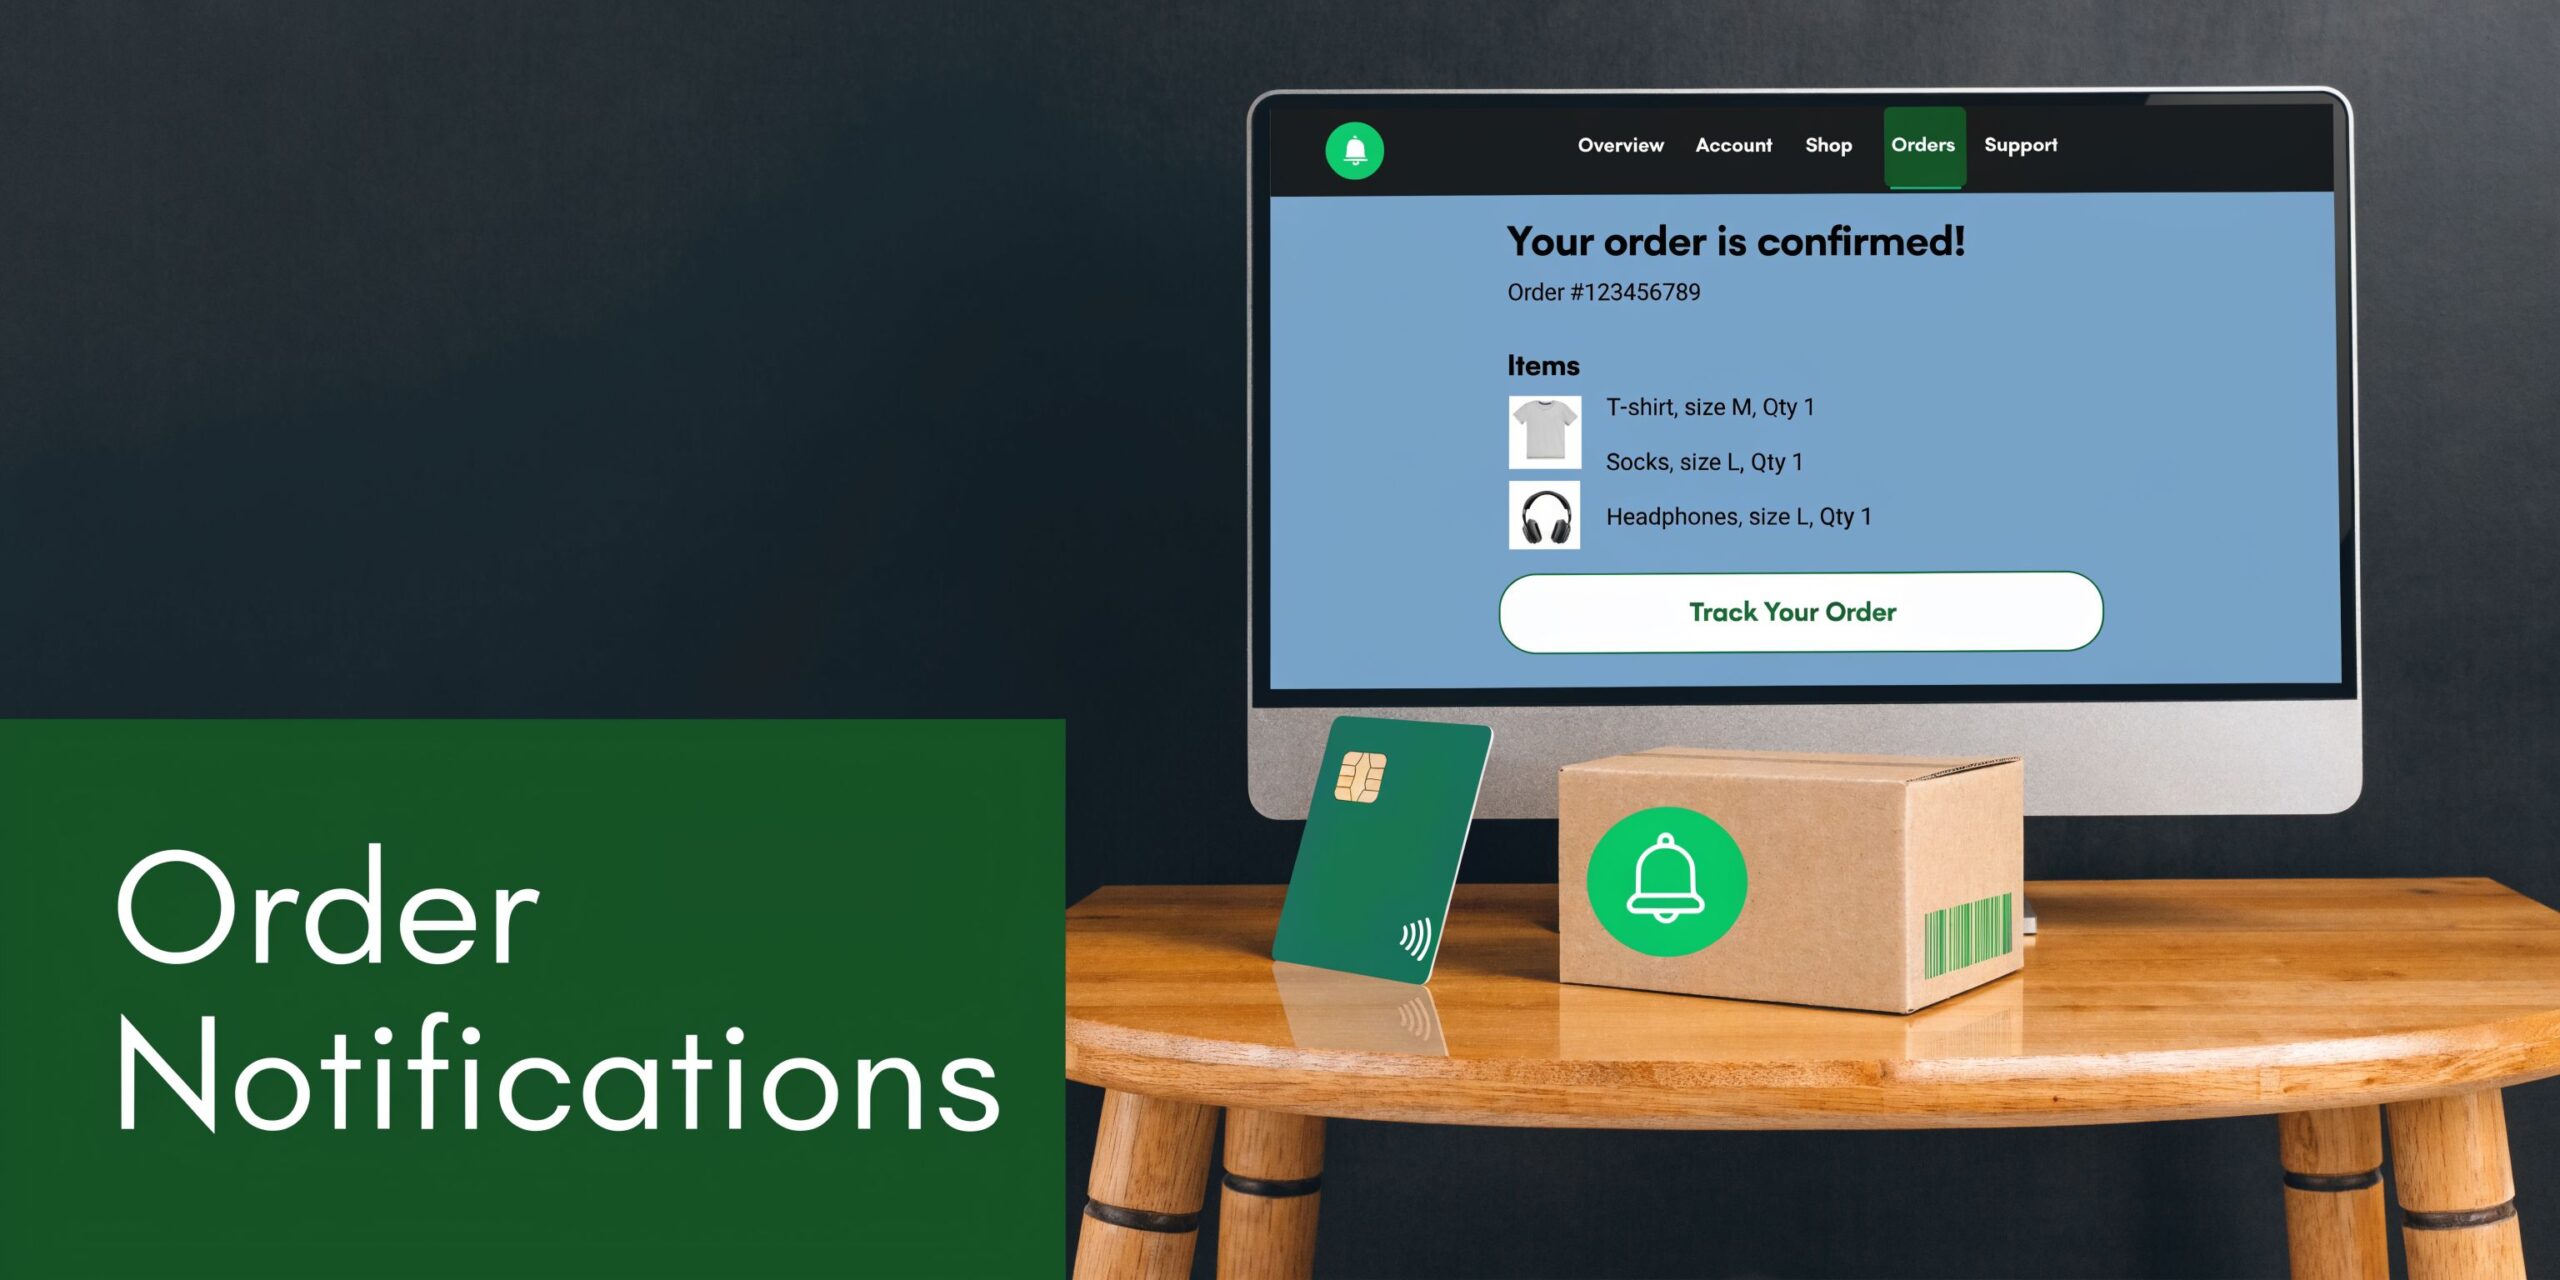
A WooCommerce store can survive a weak newsletter for a while. It can’t survive missing order emails.
That distinction matters because store owners often think “email marketing” means campaigns and coupons. In practice, your most important emails are transactional. Order confirmations, account creation messages, password resets, completed order notices, and shipping updates carry the most urgency.
Where stores get into trouble
A typical pattern goes like this.
A customer buys a product. WooCommerce creates the order correctly. Payment goes through. But the order email either arrives late or not at all because the site still uses a weak outgoing mail setup.
Now the customer opens a support ticket. They wonder whether the order went through. Your team manually resends the email or screenshots the order record.
That’s preventable.
Keep transactional mail on the reliable path
Your SMTP or API setup should handle all WordPress-generated mail, not just newsletter messages.
Check these items after configuration:
- Place a test order and confirm the customer email arrives.
- Trigger a password reset for a test account.
- Review WooCommerce email templates so branding matches your sender identity.
- Make sure no plugin bypasses your configured mail route.
If you want to automate store follow-ups and customer messaging after the core transactional layer is stable, this overview of WooCommerce automated emails shows the kinds of workflows a WordPress-based setup can support.
A store owner doesn’t notice email infrastructure when it works. Customers notice it immediately when it fails.
Separate urgent emails from promotional thinking
One mistake I see often is treating every outgoing email as part of “marketing.” That leads to casual changes in sender settings, experiments with templates, or plugin swaps without testing the checkout flow.
Handle store email in two lanes:
| Email type | Priority | What to protect |
|---|---|---|
| Transactional | Immediate | Order, account, payment, reset emails |
| Marketing | Flexible | Newsletters, promotions, post-purchase campaigns |
When transactional mail is reliable, your support load drops and the buying experience feels professional. That foundation also gives you room to expand into segmentation, coupons, and post-purchase automation without risking the core customer journey.
Supercharge Your List with AI and Automation
Once delivery, authentication, and transactional email are stable, list growth becomes worth the effort. Before that, automation just sends more unreliable mail.
A WordPress-native tool provides an effective solution. Noptin lets you collect subscribers through forms, popups, WooCommerce checkboxes, and integrations with tools like Gravity Forms and Elementor. It can also segment contacts by tags, purchases, and user roles, then trigger automations for welcomes, post notifications, follow-ups, and coupons from inside WordPress.
Start with a small automation stack
You don’t need a giant funnel on day one. A clean setup usually starts with three automations:
- Welcome sequence that delivers the promised resource right after confirmation
- New post notifications for readers who want updates from your blog
- Simple segmentation based on signup source, purchase behavior, or stated interests
That setup is enough to make your first subscribers feel like they joined a real system instead of a dead list.
AI can help at this stage, but only after the basics are in place. It’s useful for drafting newsletters, adapting copy for different segments, and keeping sends consistent when you don’t have a full marketing team. It won’t fix a bad sender reputation or a broken DNS record.
Don’t ignore list hygiene
Most “how to build an email list from scratch” advice stops at acquisition. That’s incomplete.
Email lists decay at 22.5% annually on average, and a missing piece for WordPress users is post-subscription hygiene. No-code automations for dormant subscribers, including win-back sequences, matter because they can improve reactivation by 15-30%, according to Unbounce’s article on building an email list.
That has practical consequences from the beginning. Even a small list gets stale if you never clean it, never re-engage quiet subscribers, and never ask what people want.
A better maintenance rhythm
Use automation to manage the list you already have, not just to chase more signups.
A practical rhythm looks like this:
- Tag subscribers by entry point so you know why they joined.
- Watch for inactivity over time, then move quiet contacts into a reactivation segment.
- Send a win-back email with a simple choice such as stay subscribed, update preferences, or leave.
- Use short surveys to collect zero-party data and improve later segmentation.
The fastest way to wreck a young list is to keep mailing people who stopped caring.
Where AI fits without creating clutter
Used well, AI removes repetitive drafting work. It can help produce welcome emails, post summaries, and campaign variations quickly, especially when your content already lives on the site.
Used badly, it floods your list with generic copy.
The standard I use is simple. If the automation makes the email more relevant, keep it. If it only makes sending easier for you, rethink it.
A reliable list doesn’t just grow. It stays deliverable, organized, and worth opening.
If you want to build that system inside WordPress instead of stitching together separate tools, Noptin LTD offers a practical way to handle subscriber capture, segmentation, automations, AI-assisted newsletters, and WooCommerce email workflows while keeping data under your control.
Enhanced by the Outrank tool


Leave a Reply